So many structures so little time.

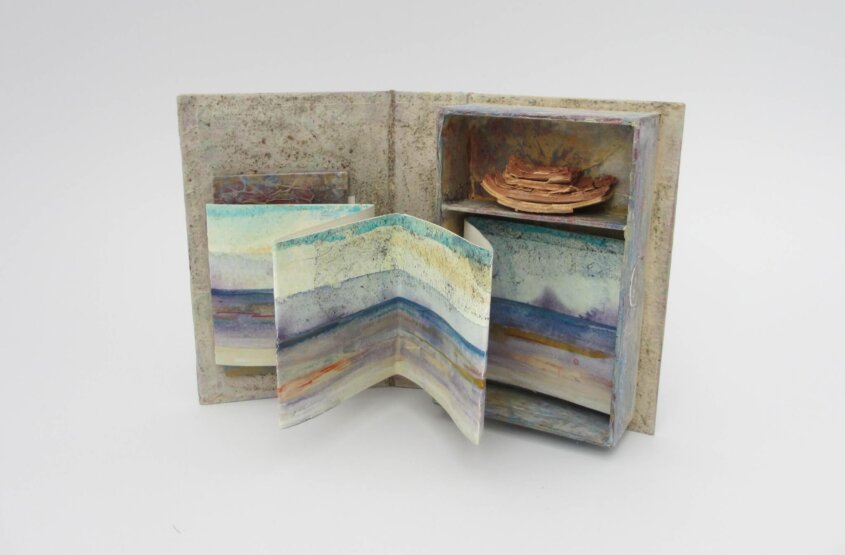
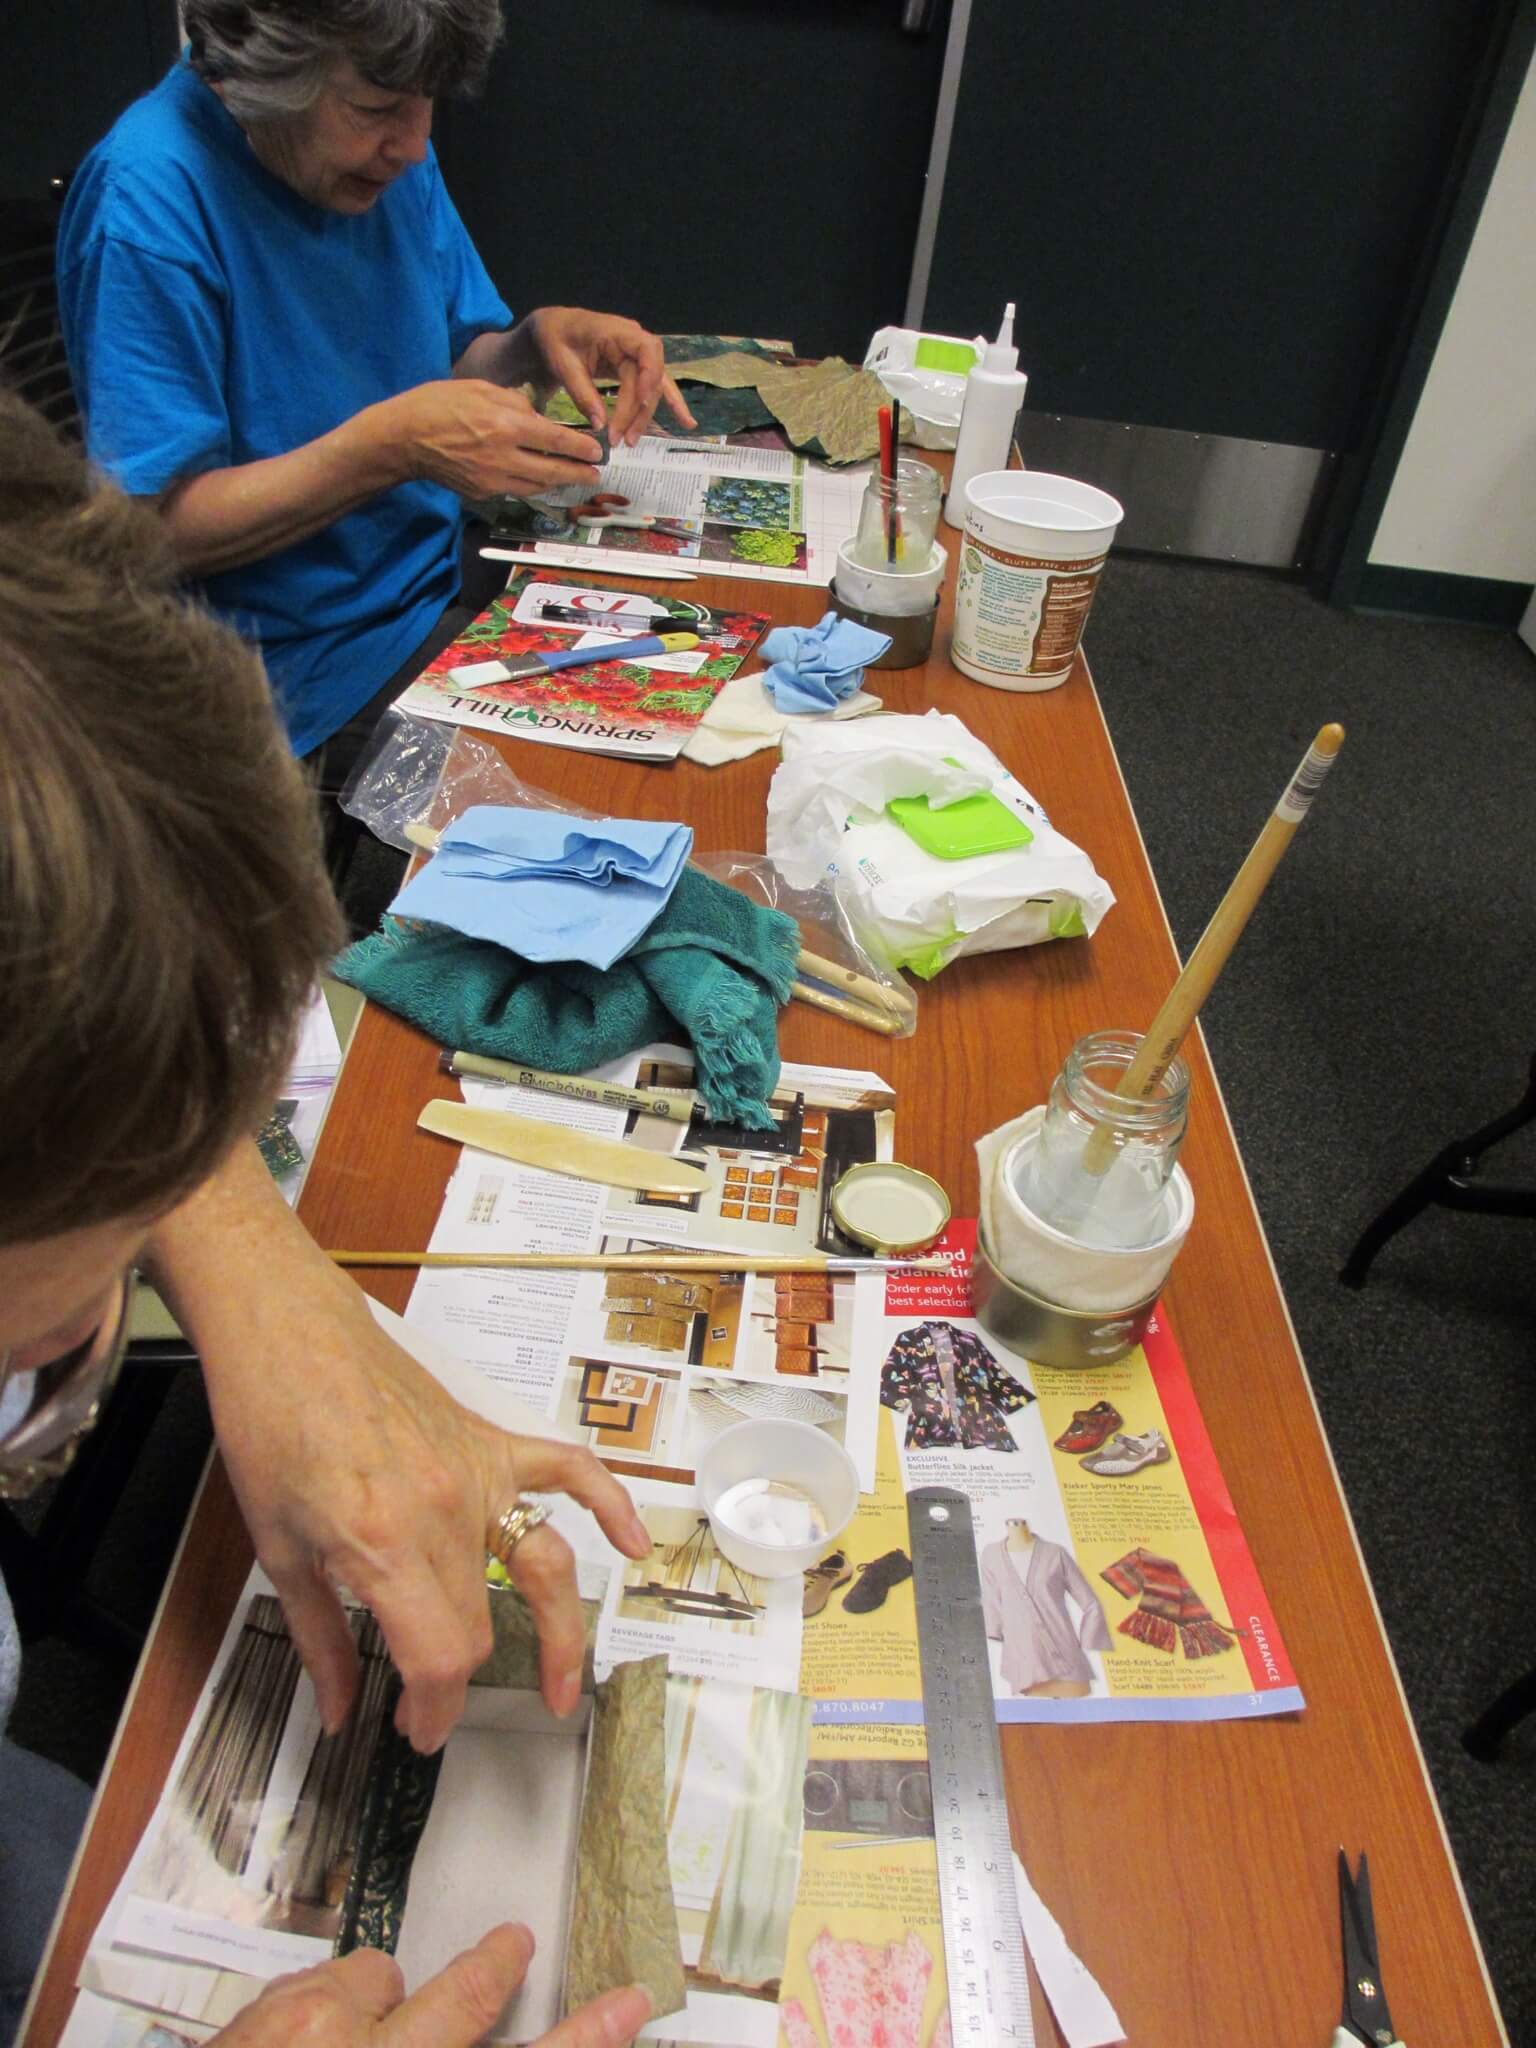
Margo Klass is one of my favorite books artsts because of the way she works with wood, the care she takes with detail and bookbinding  principles, and the  Japanese feel of a lot of her work.  I’ve been lucky to have taken three of her classes at the Newport Paper Arts Festival in Newport, Oregon. She is an exceptionally good teacher: patient, well organized, so very talented. She spends her time in Alaska and Maine and makes books as well as altar pieces and box constructions. I’m hoping she will teach at Newport again this April!

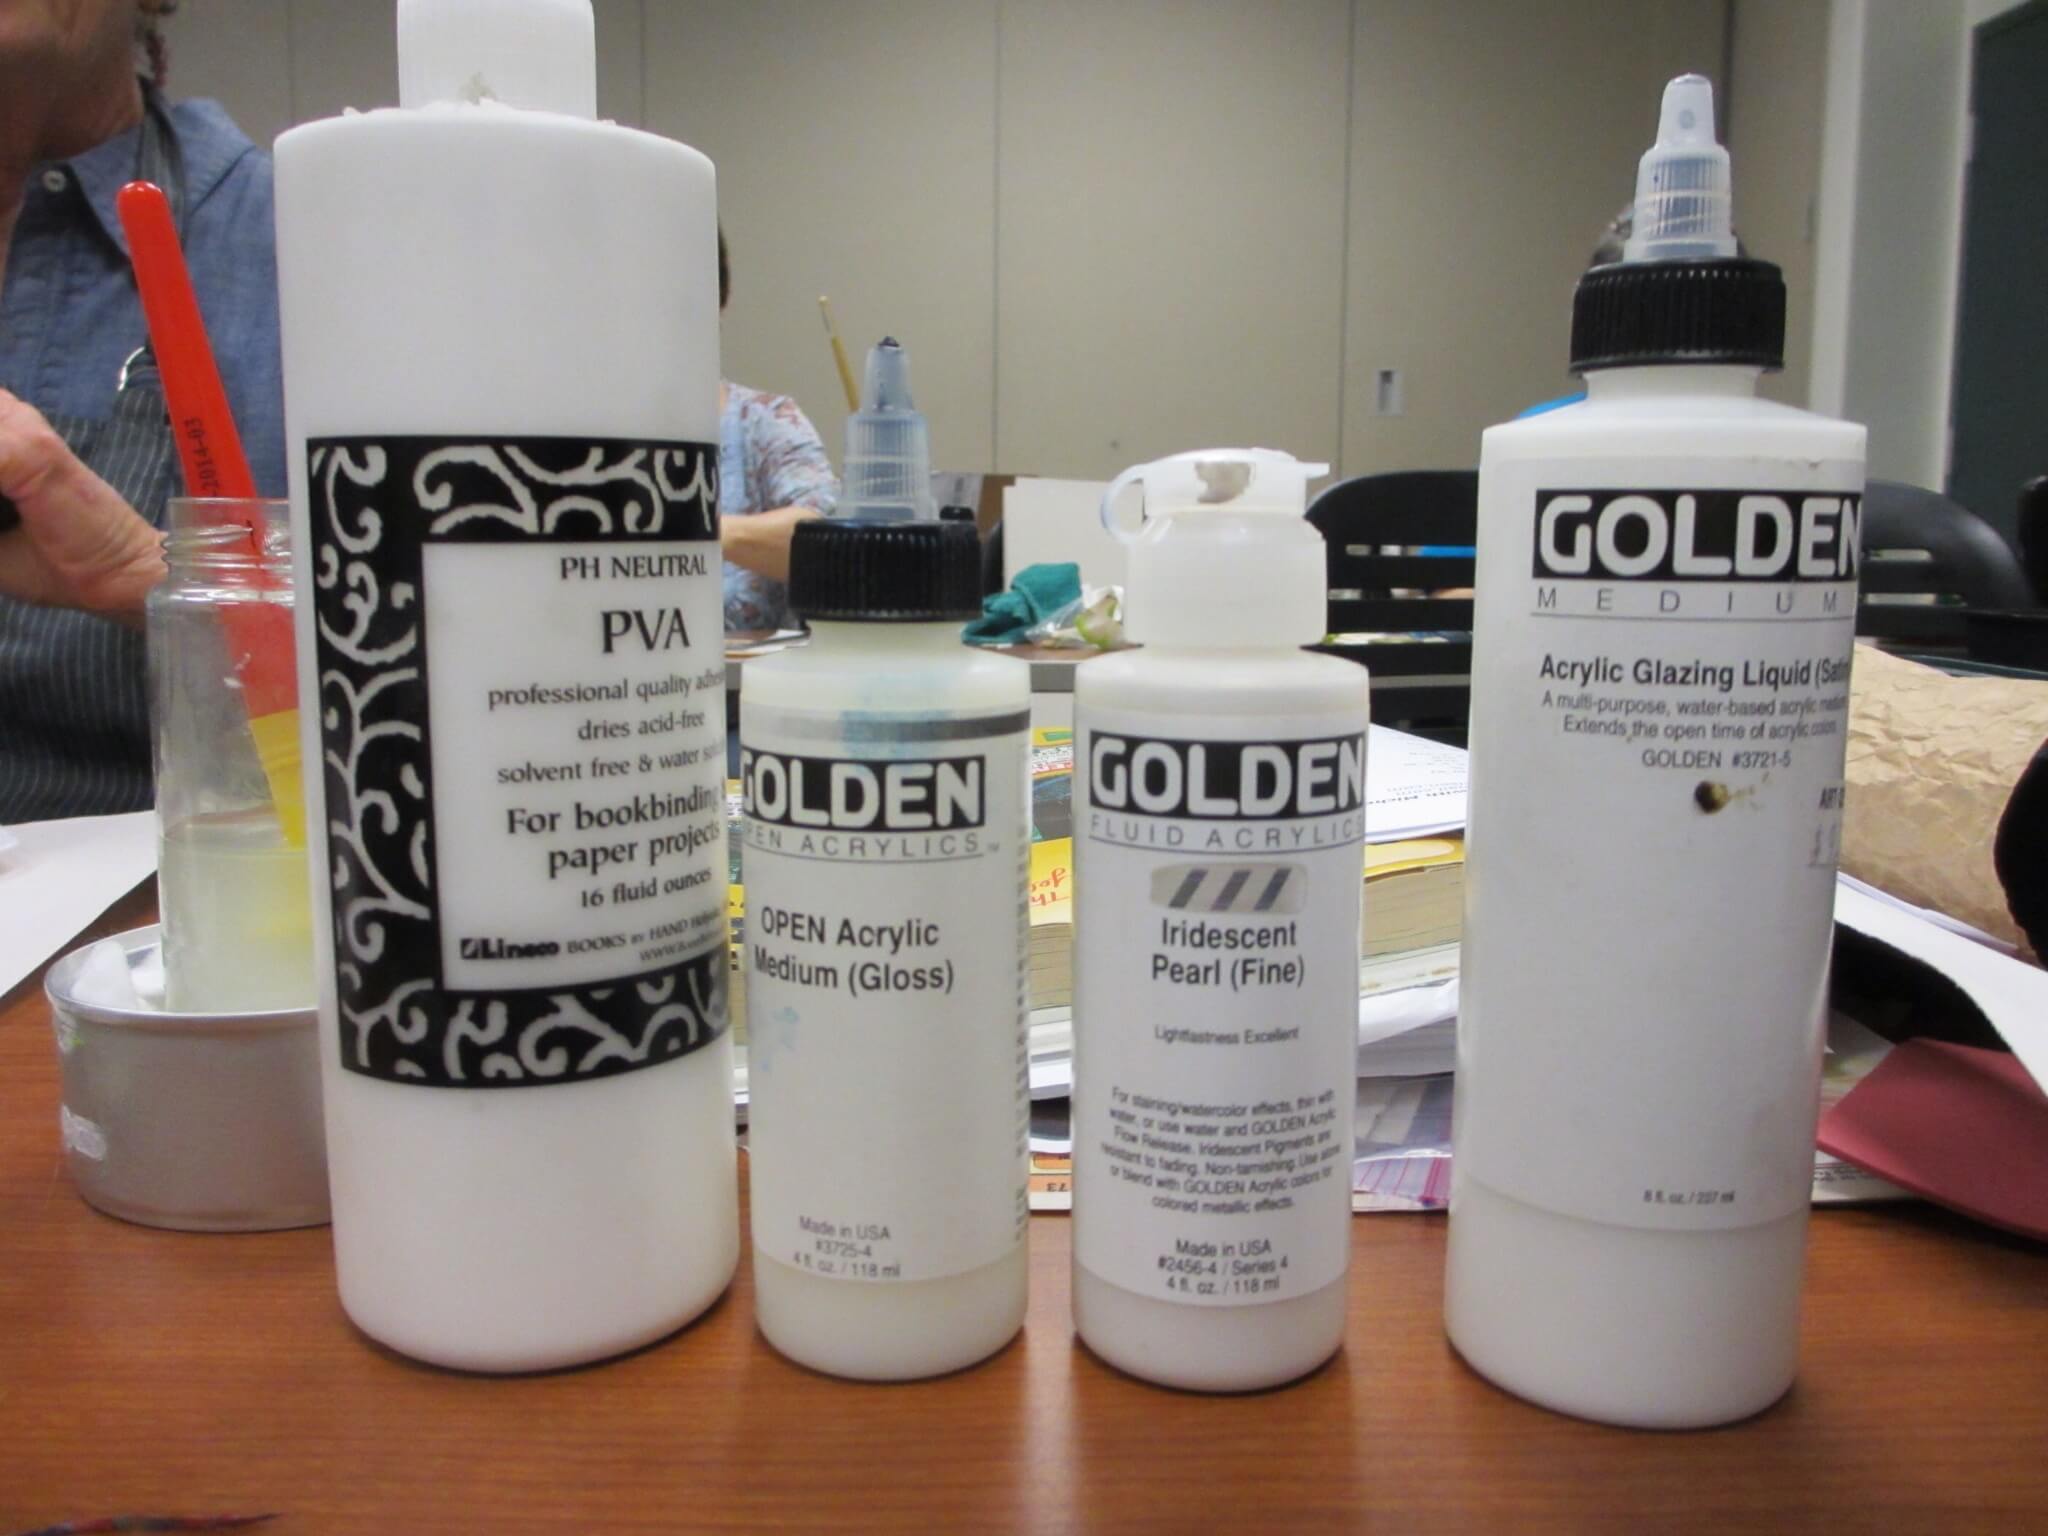
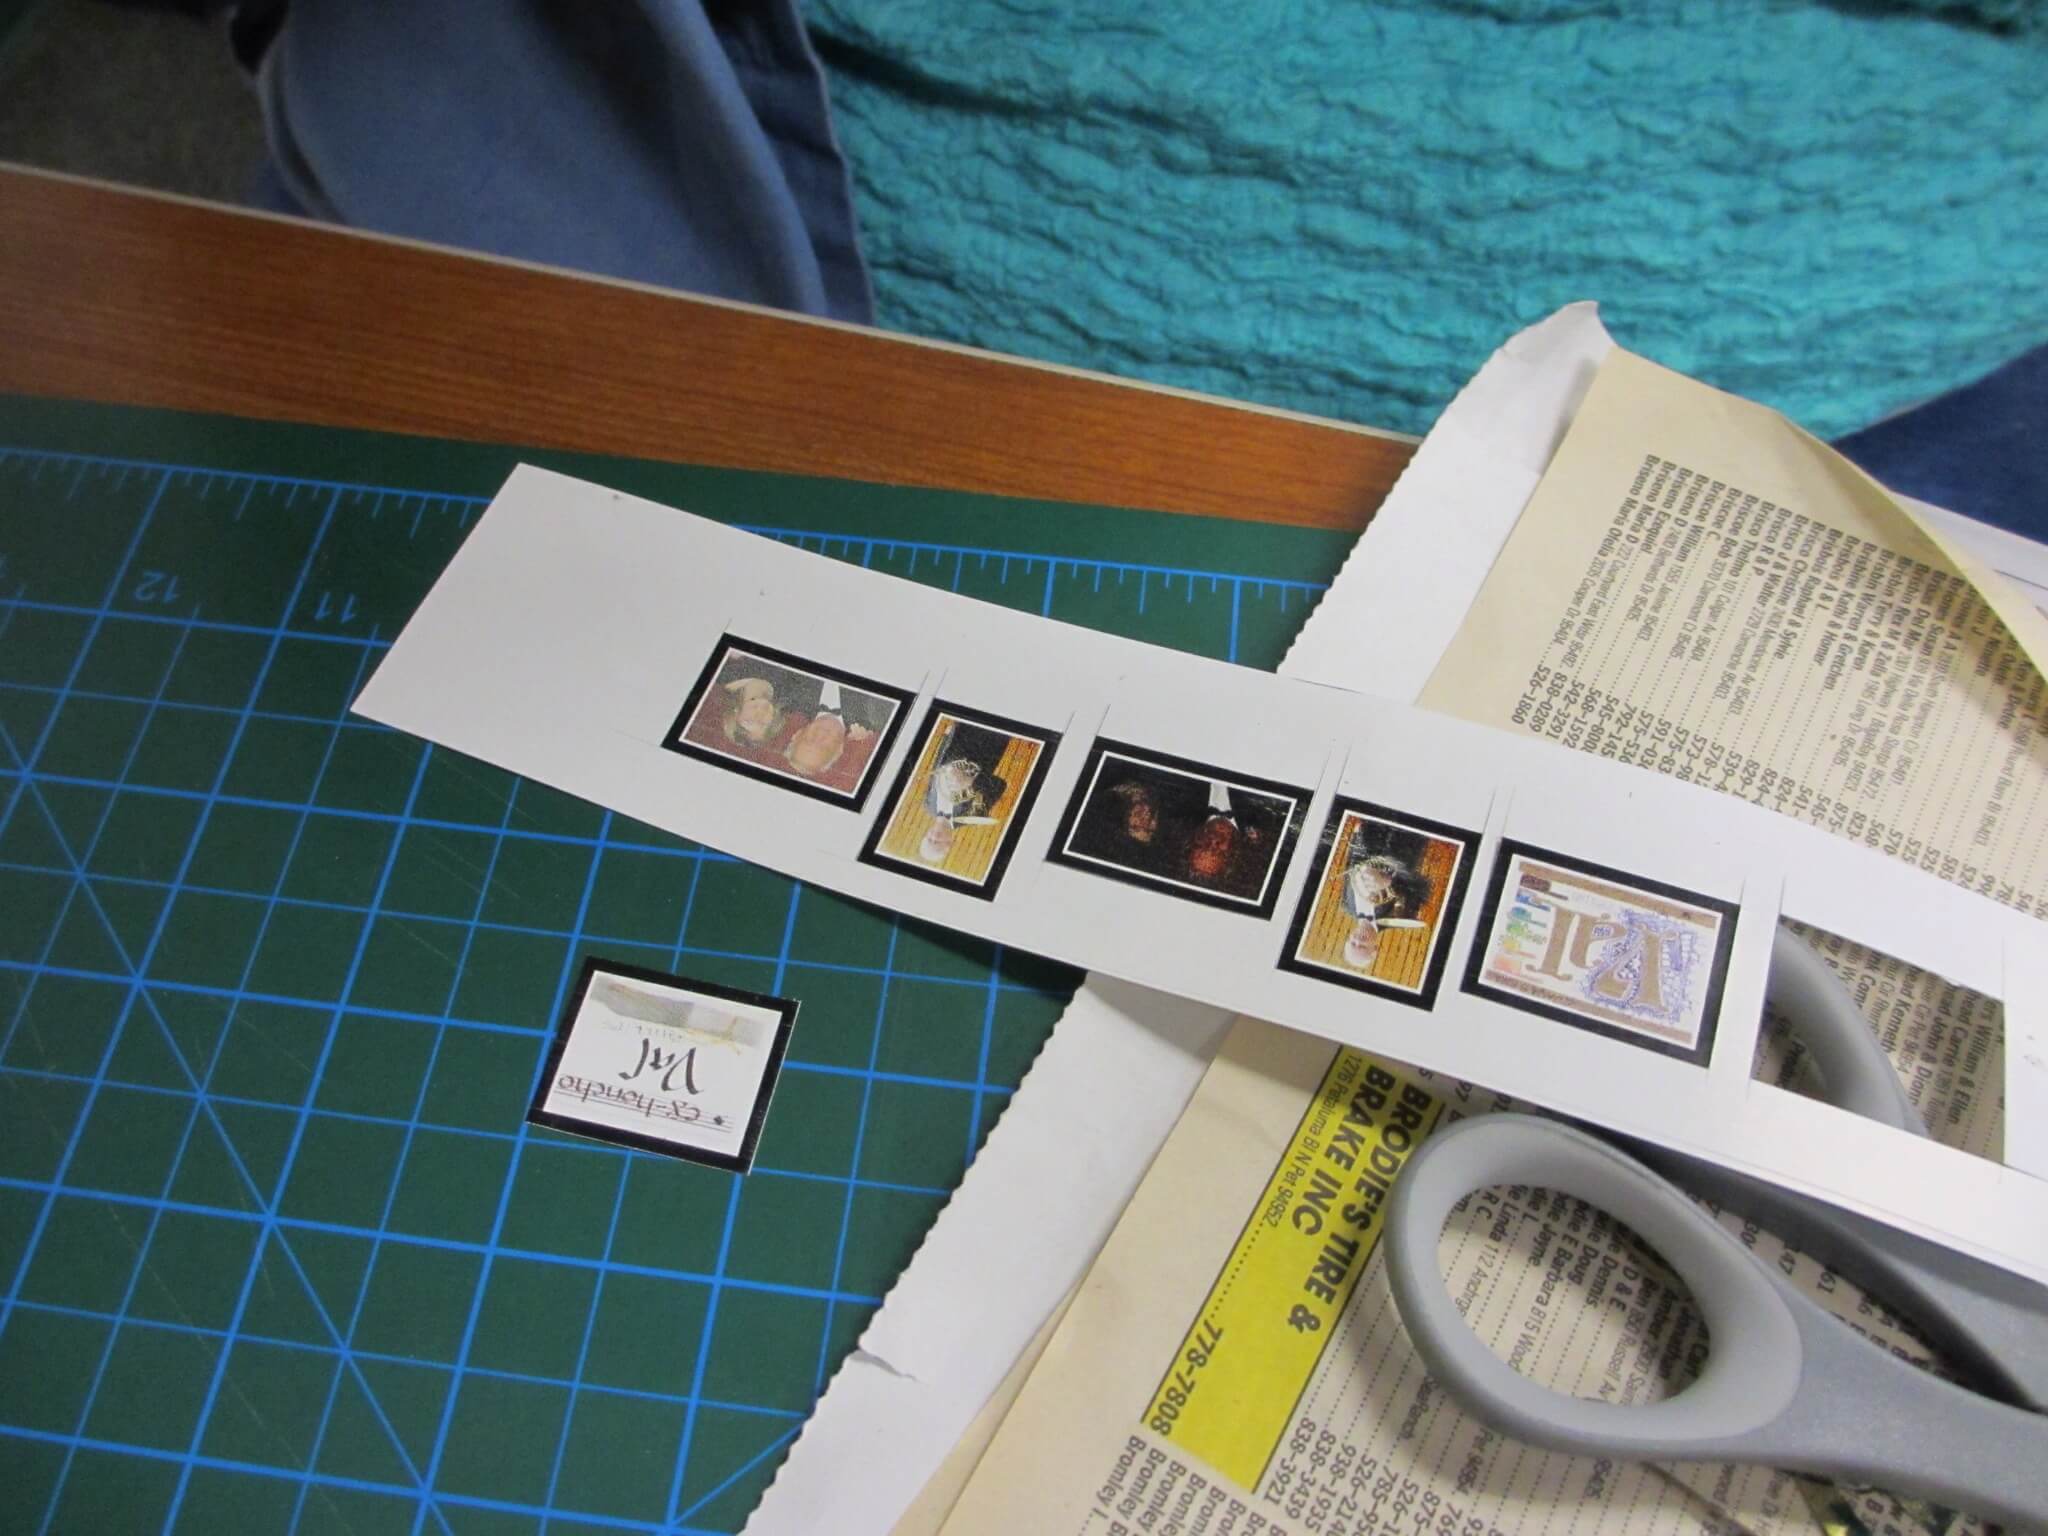
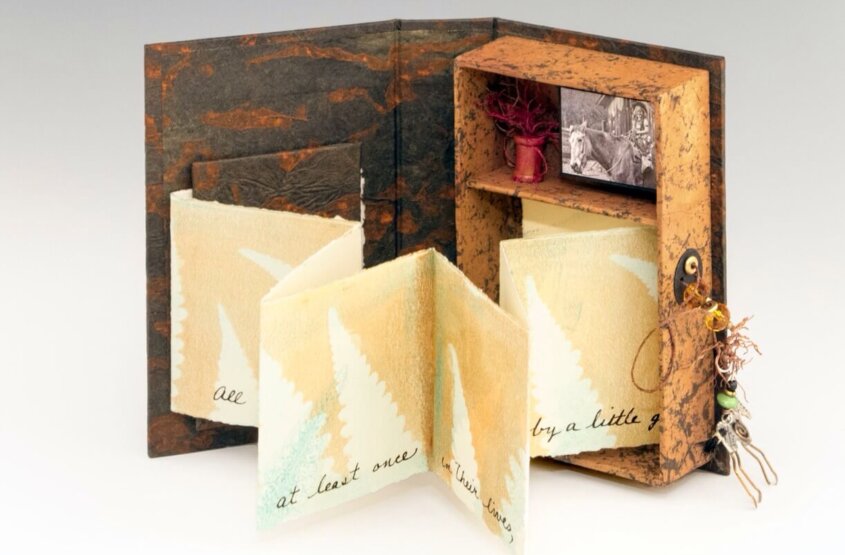
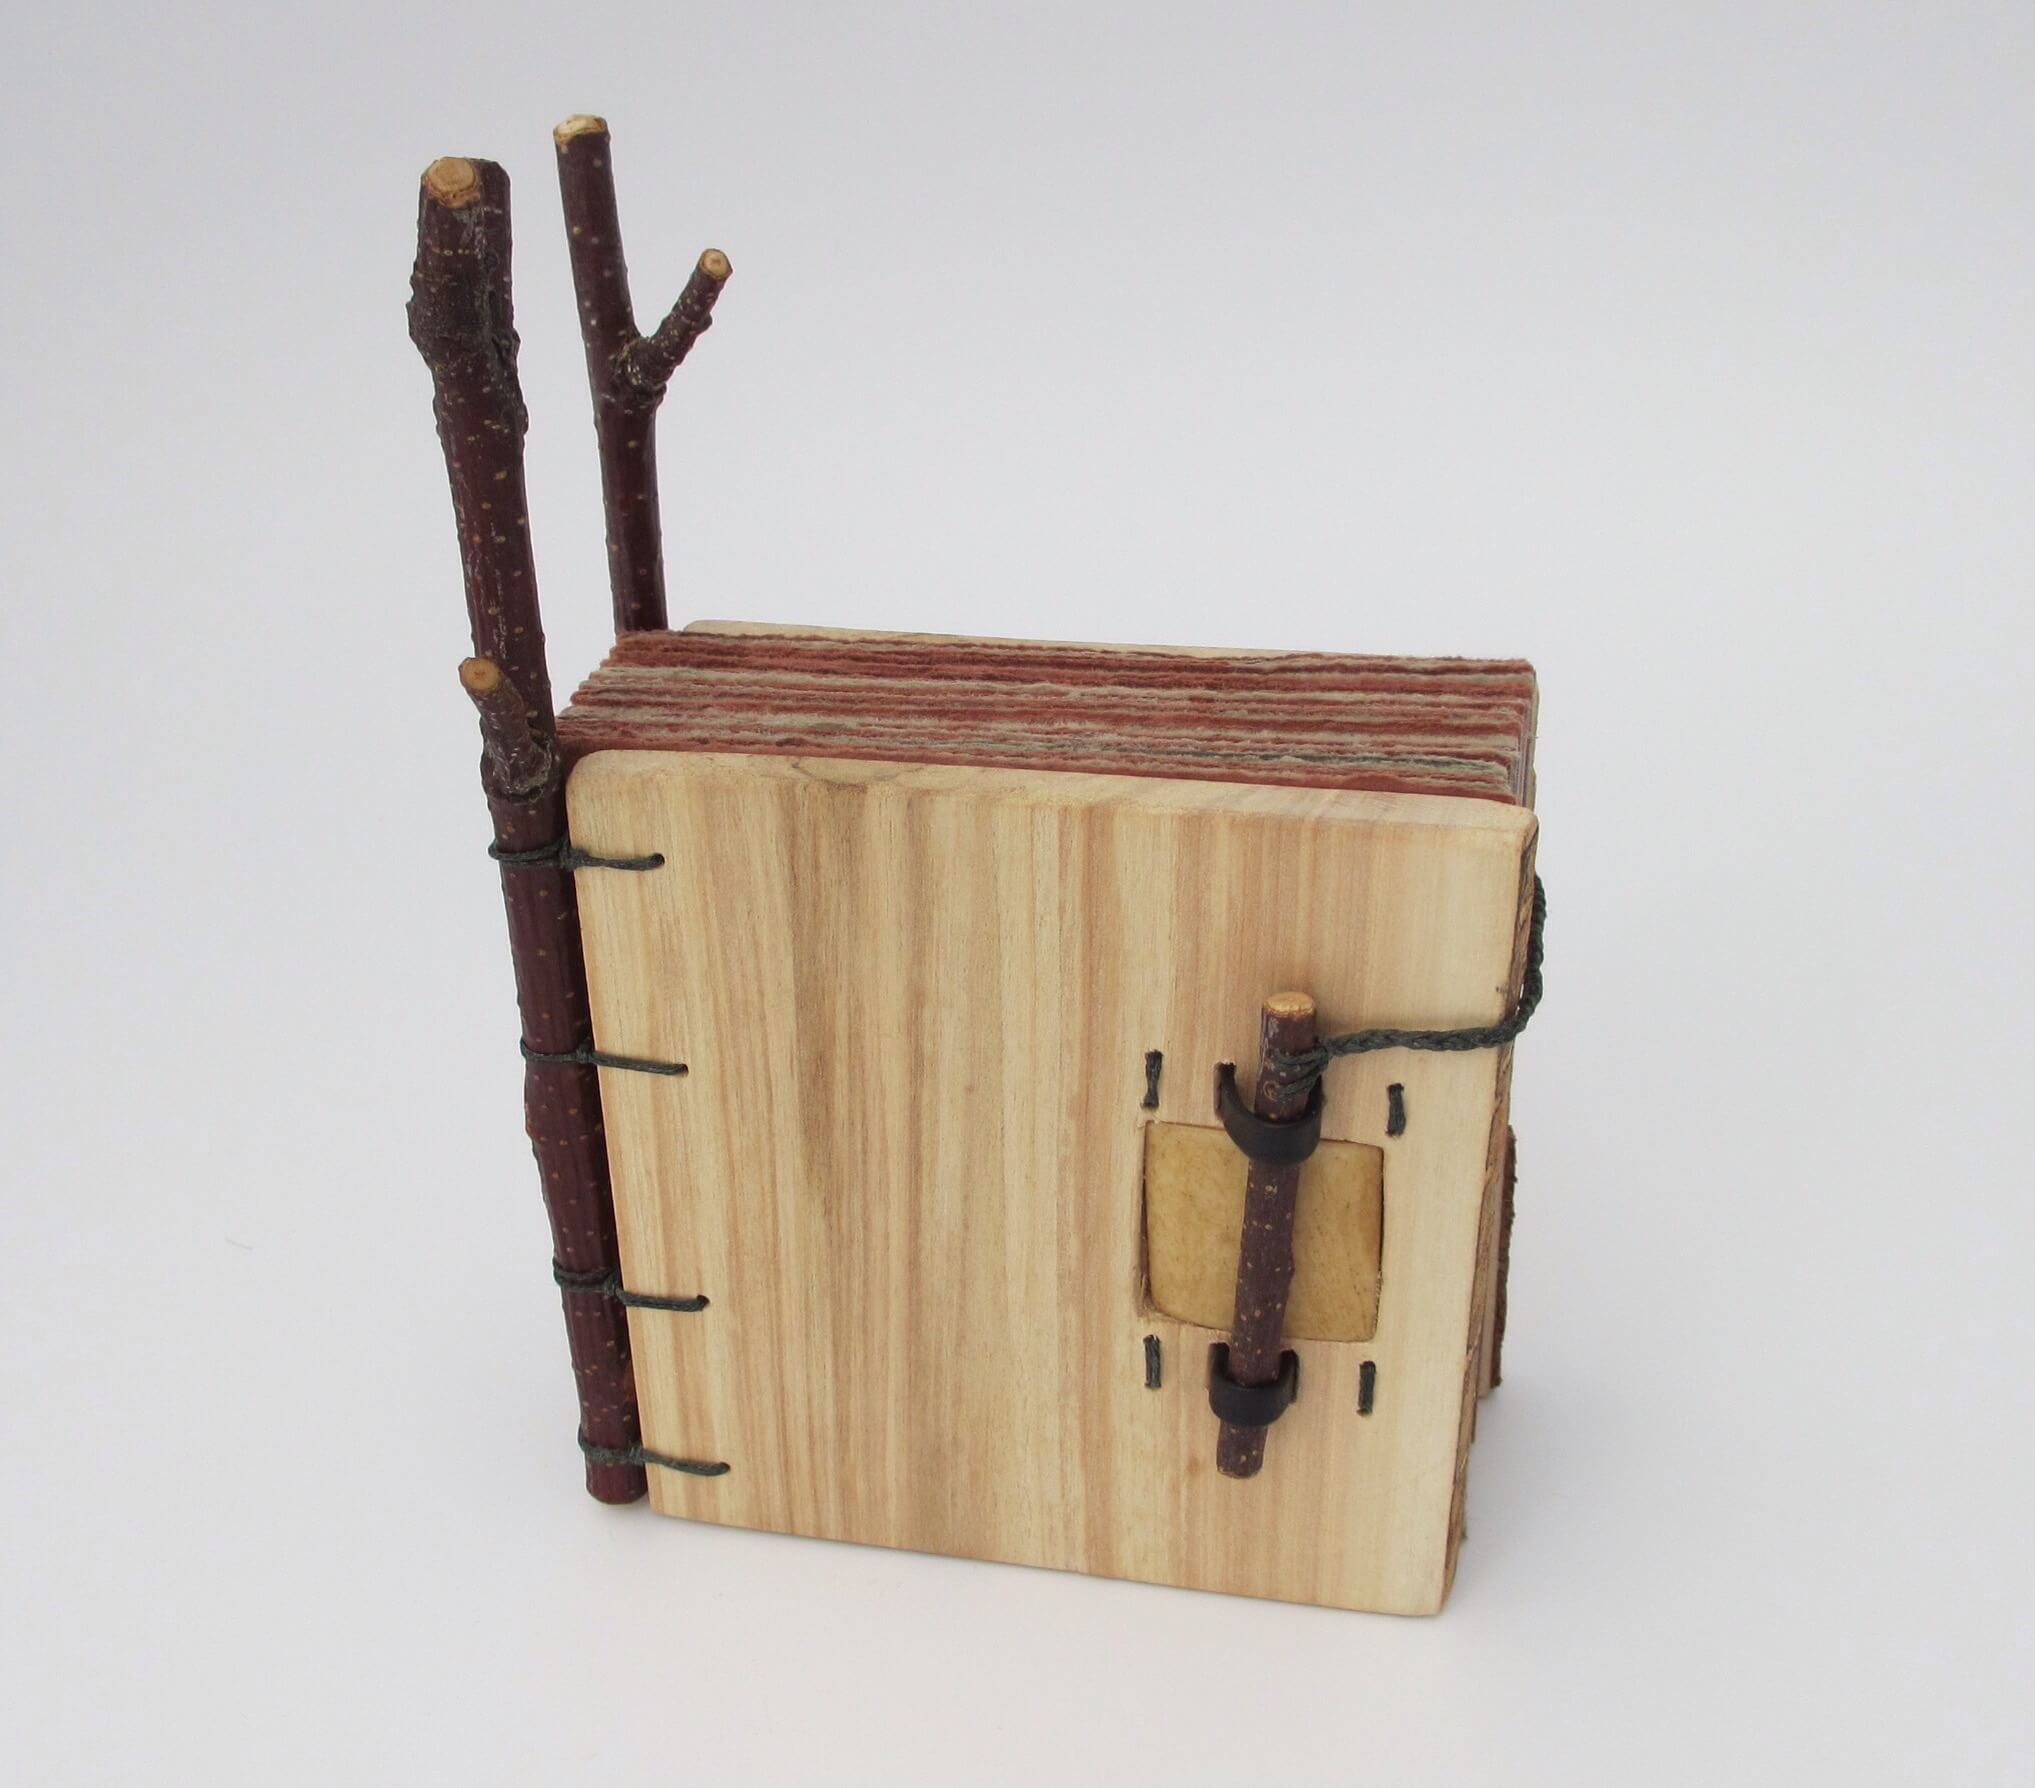
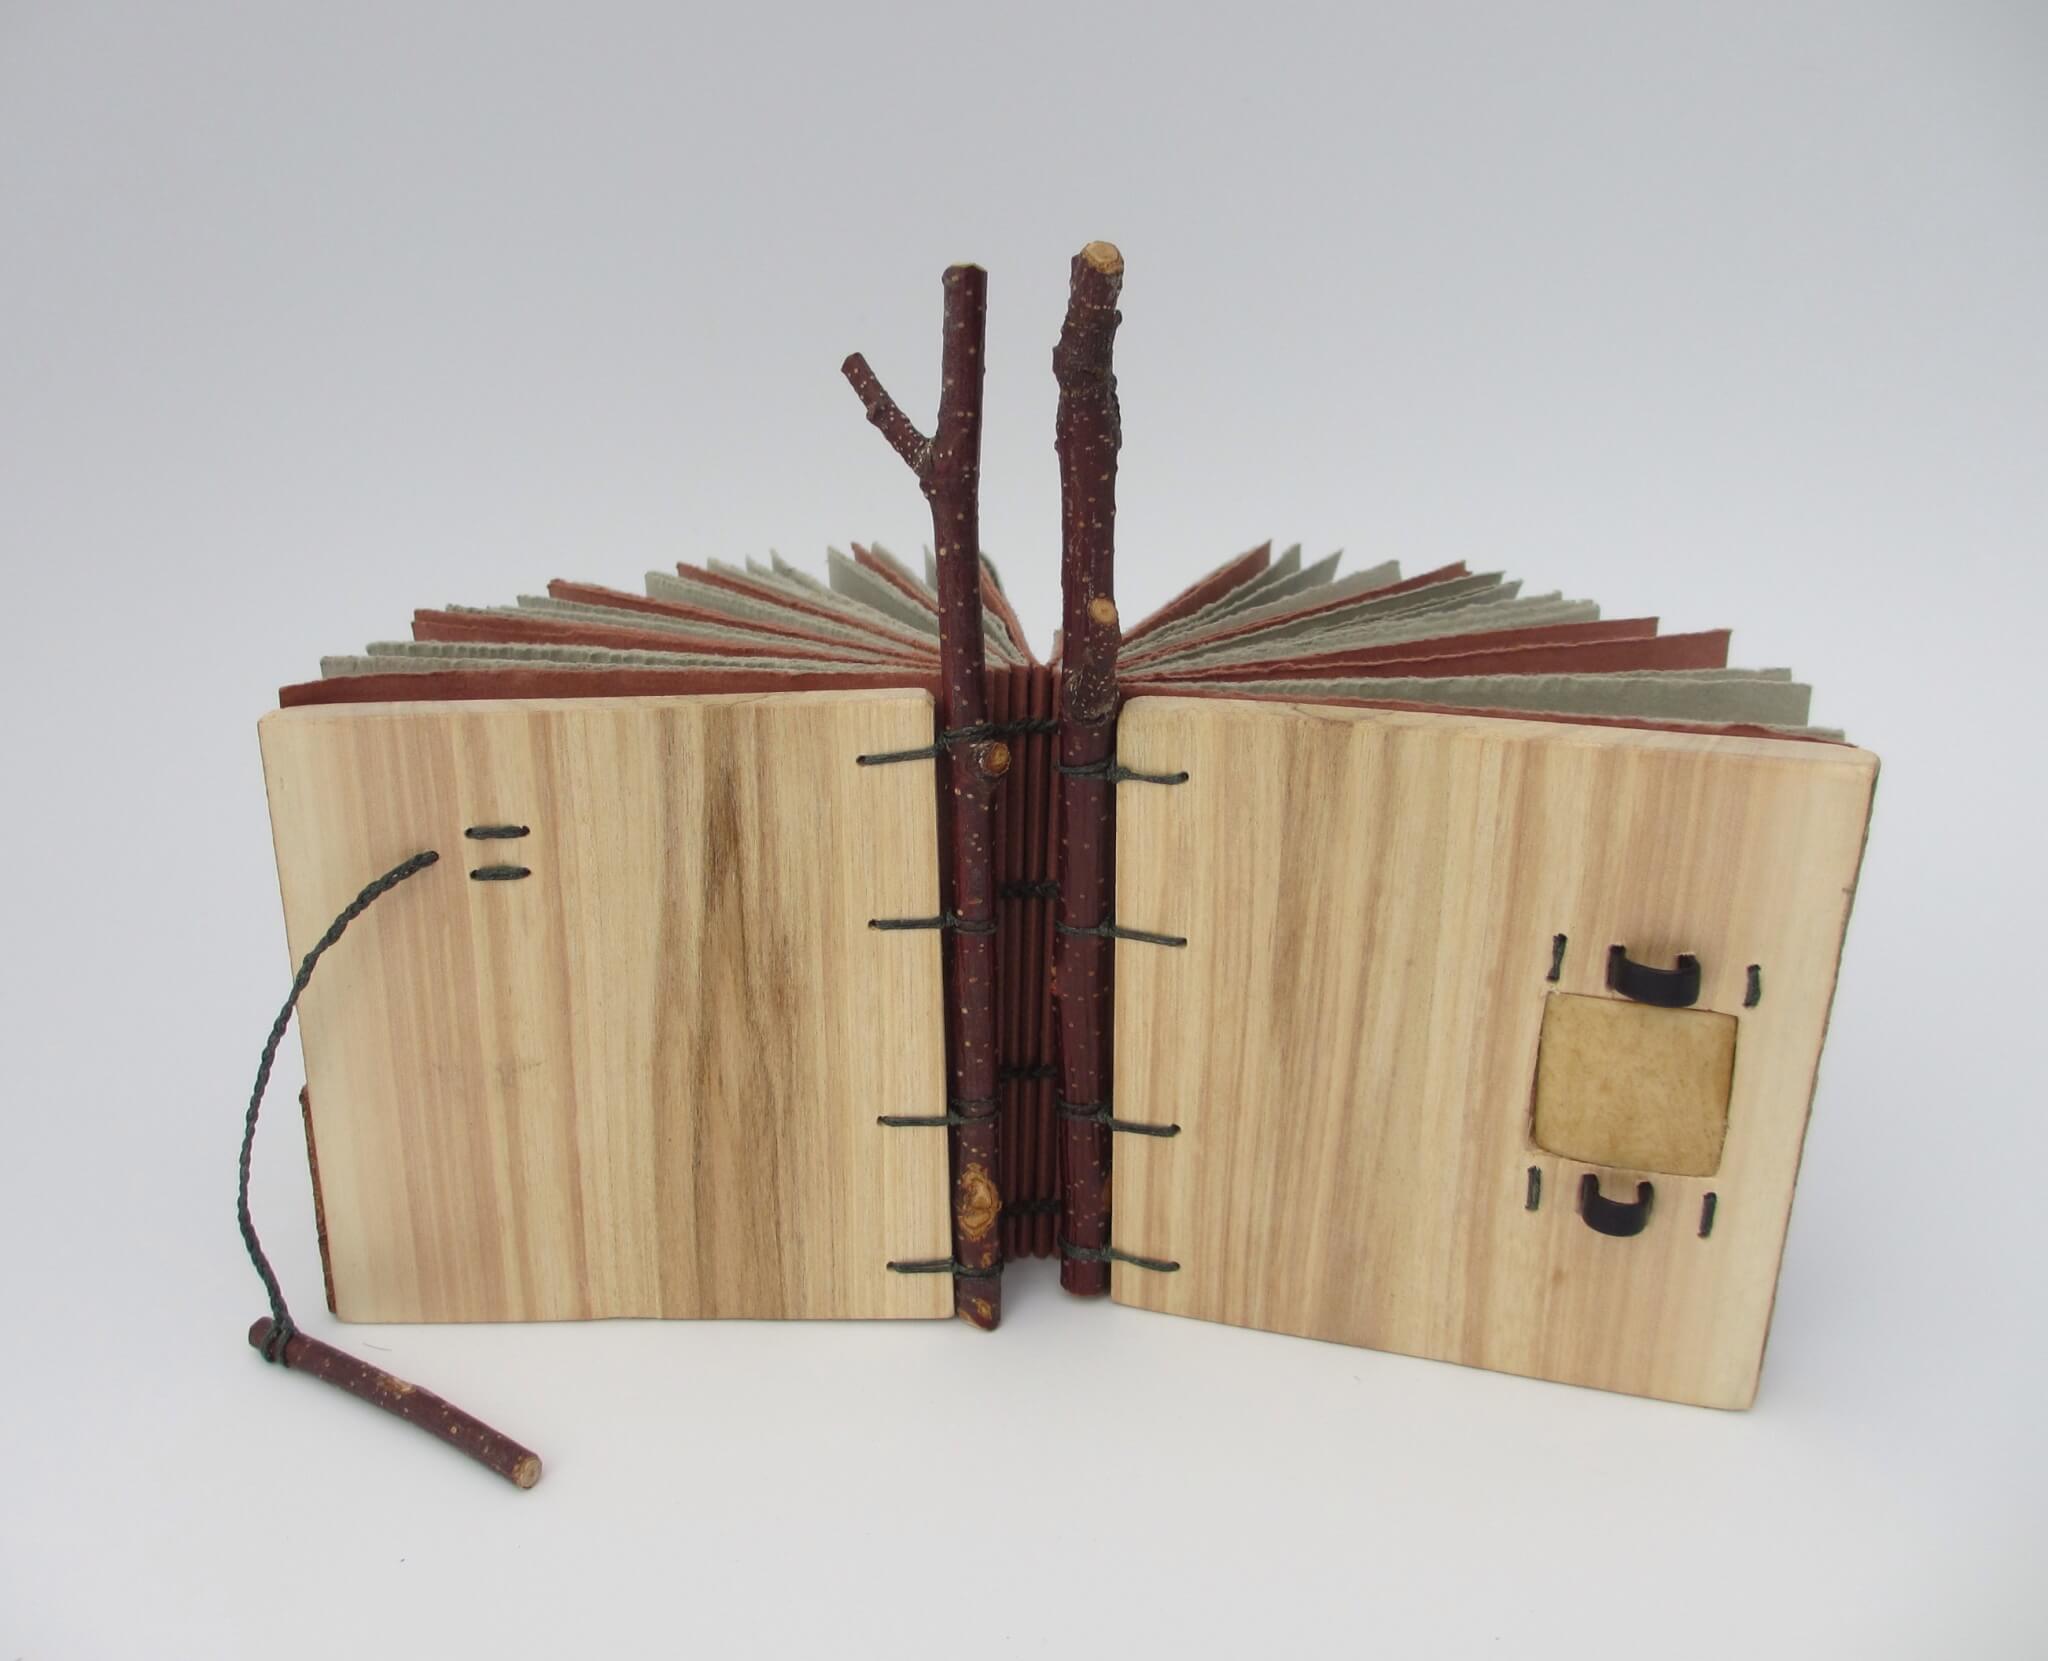
I made the book below during her April workshop;  it uses sticks from Maine and wood from Alaska. The text block was created with torn Hannemuhle papers. Attaching the sticks was challenging but practice makes perfect and I managed to complete the book. The closure loops were made from fine leather from a  repurposed woman’s glove and a fossil is embedded in the cover. The tie  is braided waxed linen thread. I love workshops that are a cross between an art class and shop class—love those electric
drills.


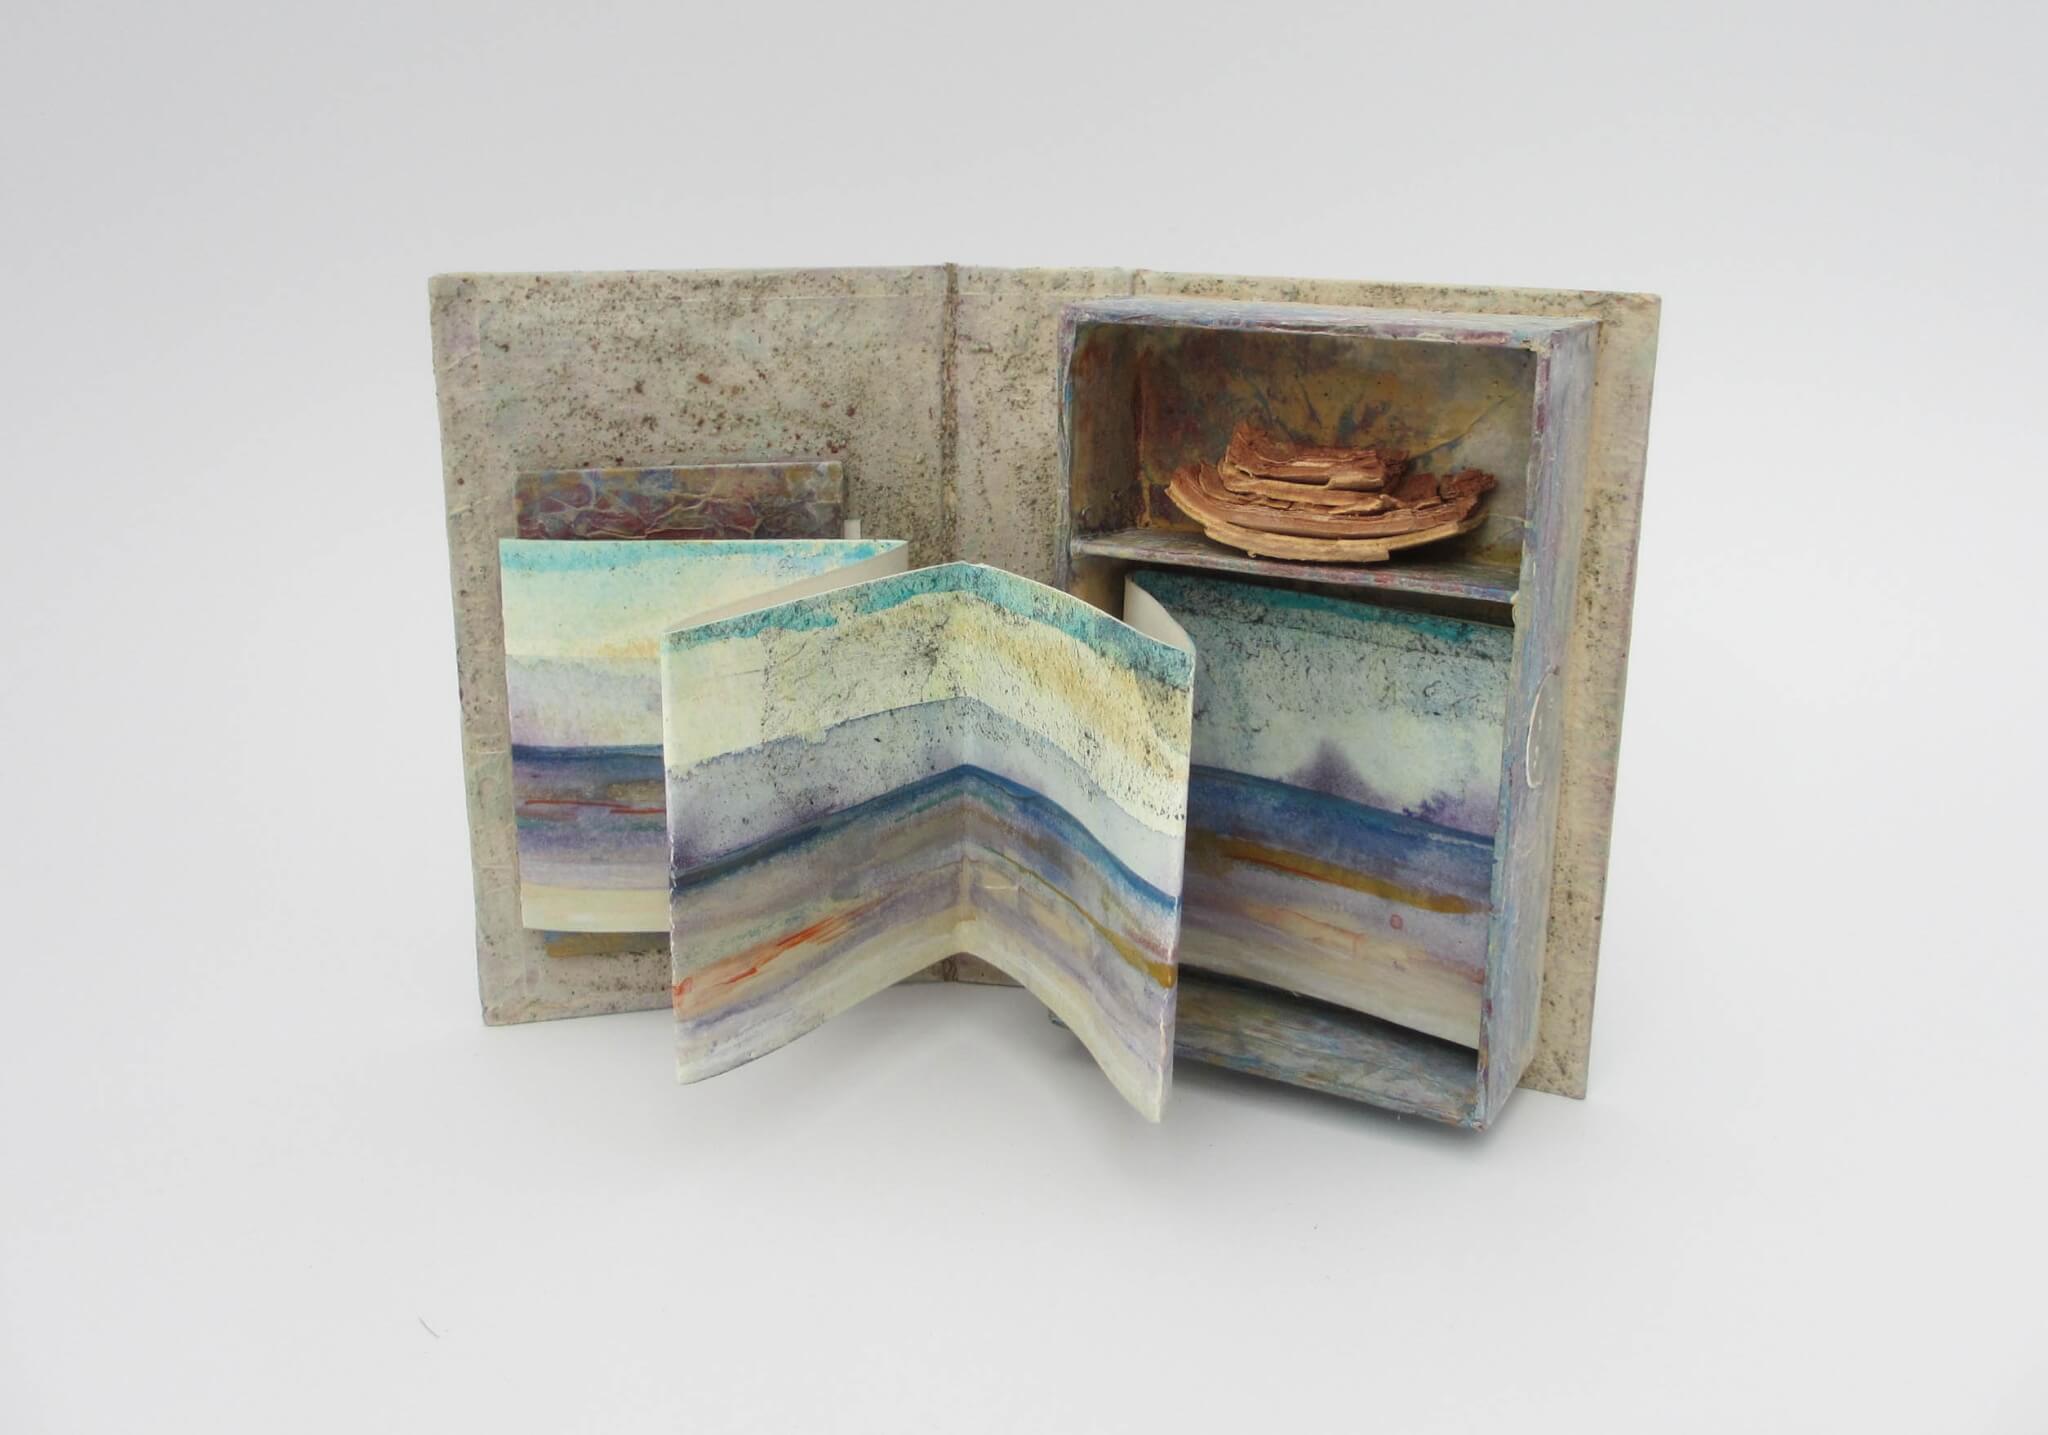
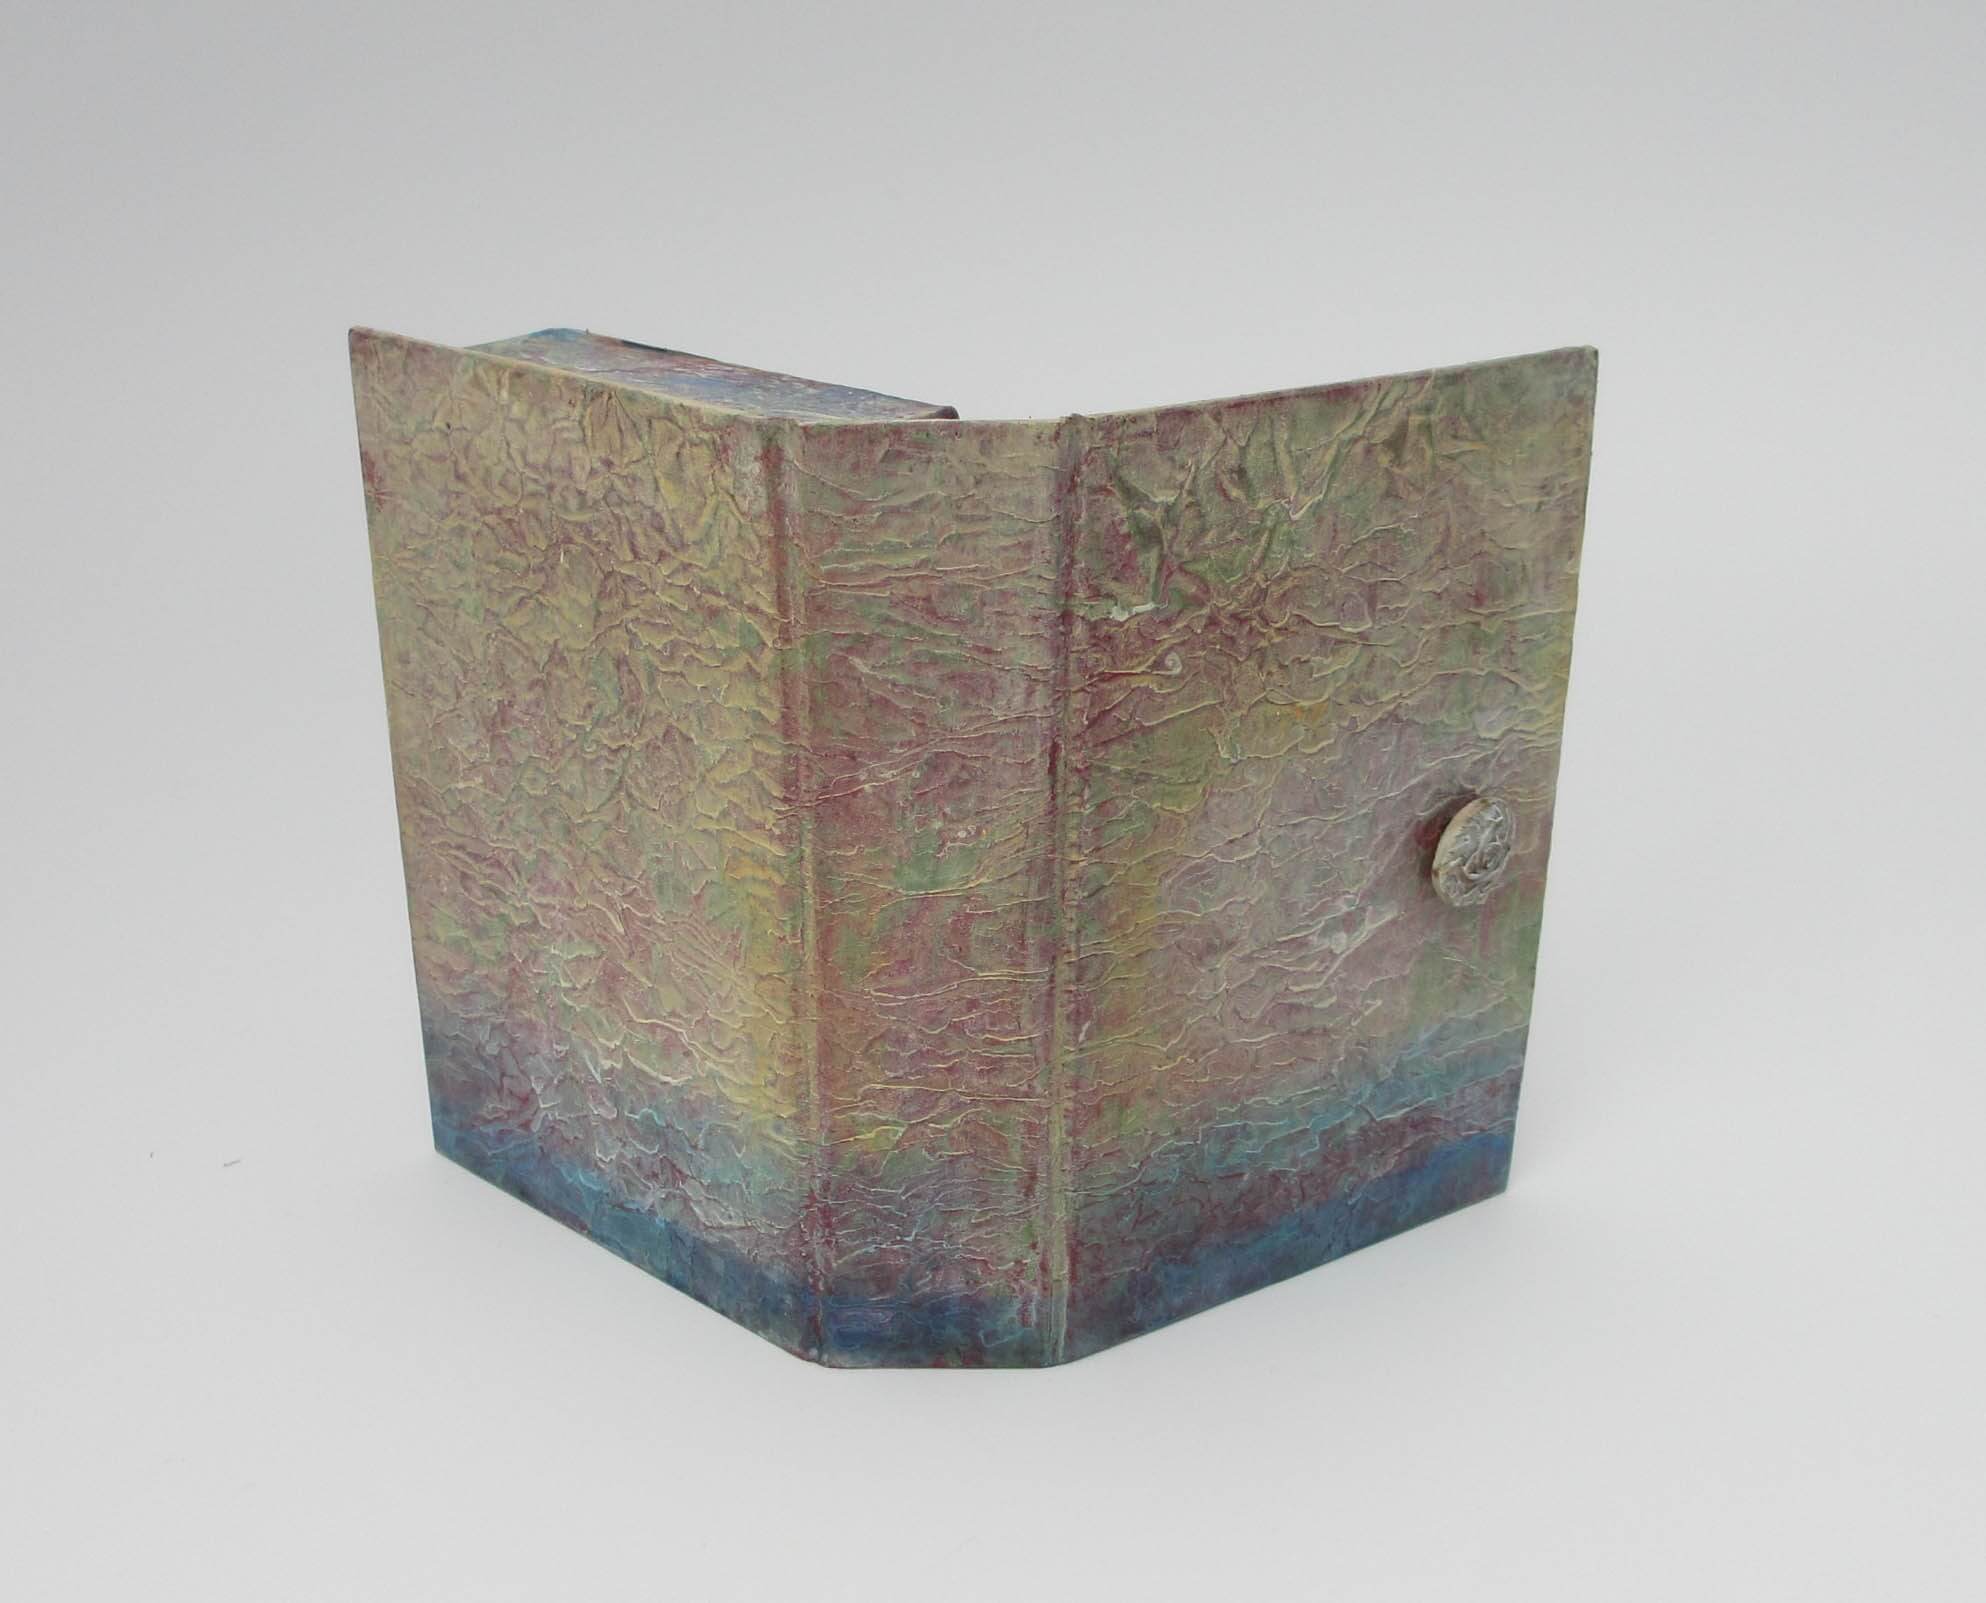
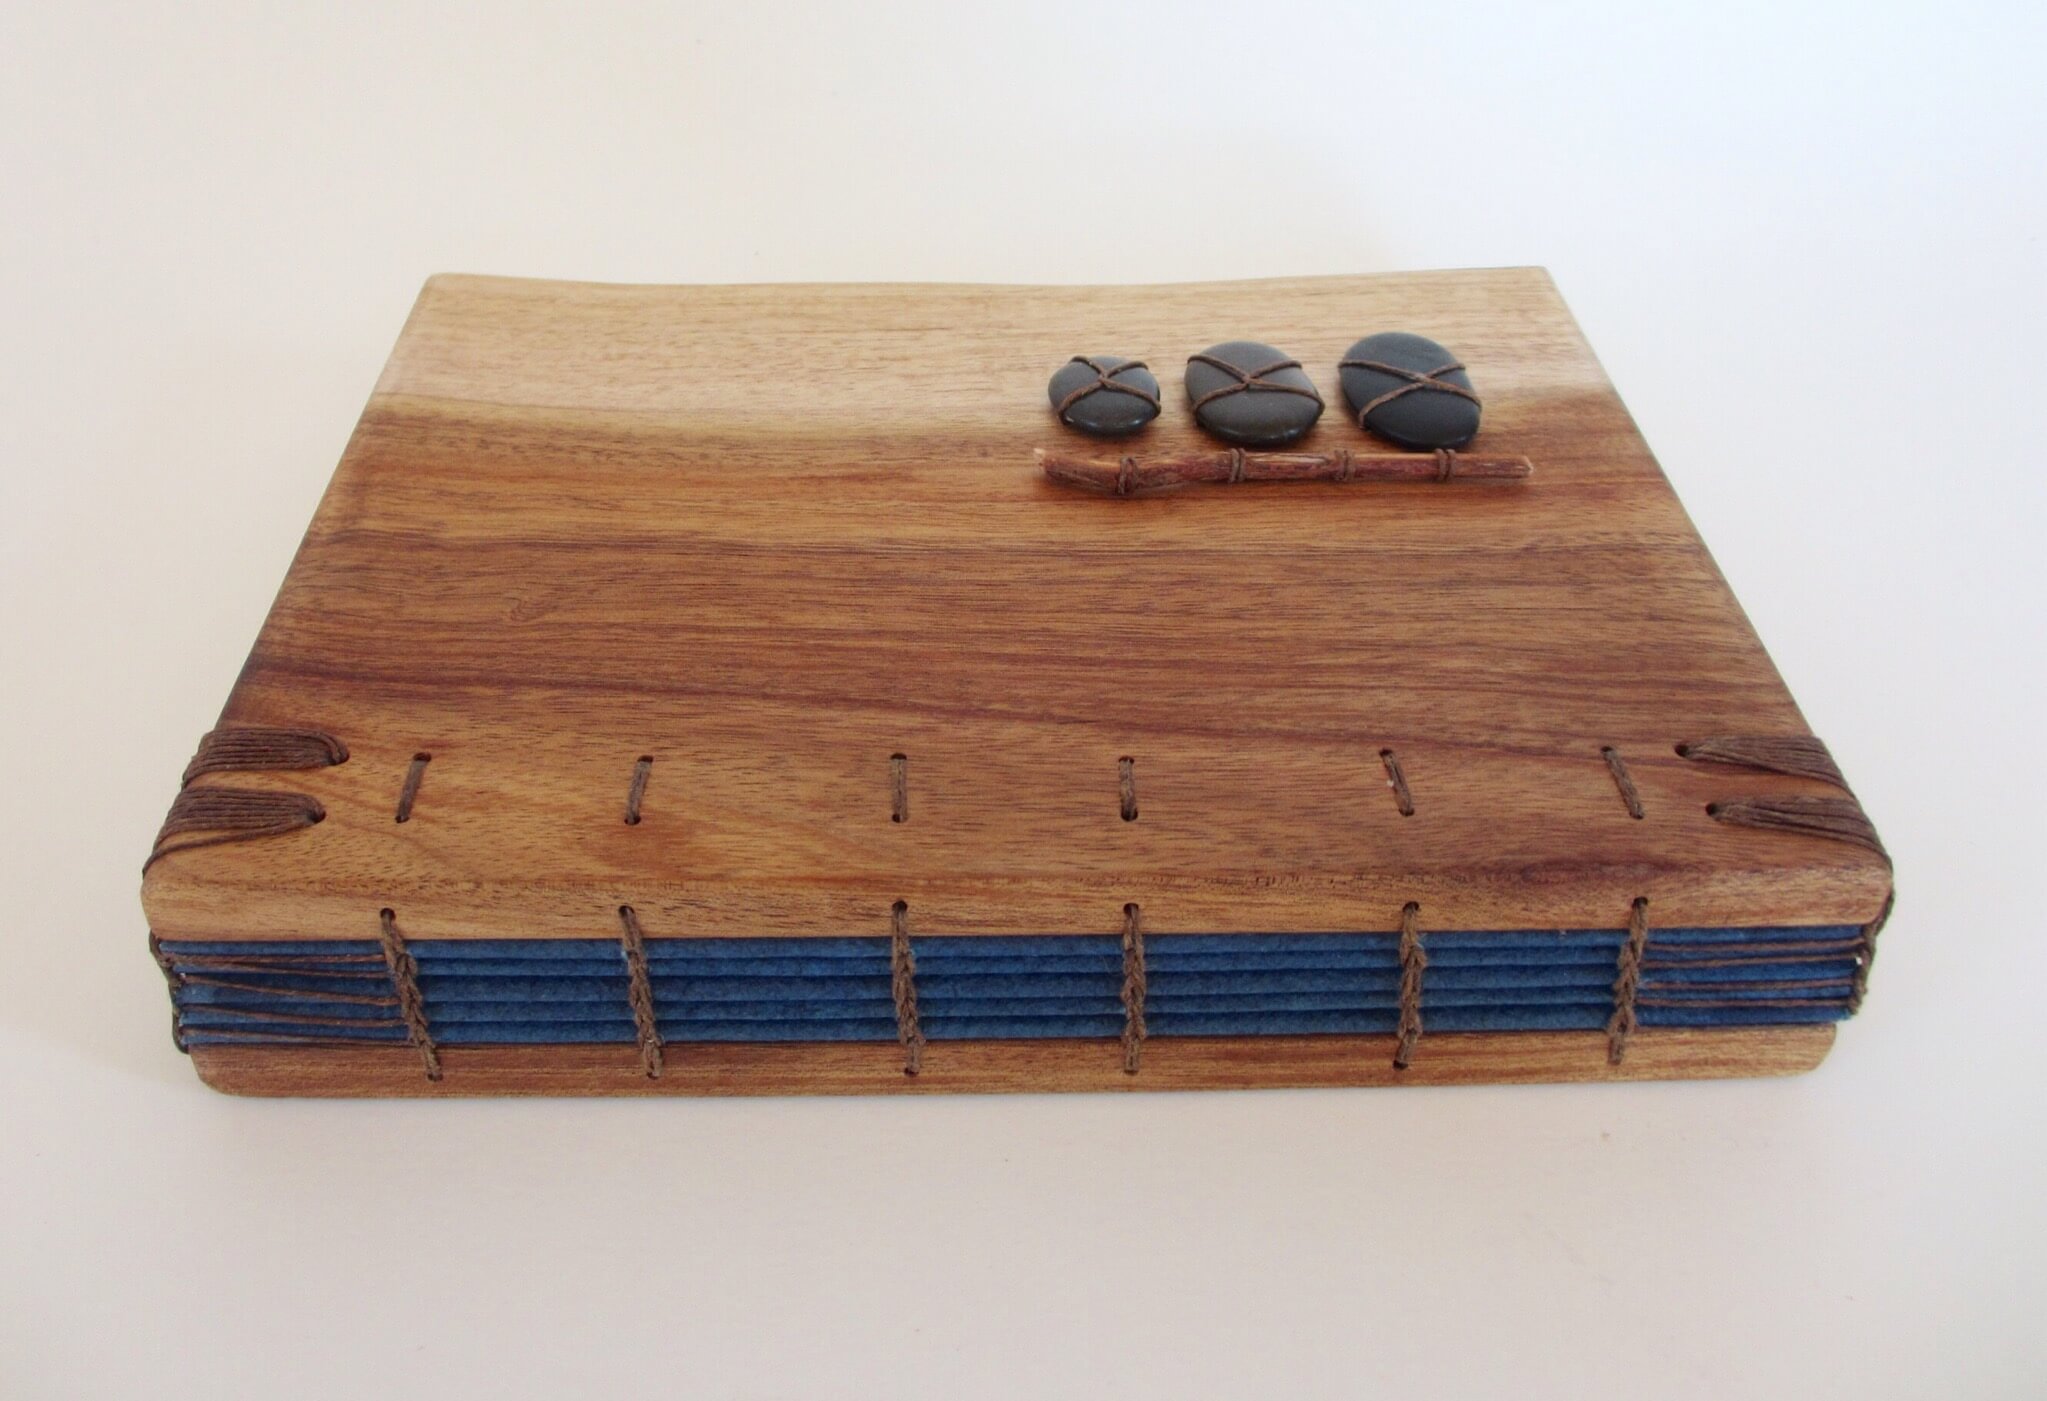
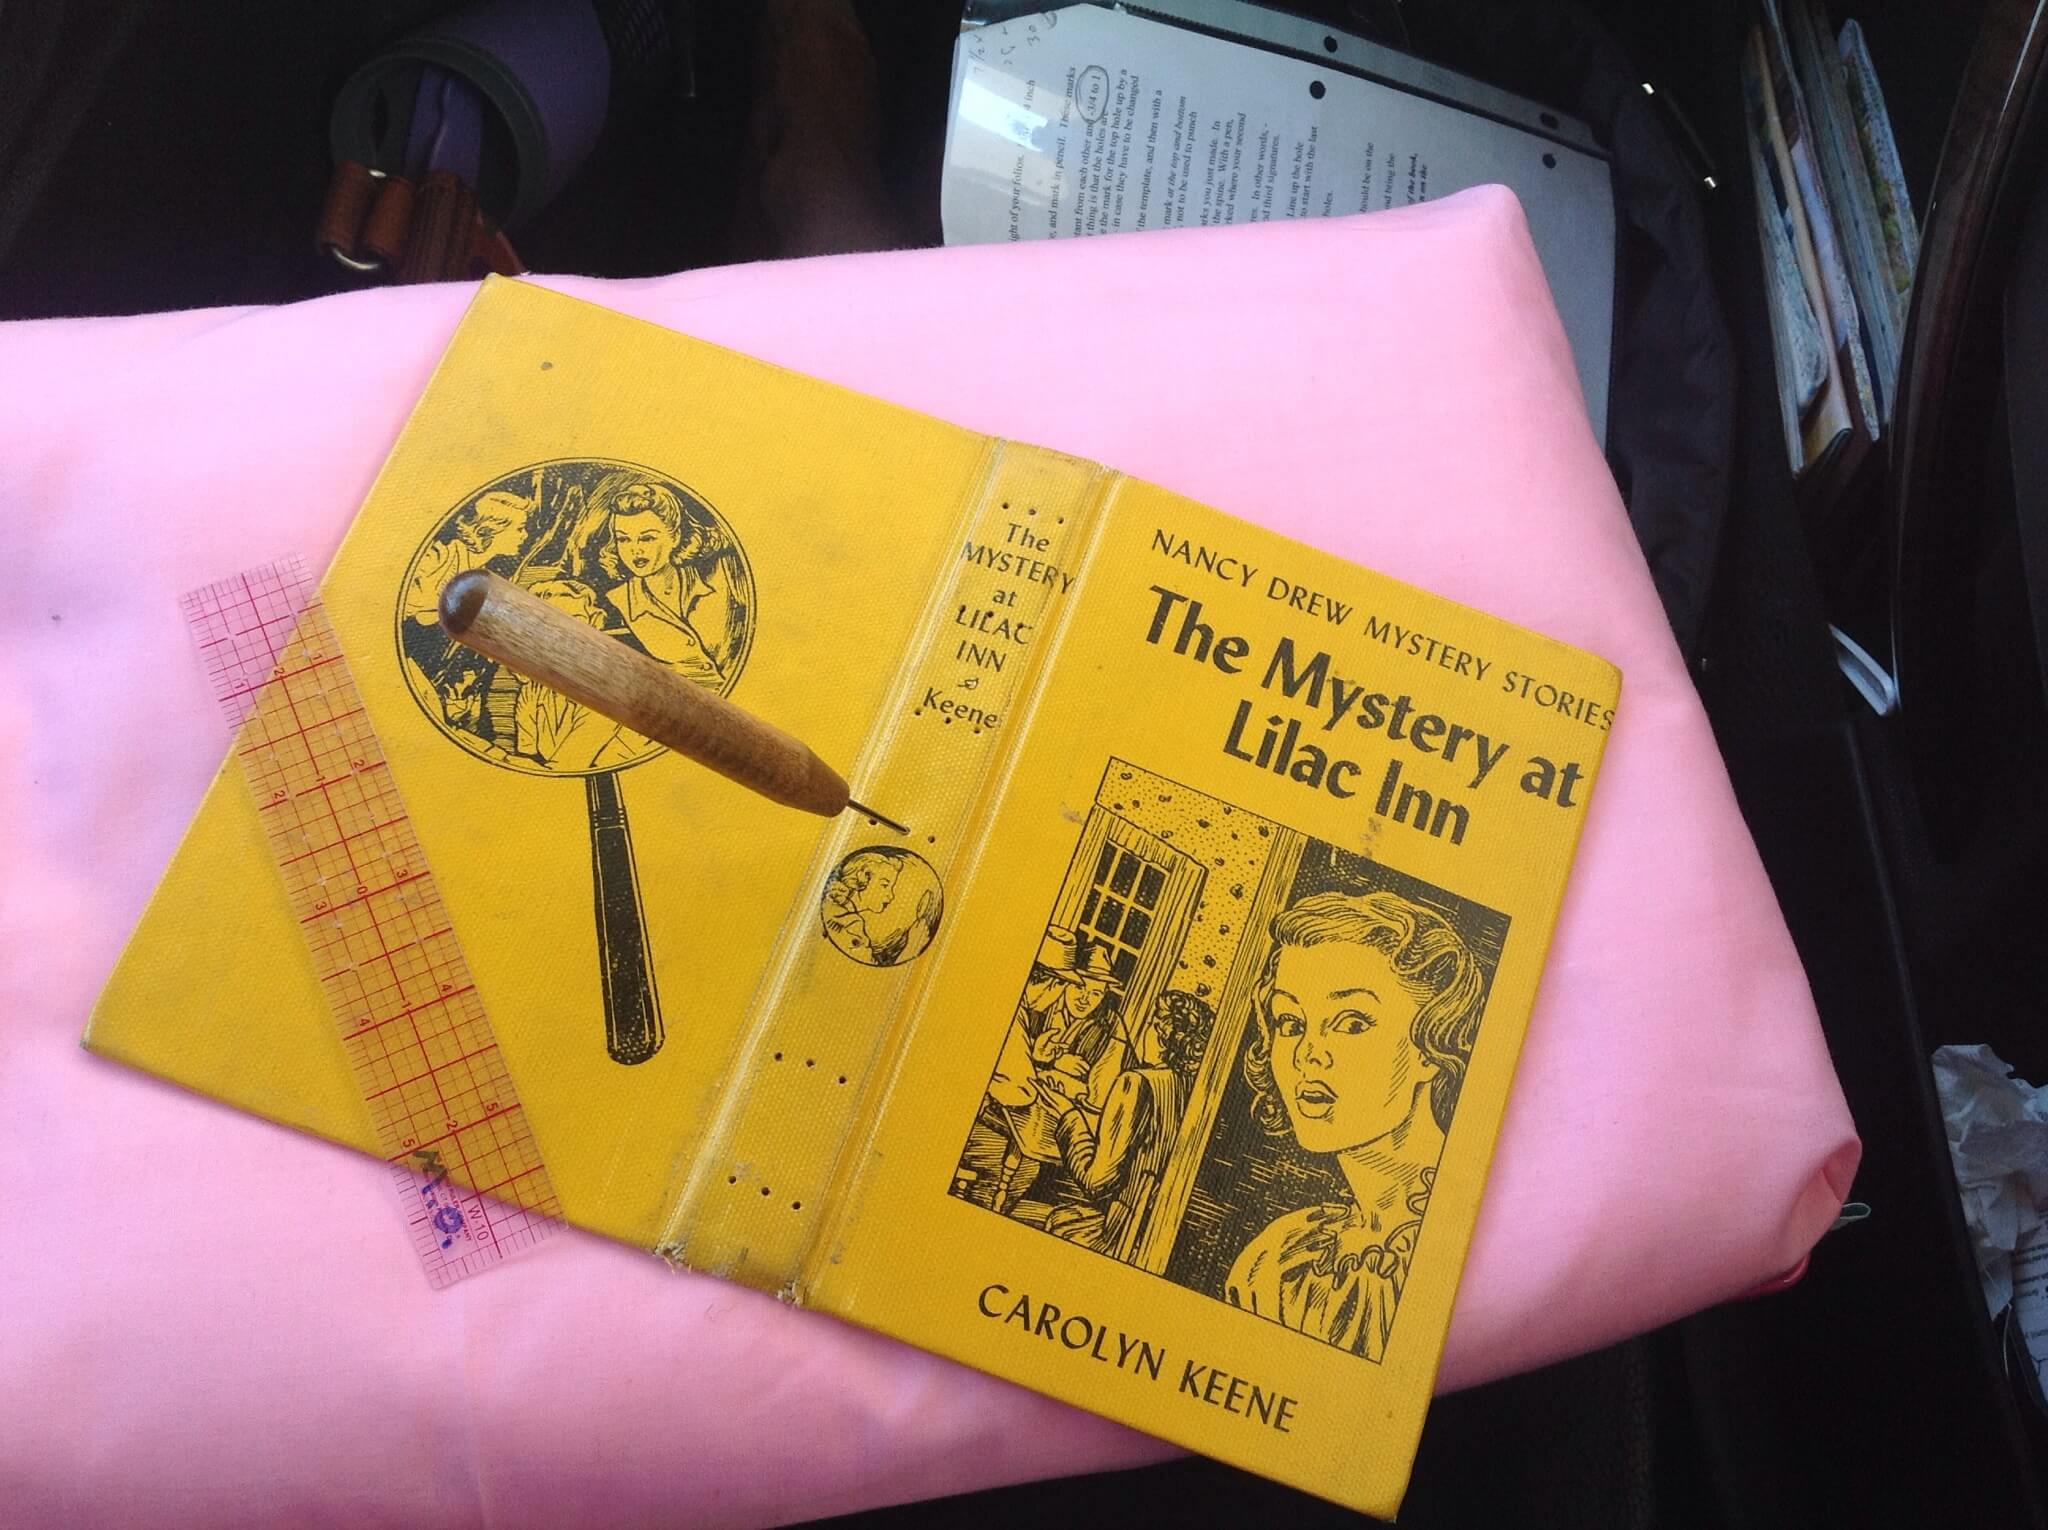
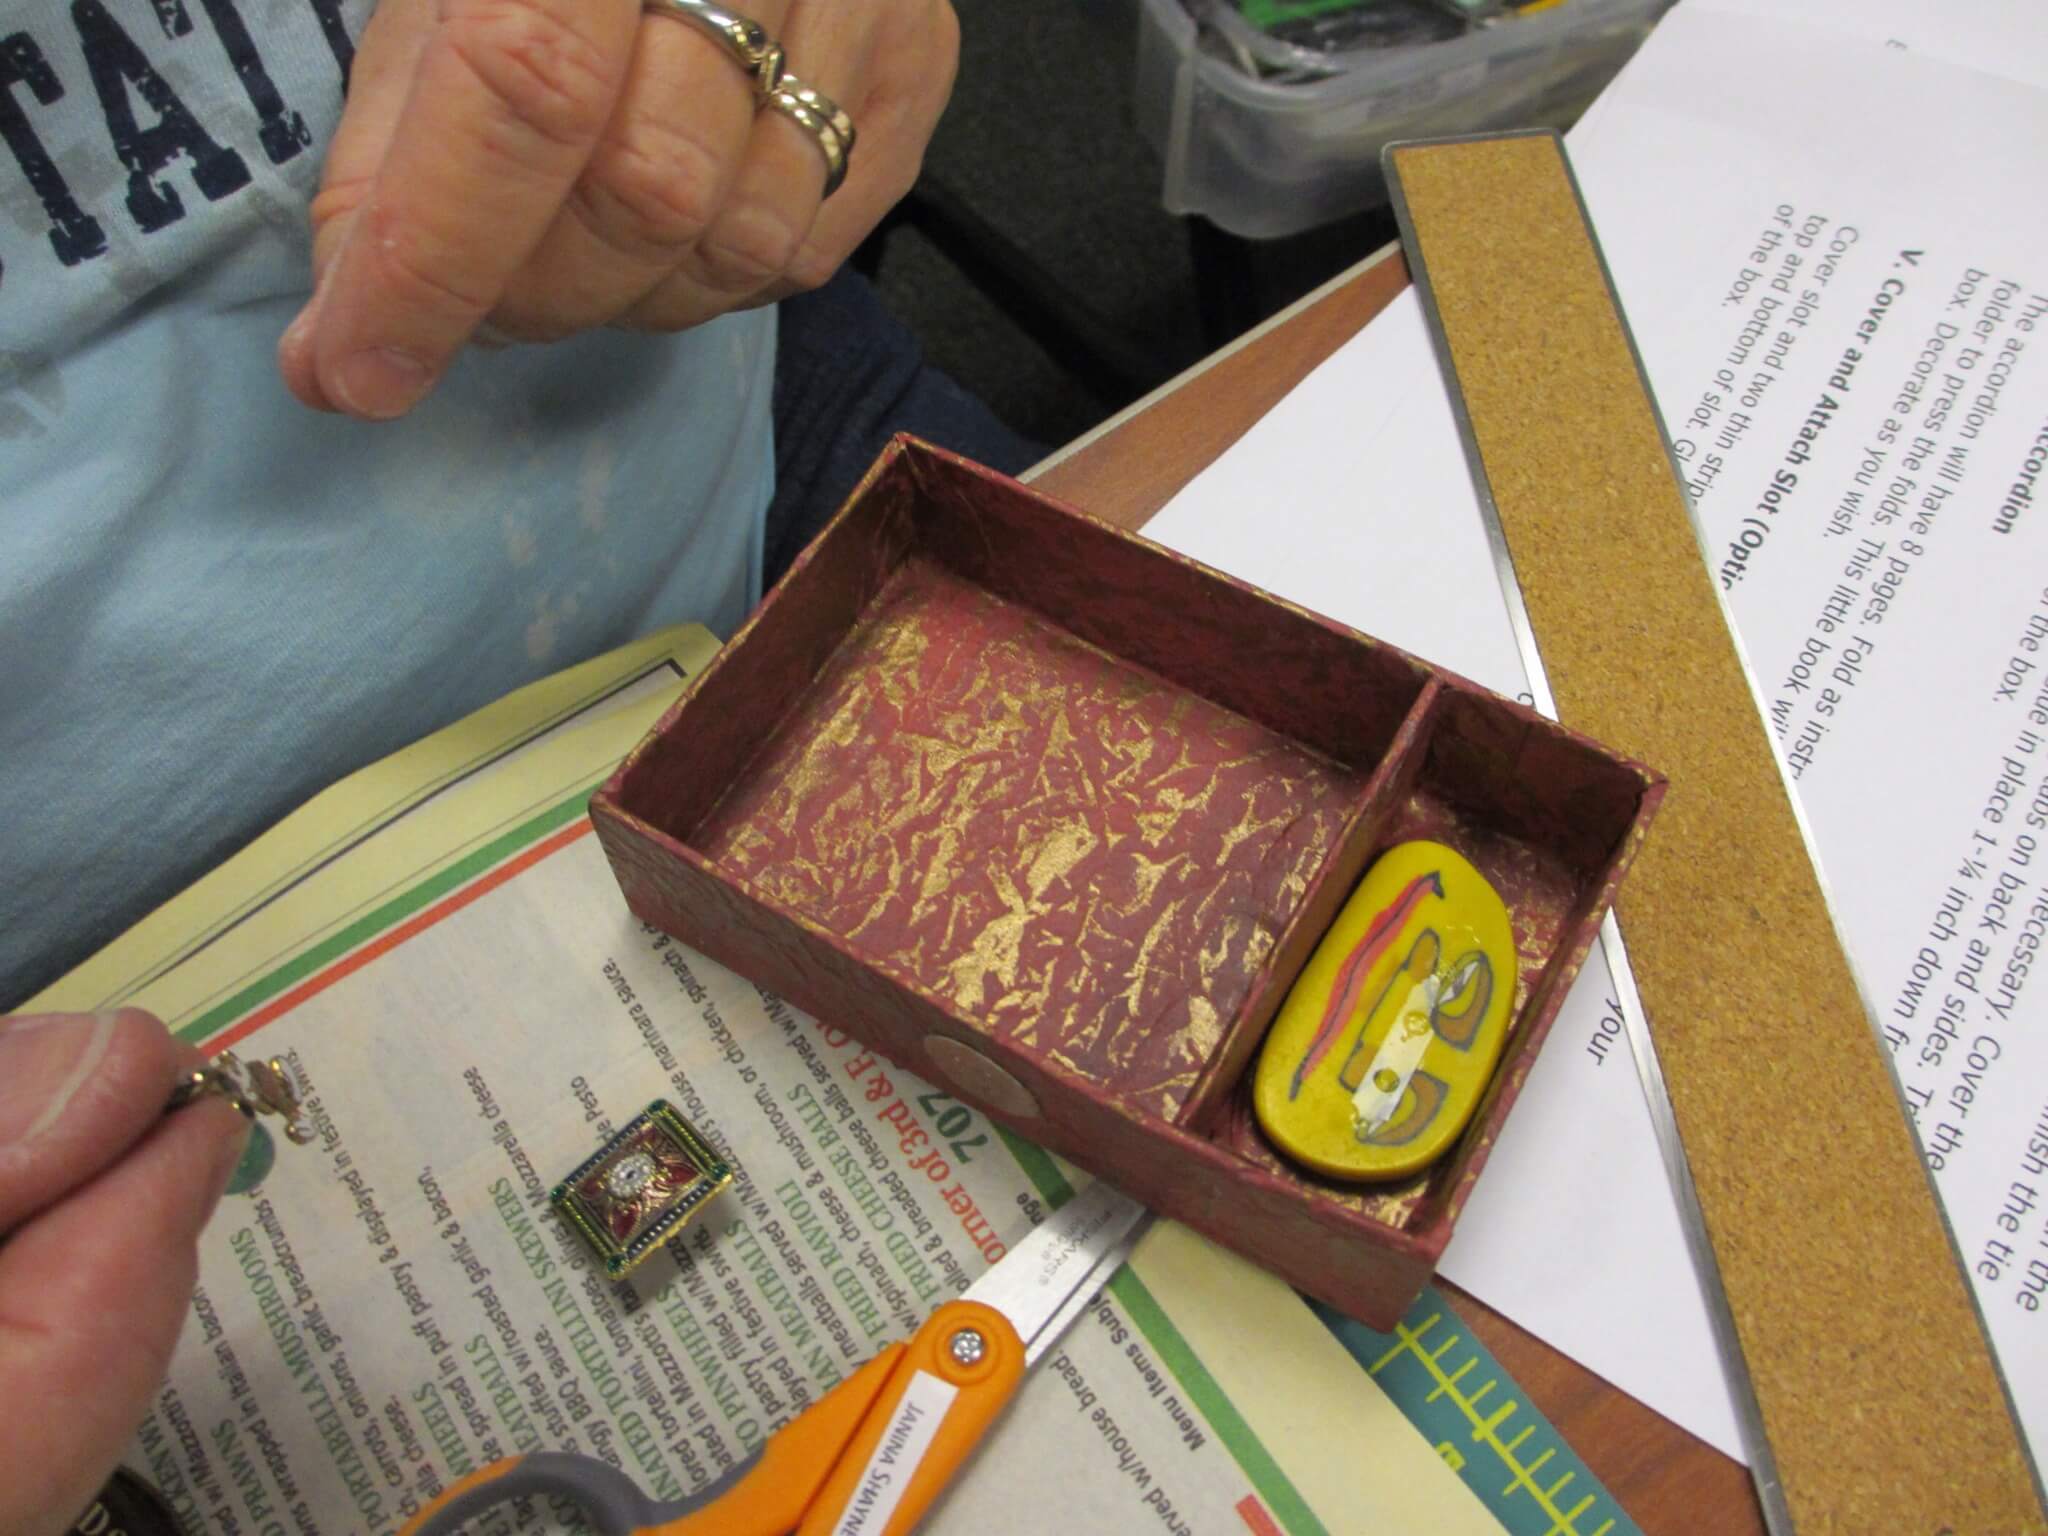
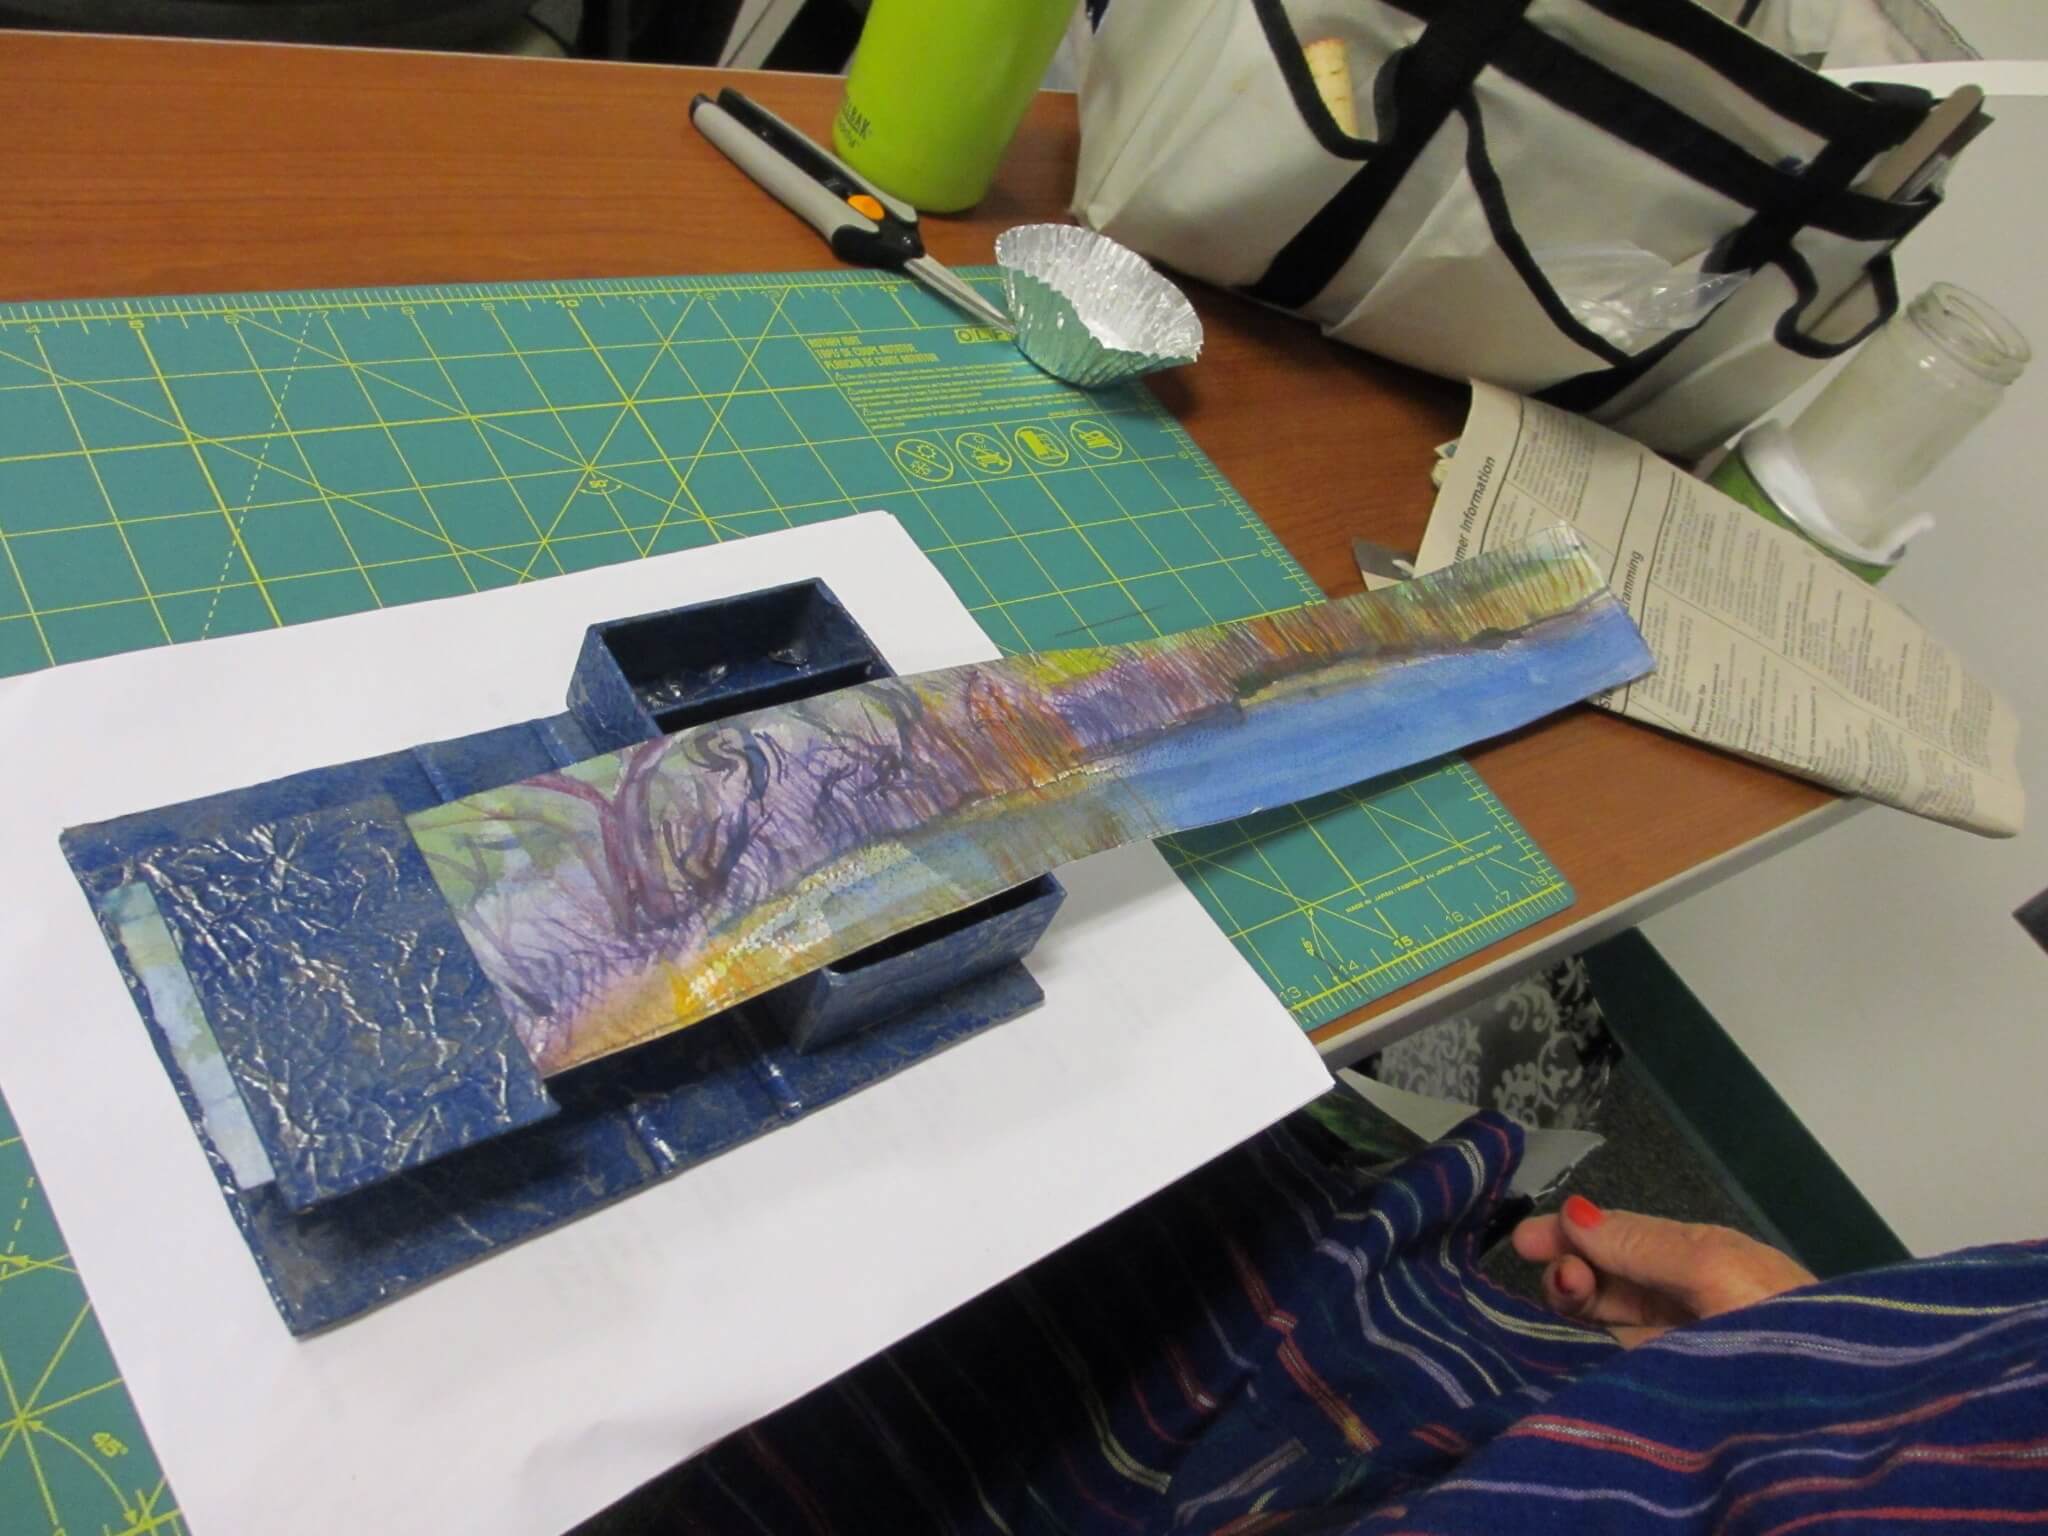
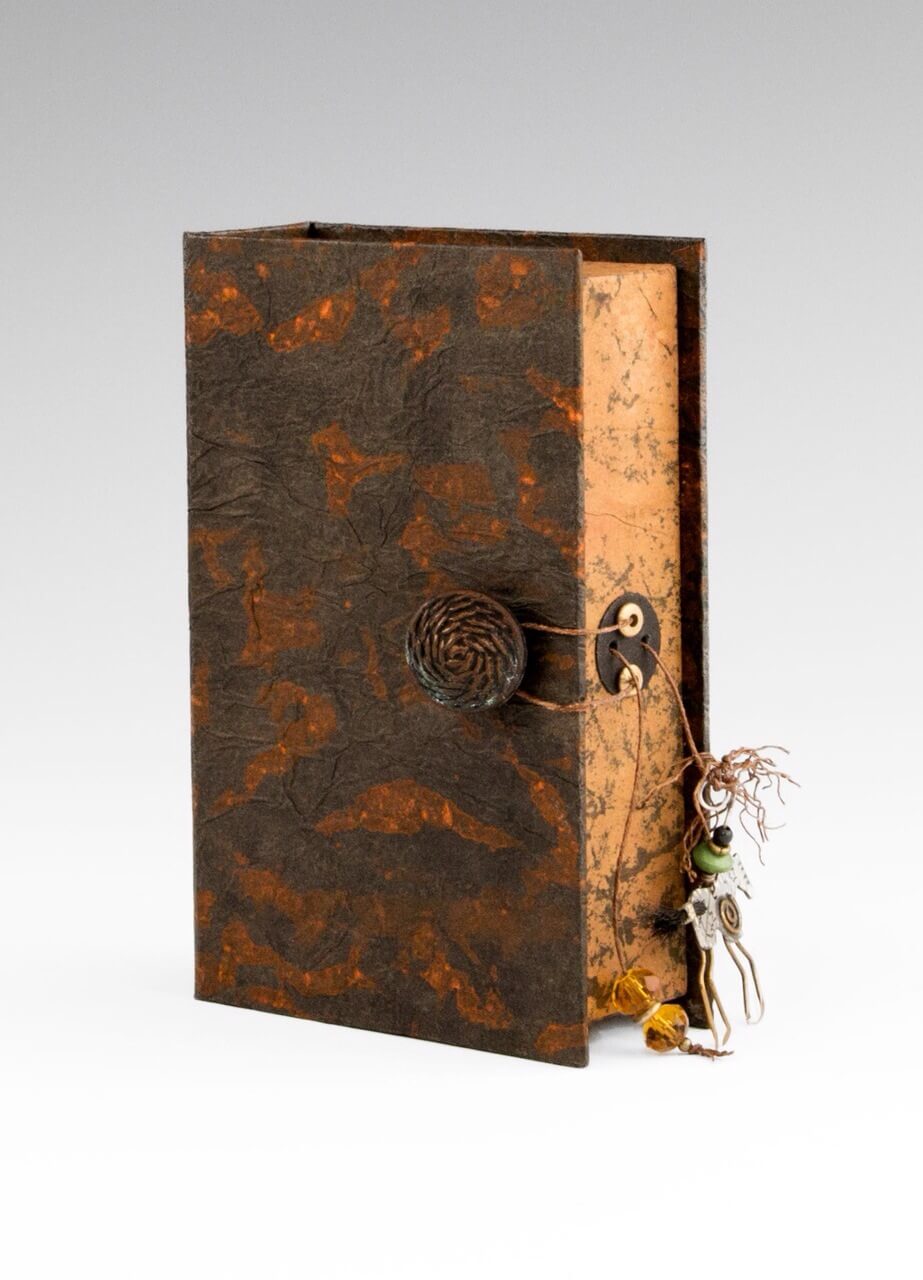
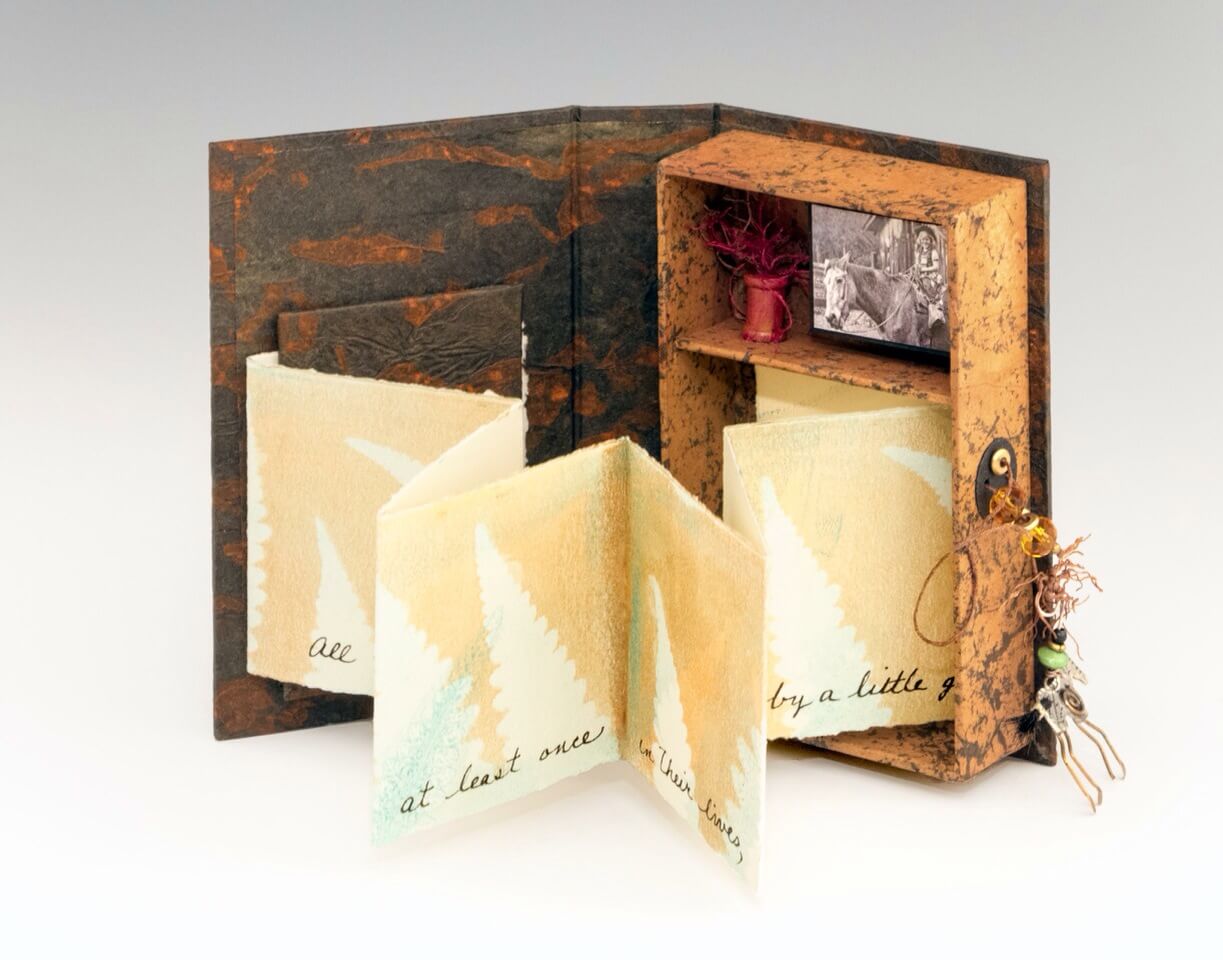
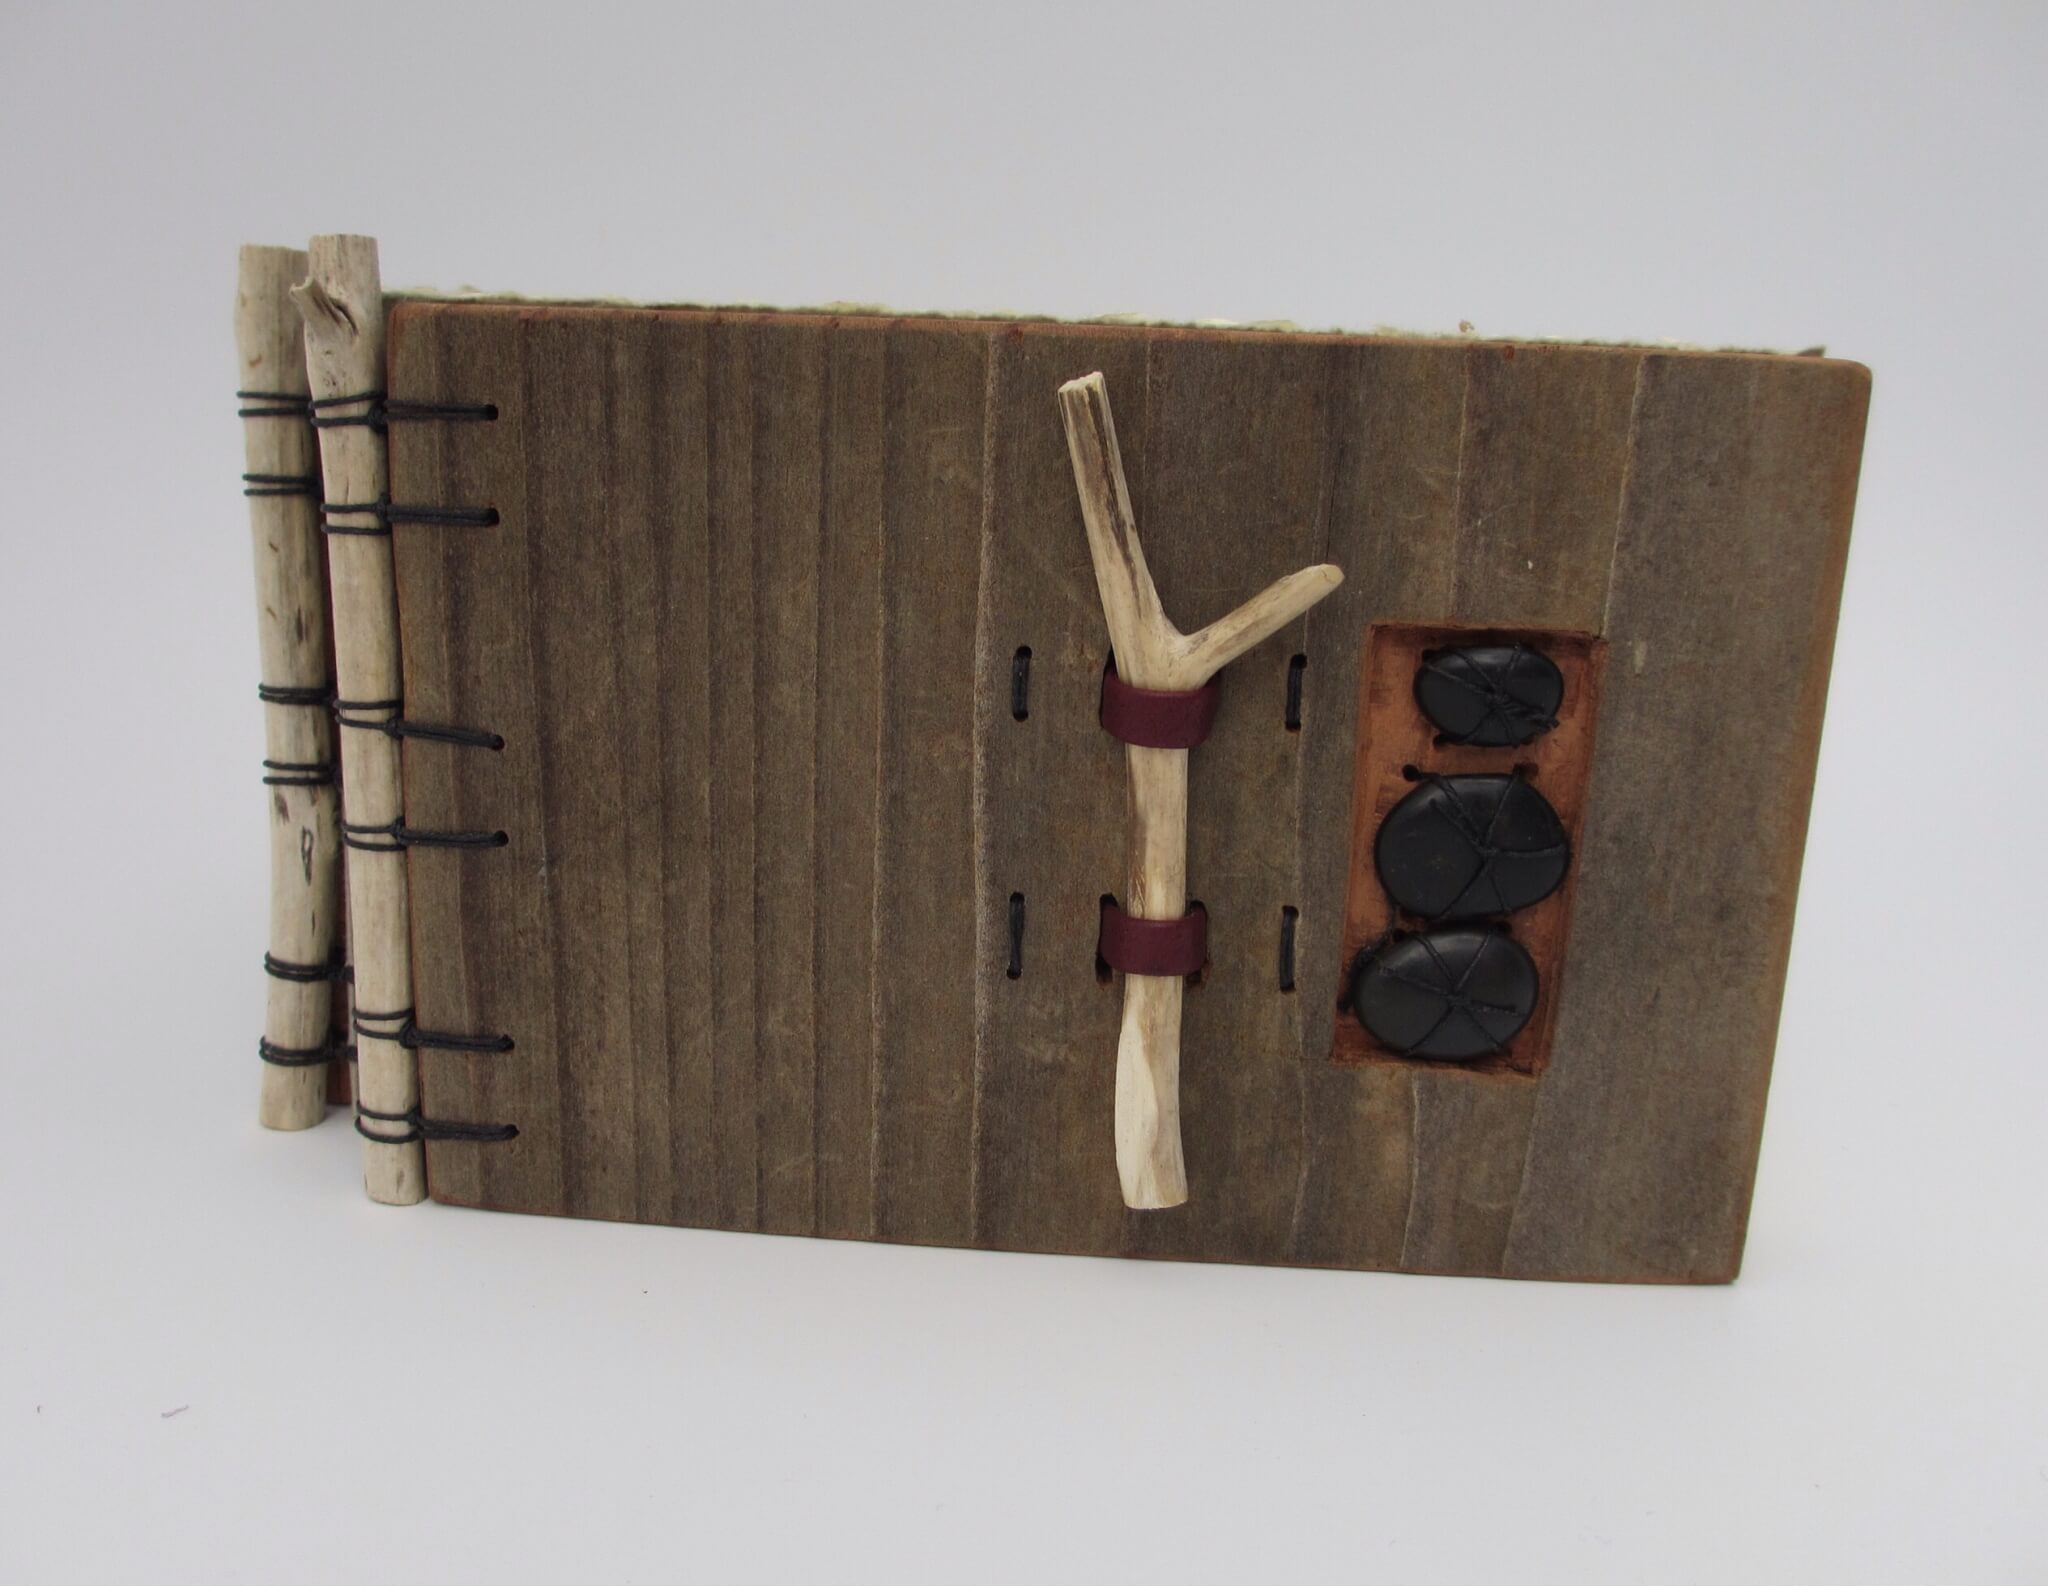
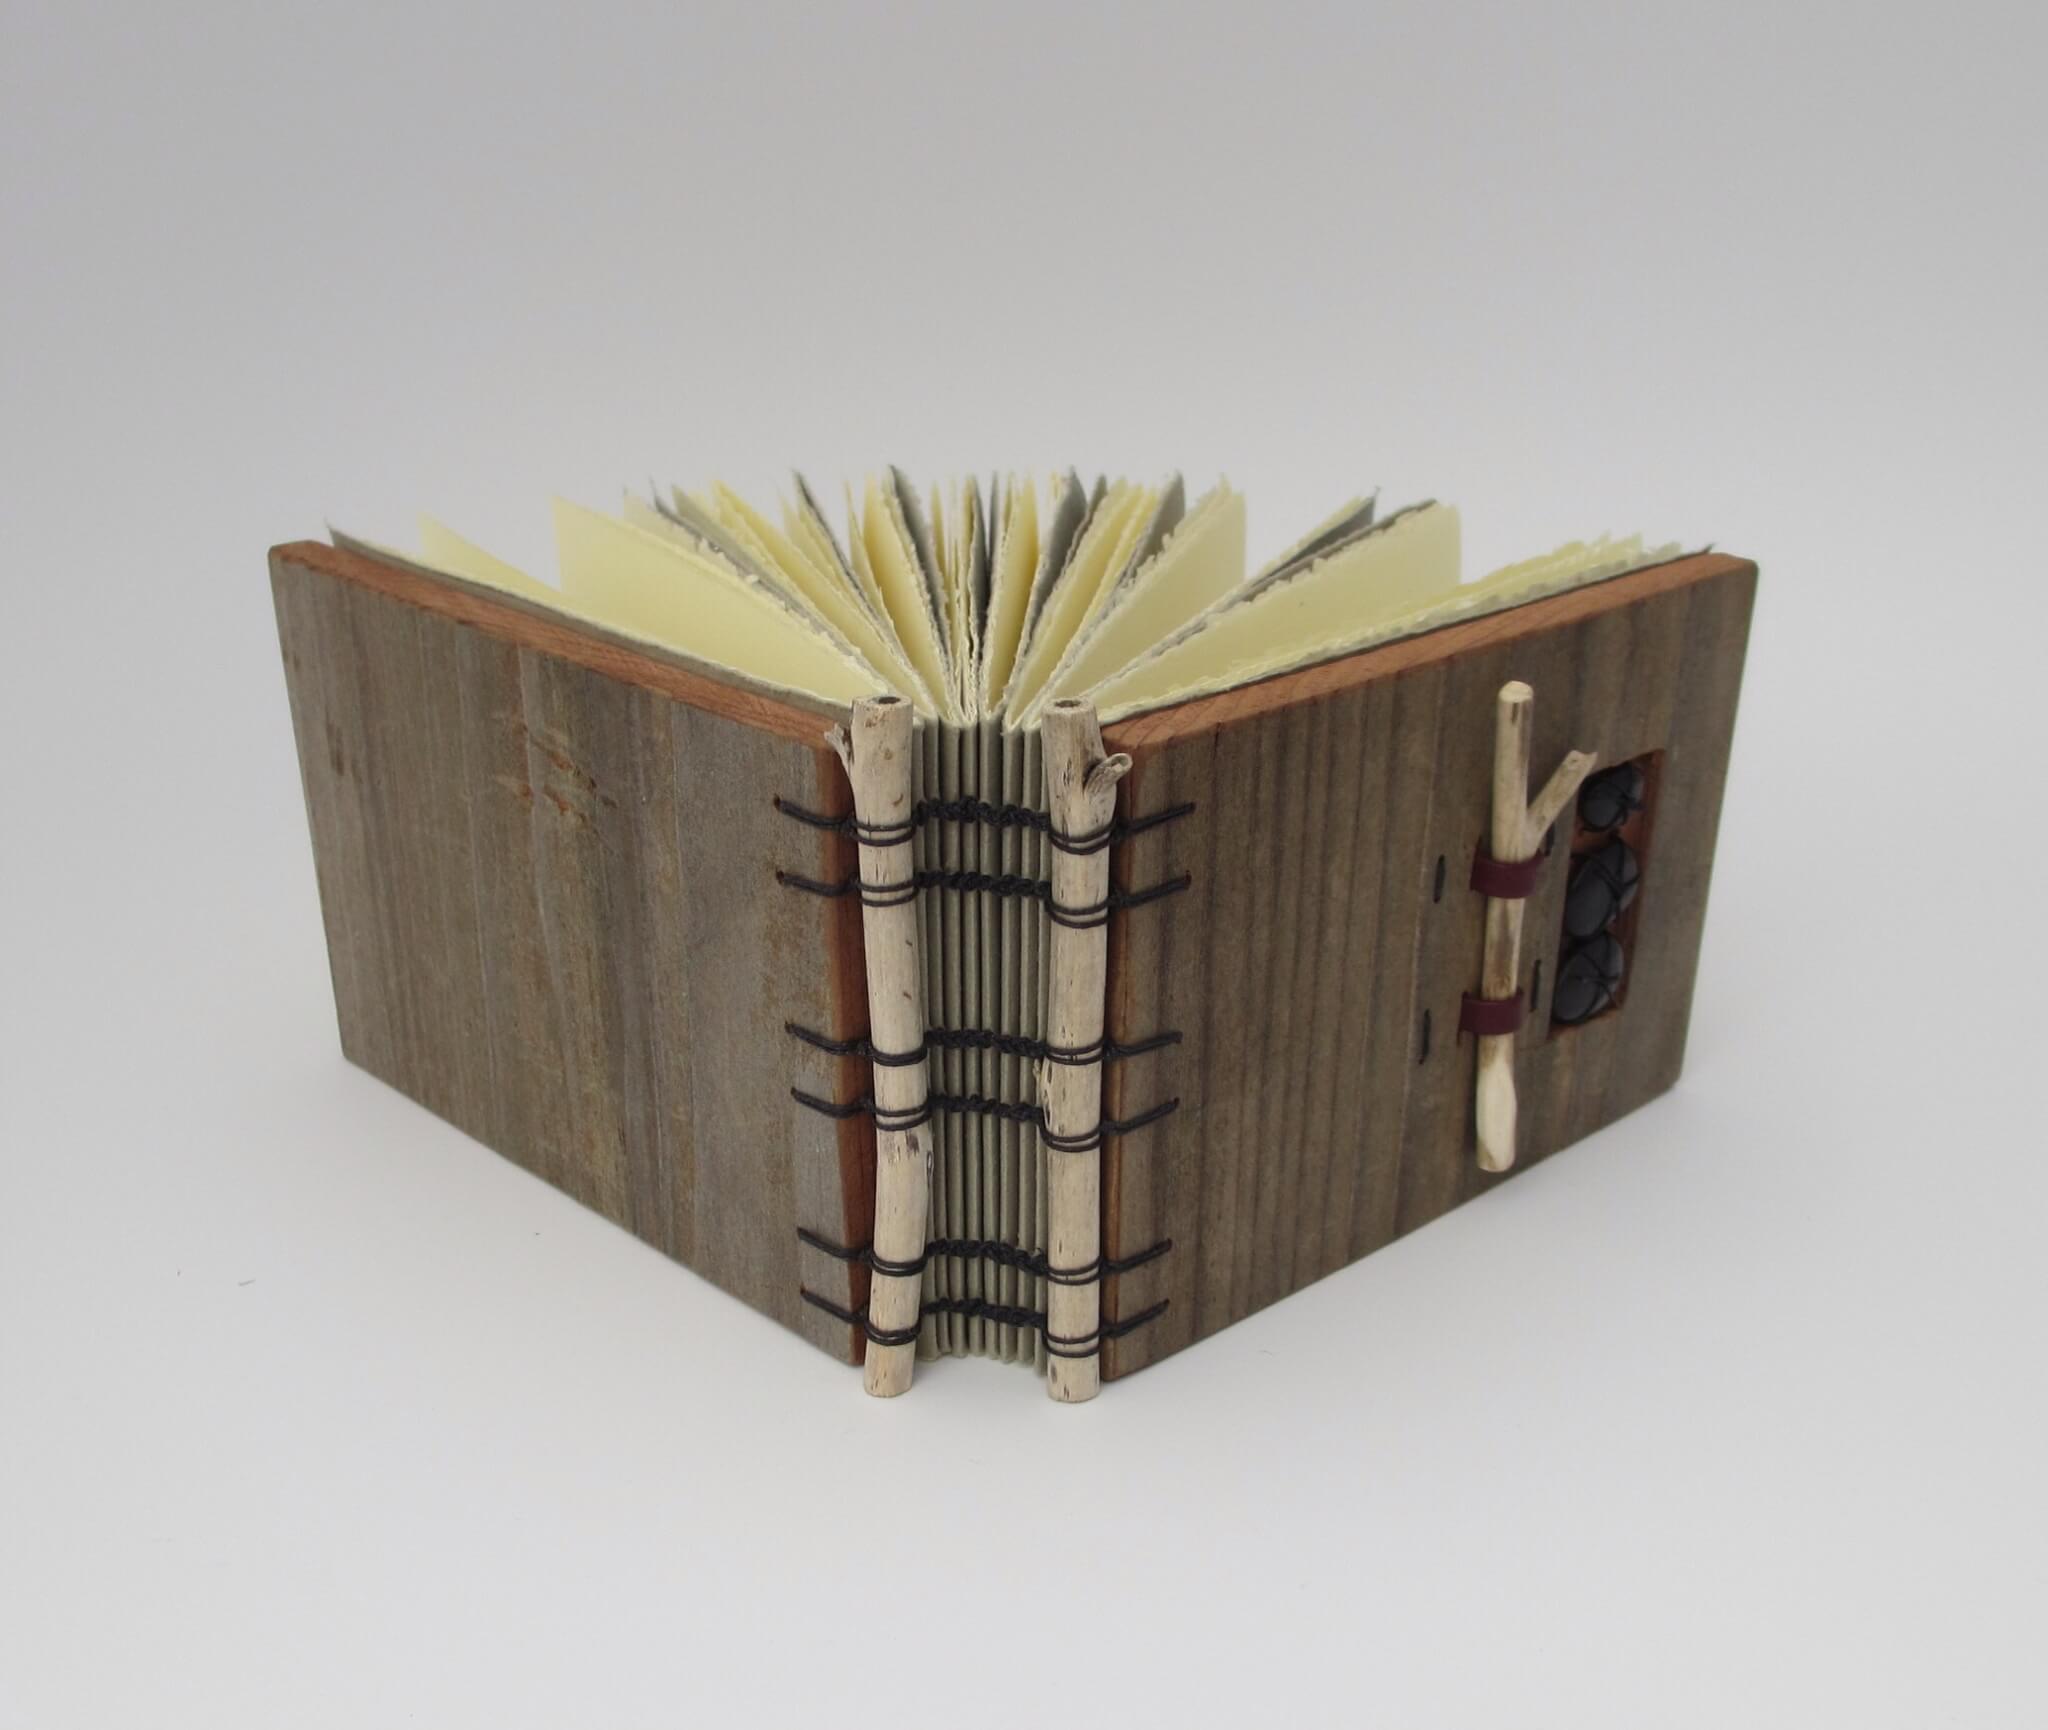
 My daughter is a serious surfer and beach lover. The following book was a gift for her. Most items are from the Redwood Coast where she grew up. The covers are redwood, sticks are driftwood from Clam Beach, stones are from Stone Lagoon. This book combines ideas from two workshop of Margo’s. The books I love the most are tactile, made of natural materials, and uusually have a rustic look. This is certainly one of them.


This has been a very busy year because of the number of workshops I’ve taken. I’ve neglected my blog. I’m going to catch up! Next: my 10 days in May at  Ox Bow, Saugatuck, MIchigan


  We have another book from the Book-in-a-Box class (see posts from November 10, August 18, 2014). Local artist Becky Evans started her book in the class and finished it during her artist’s residency in Summer Lake, Oregon.  Take a look at the website for Playa and you will see  the influence of place on this wonderful book.  The title of the book? PLAYA. Becky is a gifted local artist and former art professor at College of the Redwoods.

I’ve been making models of books with accordion (or concertina) spines and am amazed at the wide variety of structures that can are created. It all depends on how many accordions are used, the type of cover, the way the text block attaches to the cover, and the way signatures might be attached. As always, it’s fun for the teacher too. Hope you can join us this Tuesday and Thursday, (1-4pm): OLLI: Book Arts, Concertina Spine.

(null)

Date: Tues. & Thurs. Feb. 17-19, 2015
Time: 1-4 pm
Place: HBAC (Humboldt Bay Aquatic Center)

Come join this class of book arts enthusiasts as we explore the many possibilities of the concertina (accordion) spine. You decide: pamphlet, long, or coptic stitch; folded or board cover; double, folded, or back-to-back signatures; glue or no glue.

The Fly uses two concertinas—one for the spine and one for the pages. I used papers I painted in a wonderful Randi Parkhurst workshop for the covers. The poem was written by friend Dwight Marsh of Hastings,
Nebraska . I used InDesign for the text layout.

IMG_1934-0.JPG

IMG_1935-0.JPG

Thank you students for sending photos of your completed books. As always, your “take” on the structure is unique and creative. You inspire me!
IMG_1545.JPG

IMG_1548.JPG

IMG_1604.JPG

IMG_3646.JPG

The wedding guest book is finally done. The covers were drilled and sections assembled in California; coptic stitch was sewn in the car (mostly in Nevada on I80); and the headbands, rocks and redwood stick were attached at Horsecreek Ranch in central Nebraska. The bride and groom used the bed of a vintage pickup to display the book—their wedding was at a “farmette” in Colorado—it was perfect. Oh. The bride and groom are both geologists, hence the rocks. I truly loved making this book and have several more in the works. Stay tuned.

IMG_3790.JPG

IMG_3783.JPG

IMG_3788.JPG

IMG_3803.JPG

IMG_1597.JPG
I needed a new book for watercolor and ink so I gutted an old Nancy Drew mystery and put in my own sections of watercolor paper. We had a two hour car trip today so I sewed it as we drove and found a new use for the bright pink lap desk! I needed to pierce holes in the spine of the book so I flipped the desk over the pierced the holes into the padded section of the desk. It worked very well and I love the “stabbing” with this particular book title!

I love making books; teaching others to do the same is just icing on the cake. It is inspiring to be in the same room with creative, capable, and enthusiastic students. The following photos will illustrate some of the work that went into making this type of book as well many of the ideas that students contributed. Enjoy.

IMG_3631.JPG
These are papers I created out of masking paper (used for taping windows in preparation for painting) and acrylic paint. The paper perfect for covering boxes as it’s thin, pliable, and fairly strong.

IMG_3634.JPG
We used 0.059″ thick standard book board to create a box and the hinged cover. We experimented with PVA Jade-Thick from Hollanders. It was great for these small boxes because it is very tacky.

IMG_3632.JPG
While the boxes dried we created a hinged cover. This particular technique is useful for all kinds of artist books. Boards were glued then applied to the wrong side of the paper. Rather than burnishing the right side we pressed the paper to the board to encourage wrinkles and texture.

IMG_3640.JPG
Covering the boxes was next.

IMG_3645.JPG

IMG_3637-0.JPG
There was much variation in colors. Some decided to add more color and brought their acrylics…….

IMG_3636.JPG
…..and acrylic enhancements. Check out “Products” on Golden’s website to see the many products available along with their uses.

IMG_3642.JPG

IMG_3644.JPG
Then the real fun begins—getting ready to add our own miniature components to the book.

IMG_3643.JPG
The strip of decorated Arches 90 HP watercolor paper was next. Each had her own idea of what to add to the book. These were folded like an accordion and will be attached to the inside front cover.

IMG_3646.JPG
This book is almost finished. The thread needs to be trimmed and a slot added to hold the accordion fold. What a delight! The upper shelf holds miniature books and the accordion fold holds quotes about books.

Great job everyone. Working with you and your ideas is a treat in many ways. PS. Thanks for the real treats for our long work session today.

IMG_3641-0.JPG
Busy hands….busy place.

It’s getting to be that time again. OLLI Fall 2014 semester starts next week and I have a two day course you might be interested in taking. This is a wonderful box/book structure that fits in your hands. When the cover is opened the accordion book folds open; the book can be displayed in the open or closed position. This particular book is a celebration of my sister and her love of horses. I created the papers at a Randi Parkhurst workshop. Photoshop was used to size and print a photo of my sister in full-fledged cowgirl regalia. The closure has a vintage button with a silver horse and beads on linen thread.
“All horses, at least once in their lives, should be loved by a little girl.”

INFORMATION FROM THE OLLI CATALOG:

Book Arts: Book-in-a-Box

Create a custom box to encase your handmade book. Learn the basics of making and covering boxes, then create a simple book to place in the box. Boxes protect the book, but can also be an integral part of the book. They can hold small treasures that further enhance the theme of your book.
Basic Toolkit: Cutting mat, cutting knife, metal ruler, sharp pencil, bookmaker’s awl, bone folder, small sharp scissors, wet wipes, old telephone book, small glue brush, PVA (Art Center or Ellis Engineering). Additional materials will be provided. ($5 materials fee)
date ………. Tues./Thurs., Aug. 26 & 28
time ………. 1-4 p.m.
fee ………. Members $55/non-members $80 (47526)
place ………. Humboldt Bay Aquatic Center (HBAC)
instr ………. Michele Olsen

Thank you Ellen Golla for the wonderful photos of the book. Thanks also to Nancy Holley for teaching me this structure.
IMG_1519.JPG

IMG_1518.JPG

I spent two wonderful afternoons with twelve very creative students. To prepare the pages for the books we spent a bit of time working with acrylic inks on watercolor papers. The intention was to create some kind of background for other artwork that would be added when the book was sewn. Following are just a few of the background papers.

IMG_1481.JPG
The covers were cut from faux emu upholstery fabric—a great material because it doesn’t fray or tear.

IMG_3599.JPG
The sections were sewn onto the straps with waxed linen or cotton embroidery thread. Some students had experience with the long stitch but the kettle stitch was new to most. They all did a great job on the sewing. Below are some examples of pages that were embellished after the book was sewn as well as a few photos of book closures.

IMG_1482.JPG

IMG_3603.JPG

IMG_3594.JPG