Folded books can be sewn, glued, or just folded.

Lynn Jones of Just My Type Letterpress Paperie was my co-teacher for our second class for OLLI Book Arts. Eight women worked together to produce collaborative books with the title Blooming Chaos. You can share in our creative journey by viewing the photos below. Students – thank you all for two wonderful afternoons of inspiration and comraderie!

Transfer of image to block

Carving the block using jigs made by my husband, Rollie.


One of eight blocks being carved.

Lynn guides their carving.

Finished blocks.

Time to pick out our type from vintage type cases.

Each student chose their own type font.

Setting the type with carved blocks.

Check out the press in action!

After much adjusting, Lynn presented us with this page for Day 2’s book.

I am demonstrating the construction of the Winter Fold book – made from the single sheet of paper.


The final results!

To a job well done!


Thank you all for a great class. You inspire me so much. Until next time!

We will use these books created by Paul Johnson to inspire our own pop-up books.

We will use these books created by Paul Johnson to inspire our own pop-up books.

Join us as we explore the extraordinary paper pop-up world of Paul Johnson — an artist who promotes literacy for children using the book arts. Pop-up books and cards delight us all, and can be quite simple or very sophisticated. Students will learn the engineering basics, and then create their own designs. We will finish with a book of pop-ups that include a story.

Paul has a wonderful book on pop-ups that can be found here.

For required tools and materials, click HERE

Tues. & Thurs., Nov. 14 & 16   •   10 a.m.-1 p.m.

Humboldt Bay Aquatic Center, Eureka

$75   •   REGISTER ONLINE: Class # 46628

linocut letterpress singlepage book

Join printer Lynn Jones at her business, Just My Type Letterpress Paperie, where you will learn to carve linocuts and set type for letterpress printing. A single collaborative print will be produced for each student which will then be used to create a Winter Fold book. The Winter Fold book is an invention of the creative book artist, Hedi Kyle; There are a number of simple fold and cuts that along with a easy sewn spine create a wonderful little book. Registration is limited, so enroll early.

When: Tuesday, March 6, 2018  •   9 a.m.-noon &  Thursday, March 8  •   9-noon.

Where: Just My Type Letterpress Paperie, 501 Third St., Eureka

Materials: Materials and linocut tools will be provided but bring cutting mat (or old phone book), small utility knife, small sharp scissors, metal ruler, sharp pencil, bone folder (or small wooden spoon), bookbinder’s awl (or T-pin).

Register hereOsher Lifelong Learning Institute

Michele Olsen was a college mathematics instructor for 25 years. She has been making custom books for 10 years, since joining the North Redwoods Book Arts Guild. For more information, or to contact Michele, visit www.micheleolsen.com.

Lynn Jones studied graphic design at Humboldt State University, interned with David Lance Goines where she cut linoleum blocks for Alice Waters’ Chez Panisse Café Cookbook. She is co-owner of Just My Type Letterpress Paperie in Old Town Eureka.

Lynn Jones, the co-owner of Just My Type Letterpress Paperie, and I have been working on a proposal for a Fall OLLI course. Lynn will teach students to carve their own linoleum blocks and demonstrate the setting of blocks and letterpress type. Workshop participants will use their images and imaginations to produce a collaborative book. The Winterfold structure was designed by book artist Hedi Kyle. Take some time to read about Lynn and her co-owner Siobhan Ayres. They create amazing letterpress art and have impressive backgrounds and produce the beautiful packaging for my favorite Dick & Taylor chocolates. The also have that printmaker sense of humor – note their OPEN sign. You can guess how the CLOSED sign reads. Excited!

IMG_5042

I will be offering a 3-hour class through OLLI (Osher Life Long Learning Institute) during the summer session.

Explore origami structures created by the international book artist Hedi Kyle. The books will all be folded from a single sheet of paper and do not require glue. The instructor will provide all papers, including Humboldt County topographic maps! Structures include the Miura map fold, (Salmon) Fishbone fold, and Bamboo folder. Appropriate for beginners.

Wednesday, July 19, 10 a.m.-1 p.m.

Location; Harry Griffith Hall Room 117

Class #: 31257

LINK TO OLLI ONLINE CATALOG

We will be creating books from single sheets of paper – perfect for the printmaker or artist. We will be discovering the wonderful world of famous book artist, Hedi Kyle. I took a two day workshop with her at the San Francisco Center for the Book ; she is absolutely amazing and a whiz at creating structures that have delighted us for years – like the Flag Book. These might be considered Origami books! Won’t you join us? Use this link for information about tools to bring and resources.

The Bamboo Pocket

The Bamboo Pocket. Can be used as a section in a book.

Diagonal Pocket Fold as Book Cover

Diagonal Pocket Fold as Book Cover

Fishbone Fold as Pages

Fishbone Fold as Pages

Miura Map Fold. Can add book covers.

Miura Map Fold – could add book covers.


It was my sincere honor to be part of a reception for Terry Tempest Williams, June 6th, 2016, to celebrate the publication of her new book The Hour of Land: A Personal Topography of America’s National Parks and the debut of the special limited edition, Canyonlands National Park. I’ve been a fan of Terry’s since reading Refuge: An Unnatural History of Family and Place in the 1990’s; I don’t know how many copies I’ve given away but the most recent gift was given in February. Little did Terry know that she was about to receive a handmade book with black walnut covers and Eco dyed endpapers using sagebrush from her beloved Castle Valley, Utah. I was blessed enough to be the book artist who designed and assembled the book. I will devote another post to the creation of this book – a story in itself. For now, enjoy some of the photos from this event and then run to your nearest bookstore and buy a book, any book, by this remarkable woman.


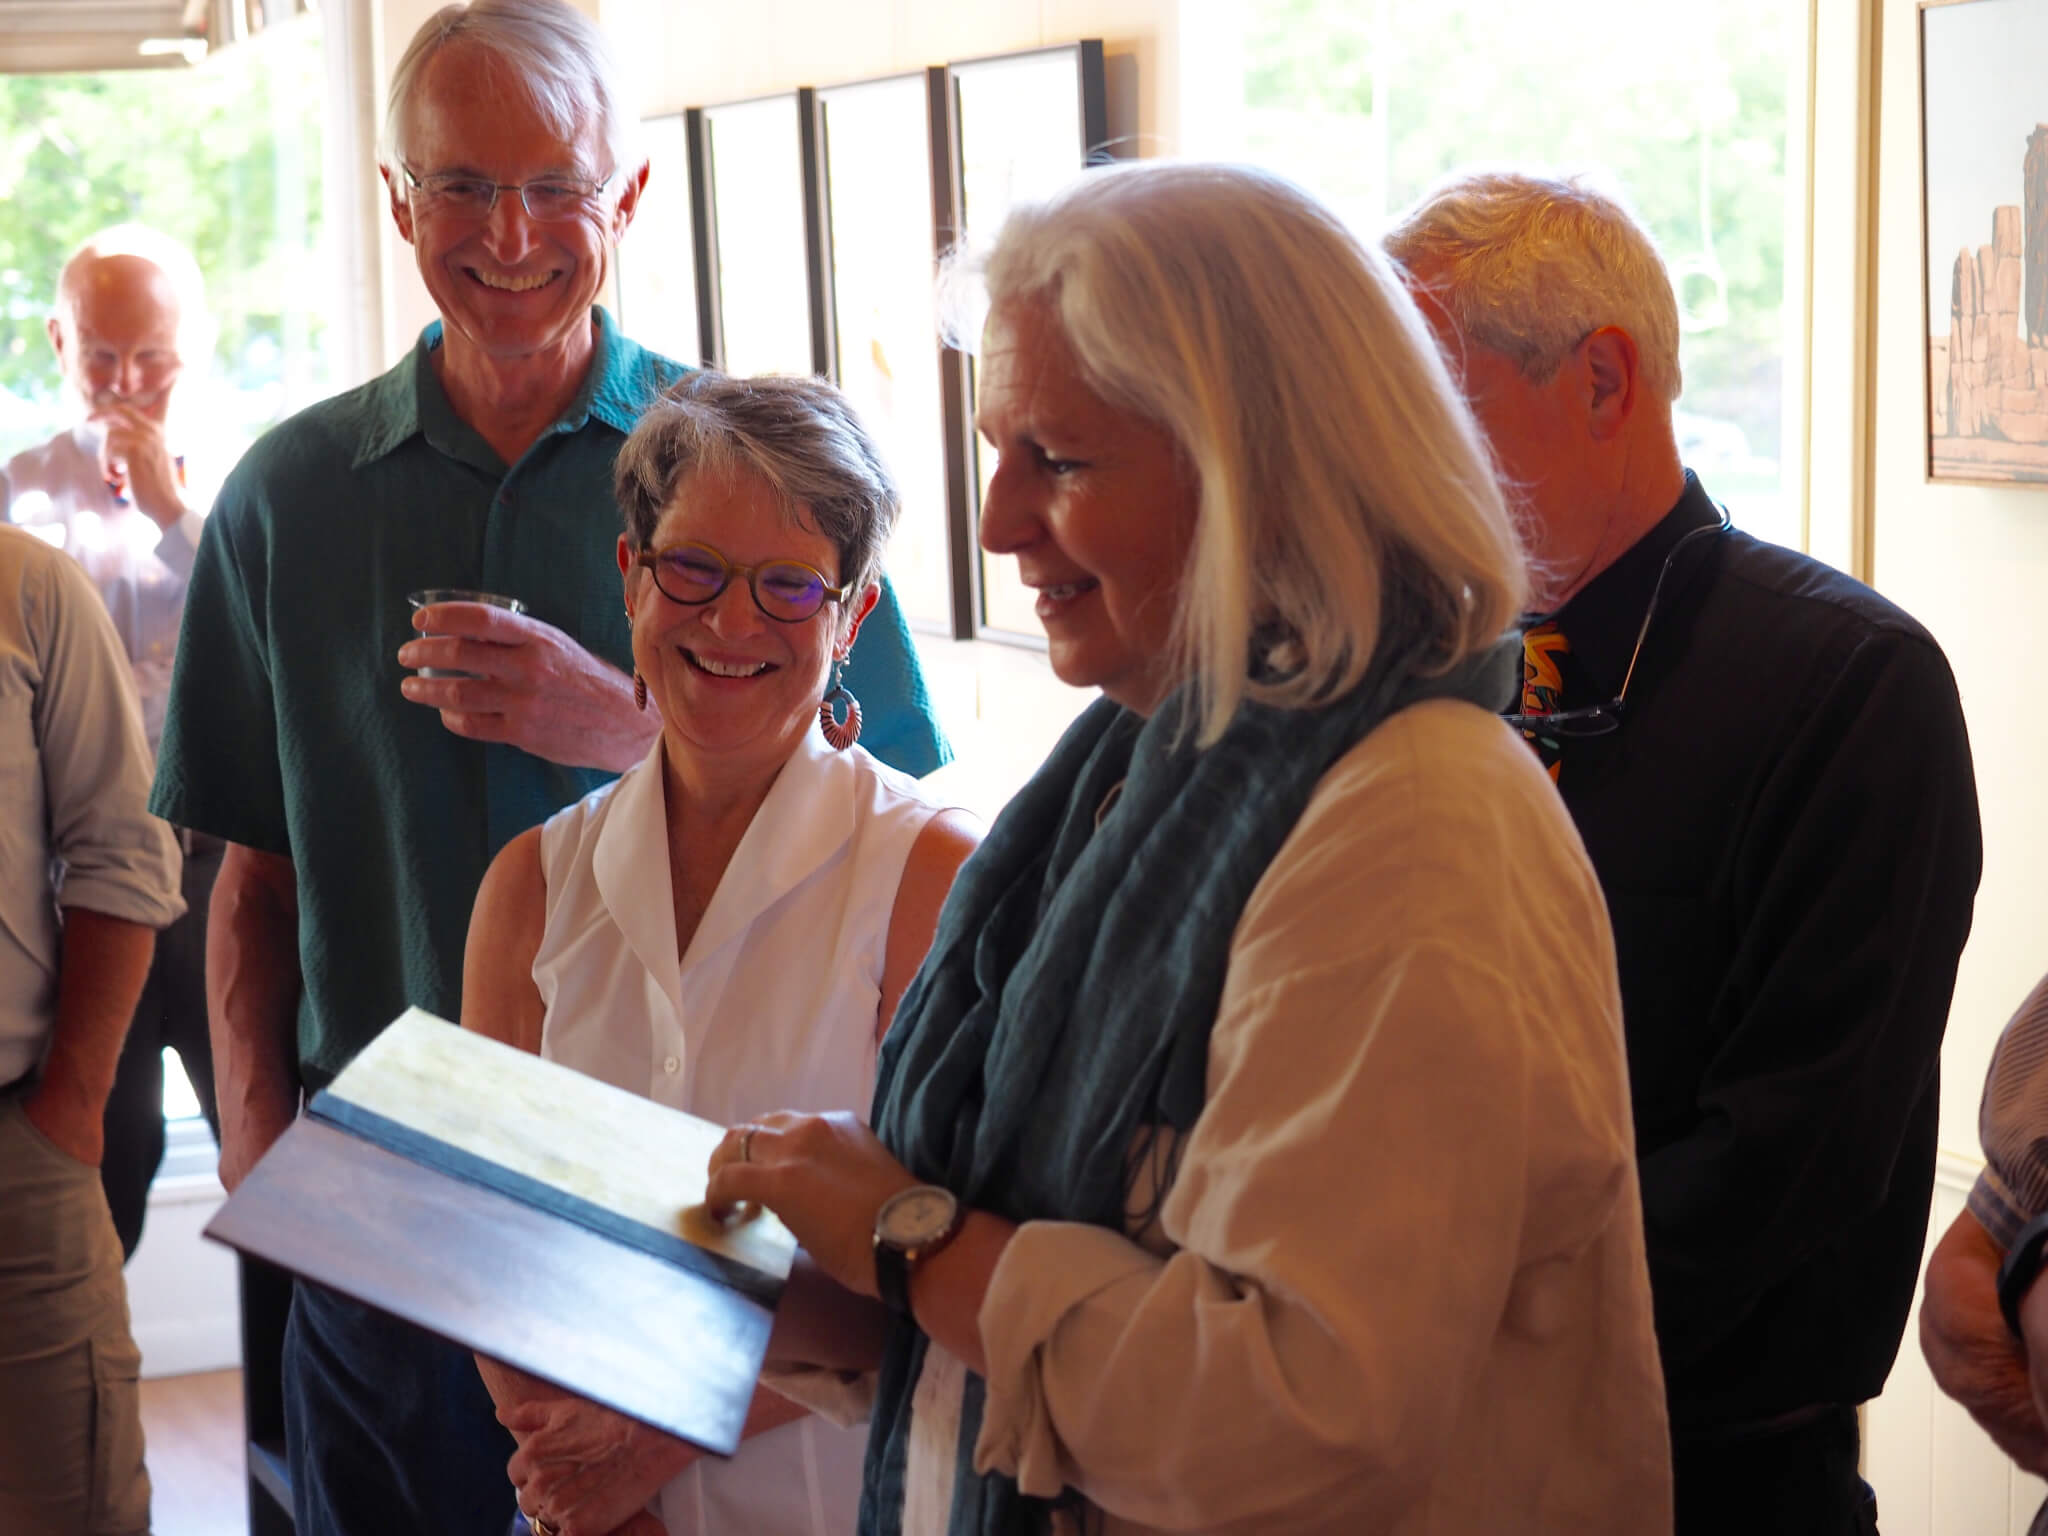
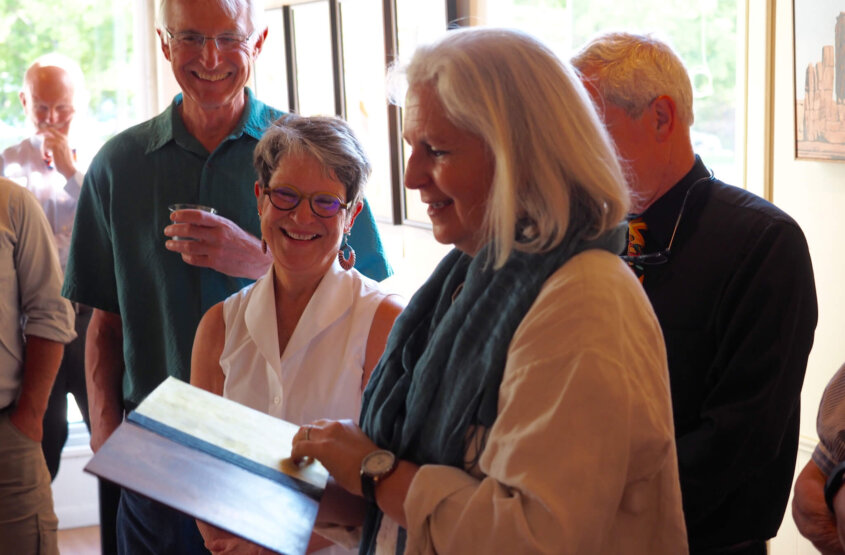
Terry’s first look at the handmade book. Bill  Hedden, on the left, provided the black walnut covers. Andy Nettell, on the right, is the owner of Back of Beyond Books, Moab, Utah. Andy organized the reception and readings that evening. He also commissioned the three handmade books. One is for Terry, one Andy’s collection, and one for the Yale University Library that holds Terry’s papers.


Two true book lovers. One makes books and one writes them.


After many email messages over the last months I finally get to meet Bill Hedden who created the beautiful black walnut covers. The story of this wood will be included in the next post. Bill is the executive director of the Grand Canyon Trust.


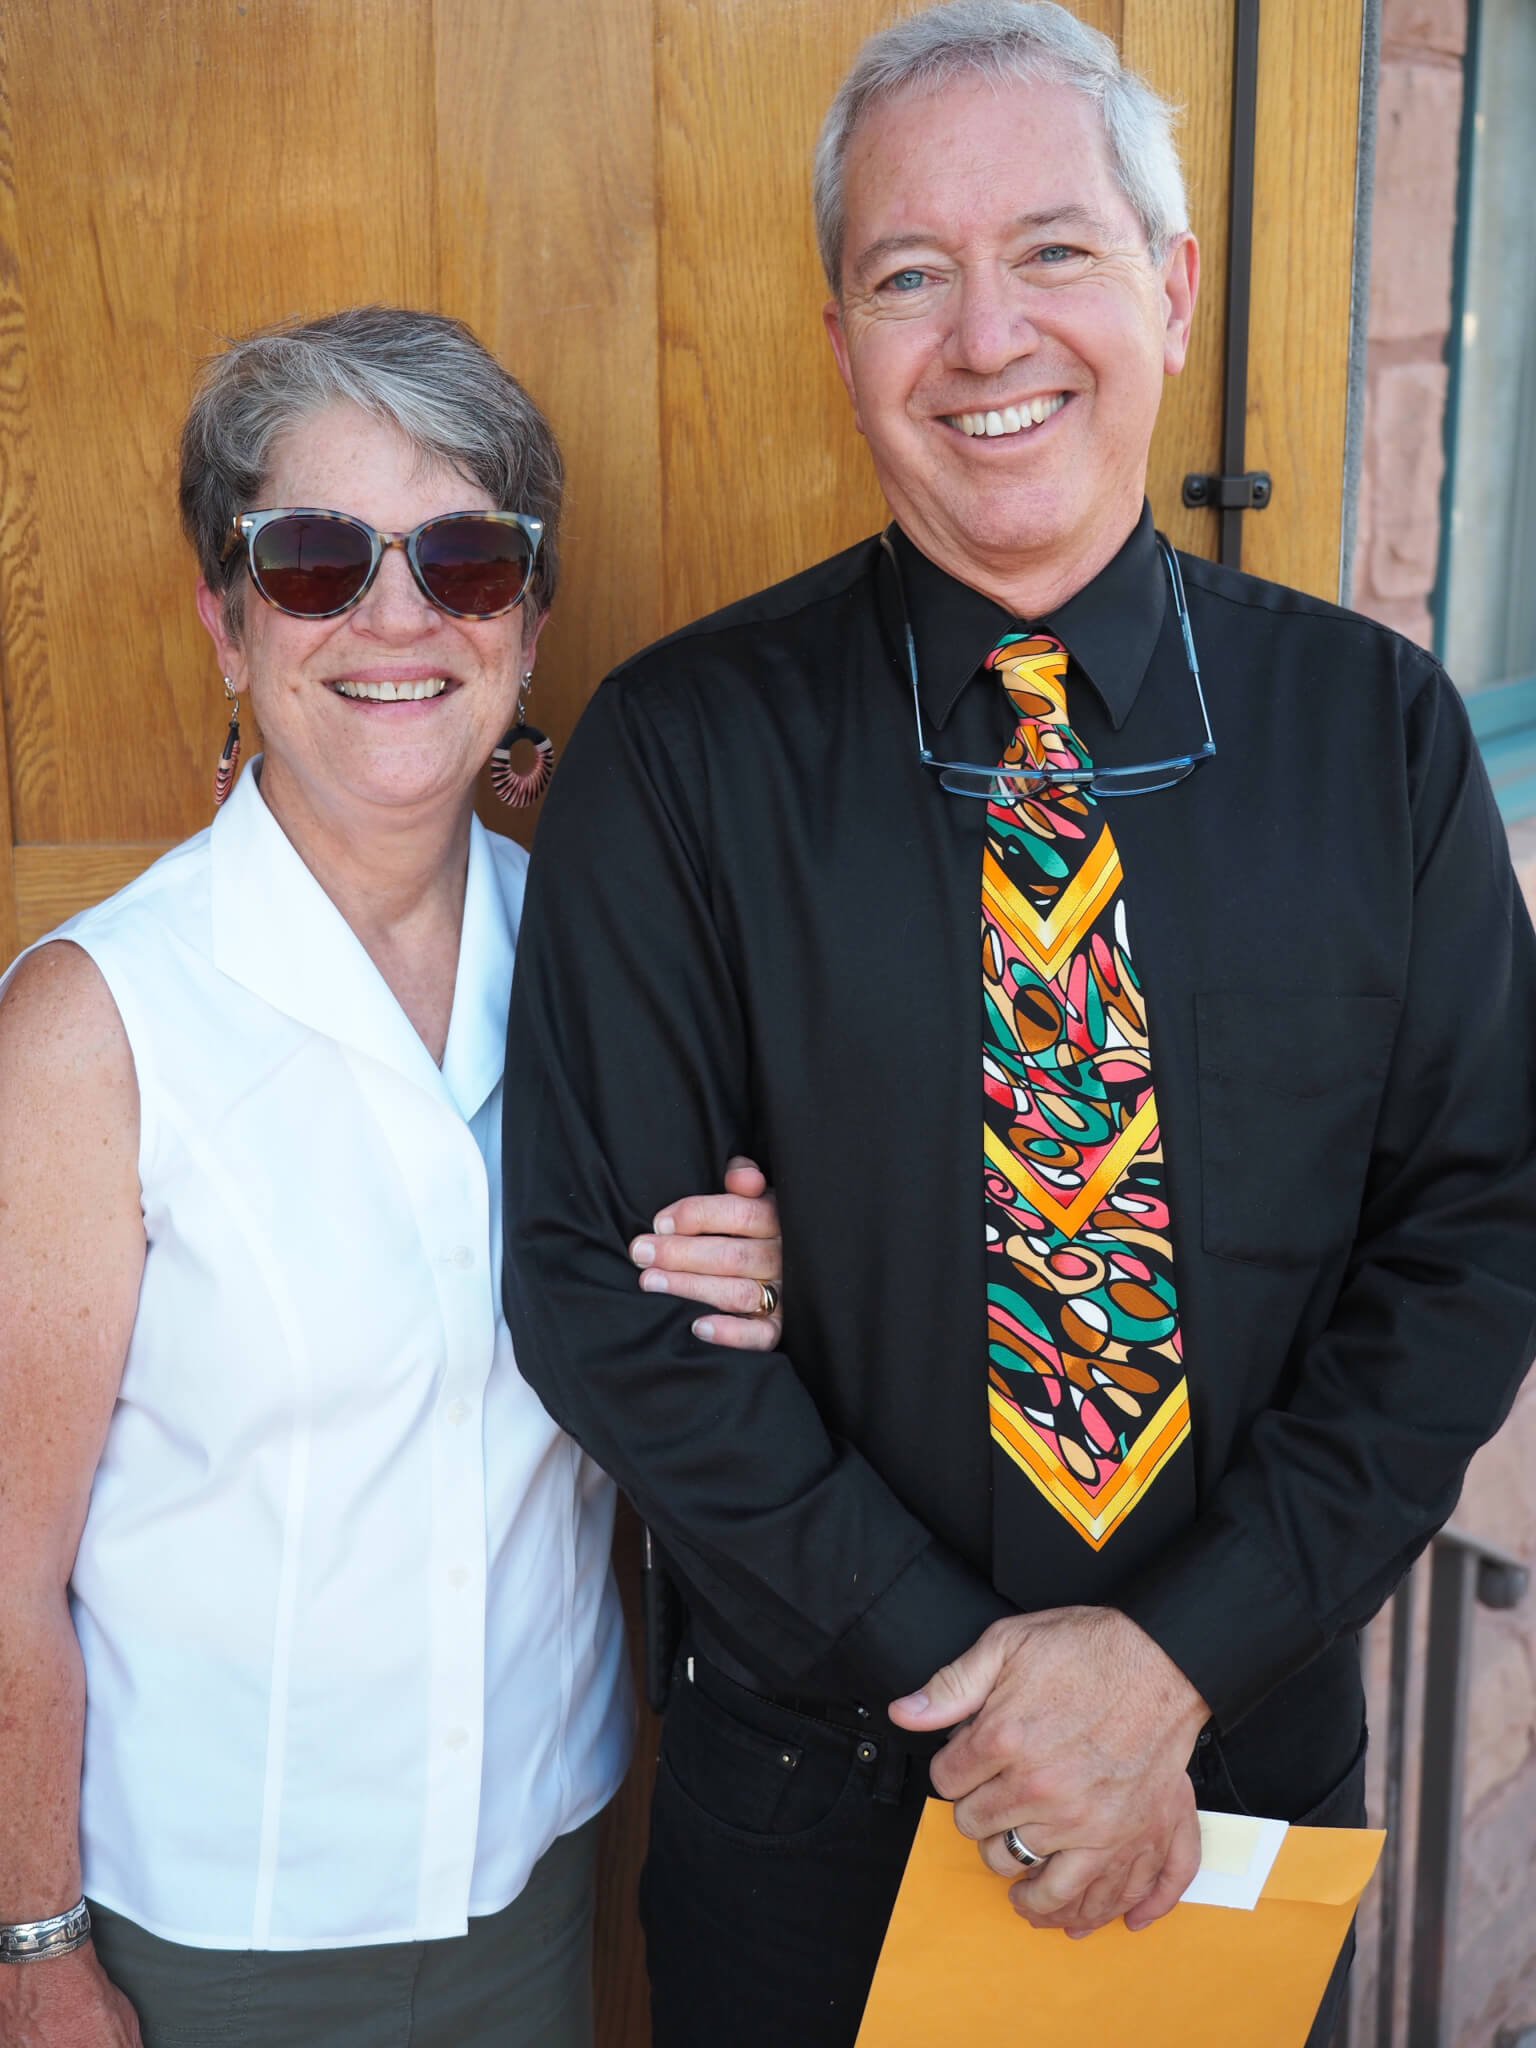
Andy Nettell, owner of the my favorite bookstore in the West, Back of Beyond Books. He is an antiquarian book dealer who specializes in regional and natural history titles of the Colorado Plateau. Want a first edition of Edward Abbey’s Monkey Wrench Gang? He’s got it.


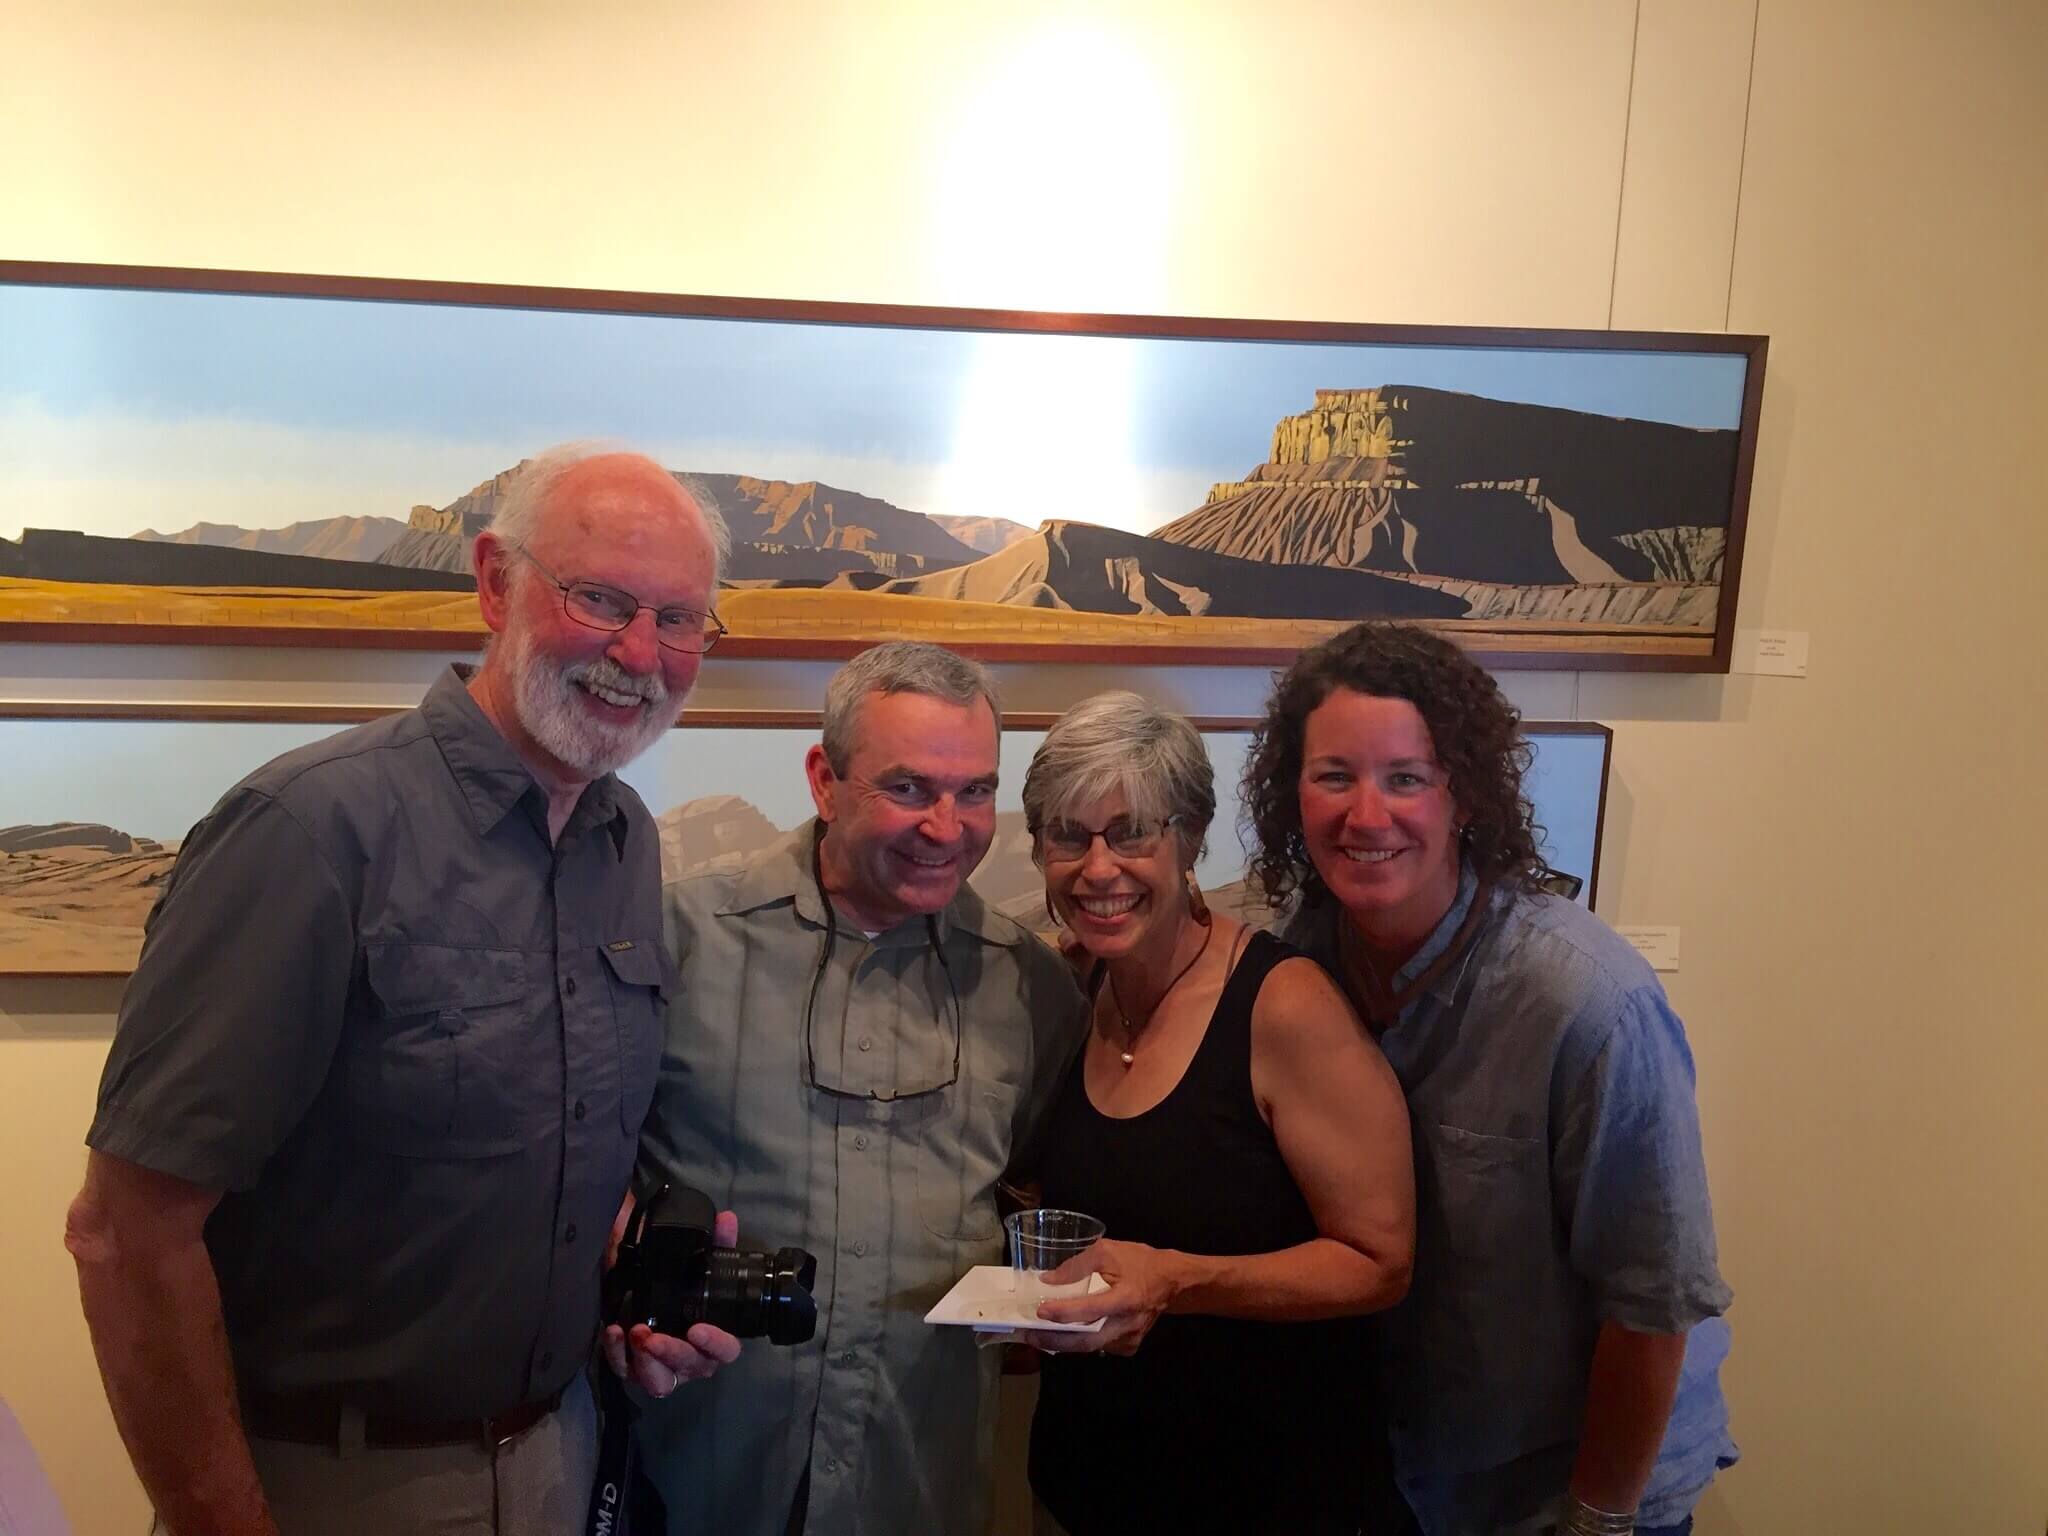
These special people were also at the reception. My husband, Rollie Lamberson, is on the left and he provided the finish for the covers. Our daughter and son-in-law, Laurie and Brian Evans, are in the center; they were the plant collectors for the vegetation I used for dyeing endpapers. Jen Jones is on the right and best friend of Laurie. Jen is a graduate of Humboldt State University!

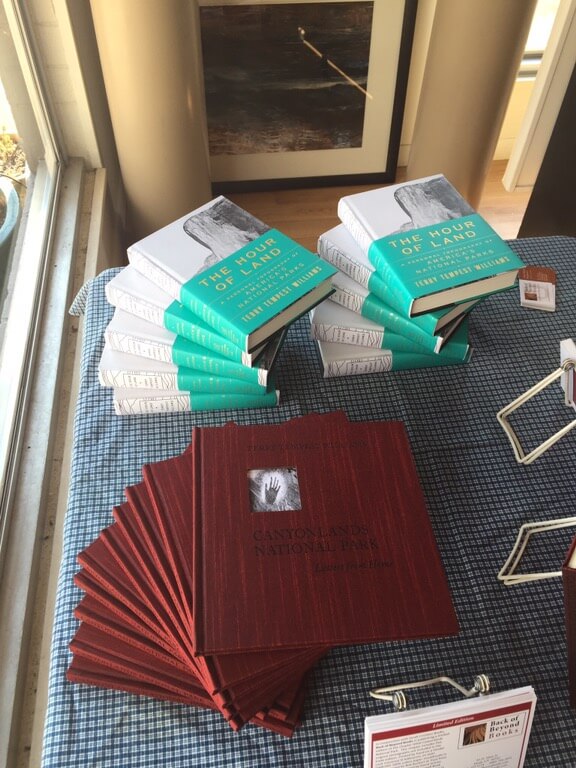
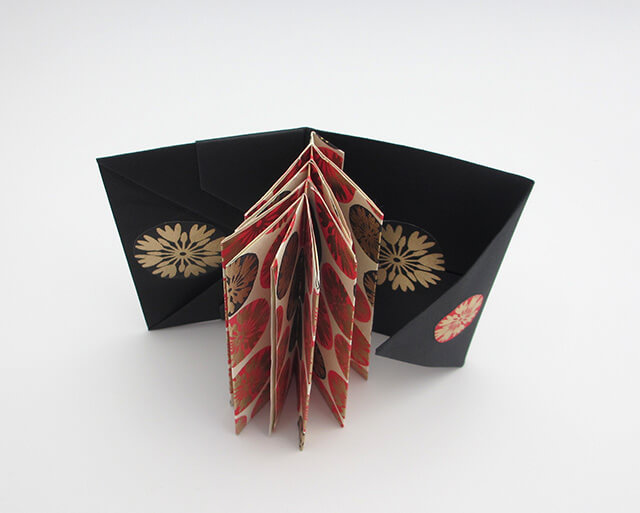
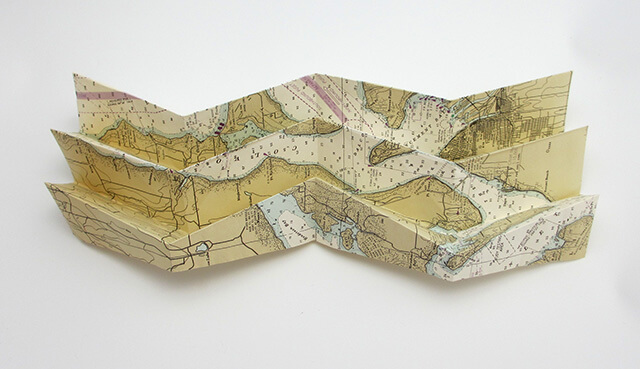
Hour of Land and Canyonlands.

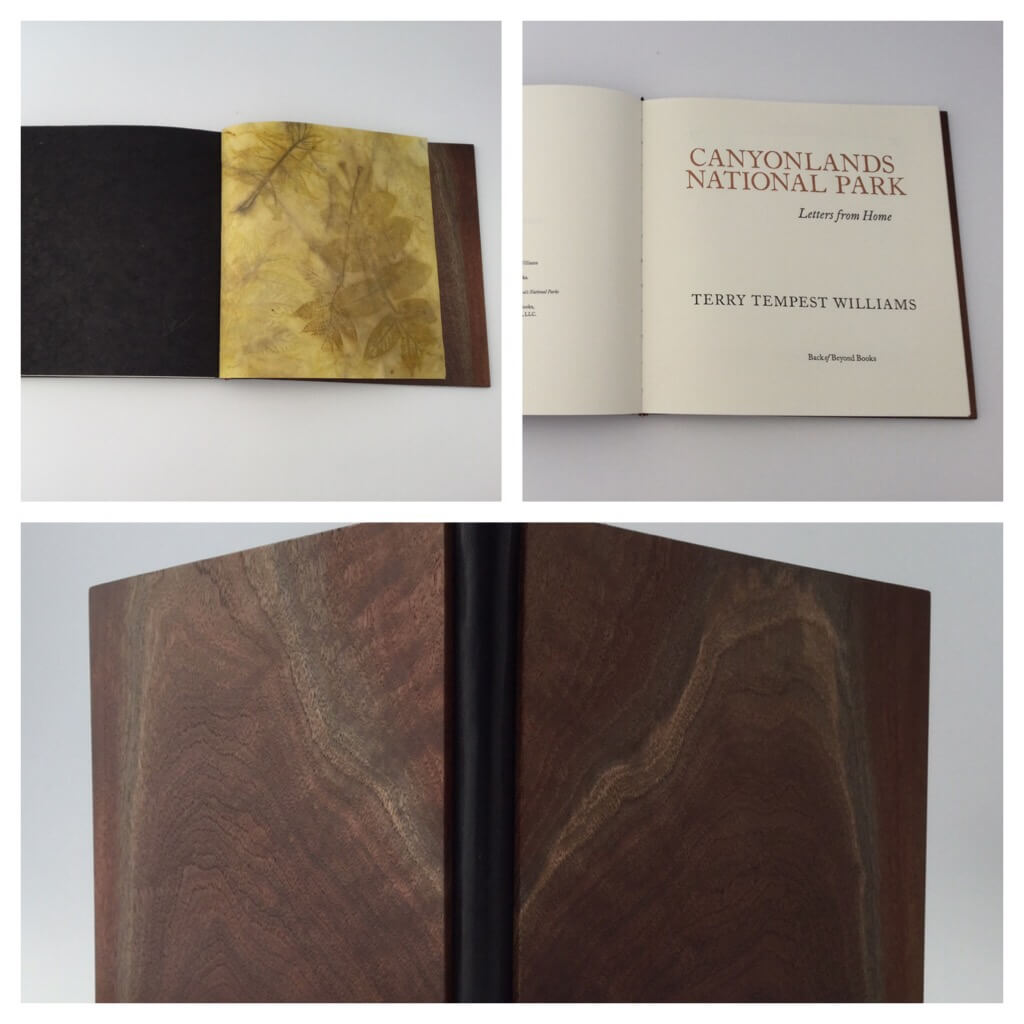
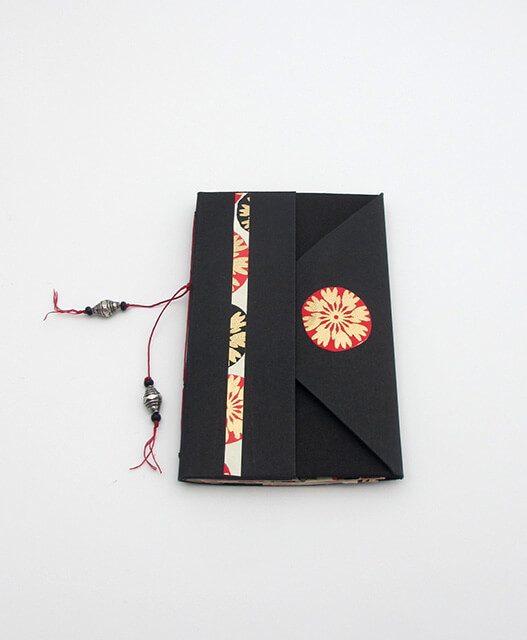
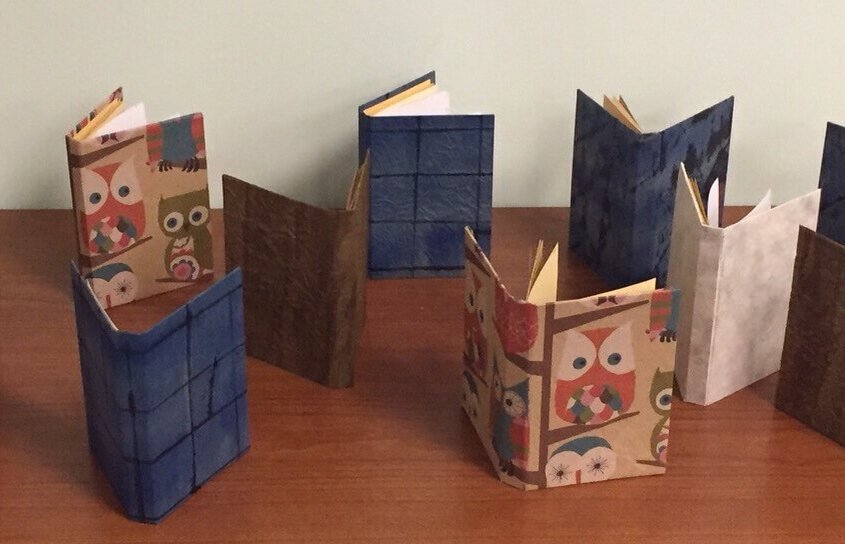
Commissioned book: Bradel binding, black walnut covers, black goatskin spine, Eco dyed papers with black walnut leaves and sagebrush on Japanese Nishinouchi handmade paper.

Next Post: Evolution of a Book

I like to teach an OLLI basic book arts class each semester. It’s meant to provide beginners with the skills needed to construct their own book; sometimes more experienced book makers will take the class to review accurate measuring, cutting, folding and gluing. We also cover different types of glue, the 3 hole pamphlet stitch, and the need to take paper grain into account. We also discuss local and online book binding resources. The structure that provides me with all of the opportunities to teach the basics uses a single section sewn with the pamphlet stitch into it’s outer folio (usual heavier paper). The back of the outer folios are then glued and pressed into a case bound cover that we also make. I learned the structure from Paul Johnson many years ago at a workshop at the San Francisco Center for the Book. Everyone finished with the additional assignment that they have to glue something on the cover to that we would know which side was the front of the book. Good job class!! I had several of these students in a more advanced workshop I gave today and they did a GREAT job. In the end we’re all beginners; I never fail to learning something new from the people in the class.


I just realized that I hadn’t posted my very first folded book. I love used book stores and thrift shops and always keep an eye out for interesting titles. Next I want to try folding images!

Sometimes I like to create something that involves repetitive tasks. I find folding to be relaxing. I’ve learned to create templates of text using Photoshop. It’s fun to come up with words that reflect something amusing about the title of the re-purposed book and I want to choose my own fonts. I am not a fan of purchasing a templates because they aren’t “mine”. This particular book was folded for the Osher Life Long Learning Institute’s Open House. OLLI means a lot to me. It’s run by caring, forward thinking people who have created an organization that supports seniors by offering stimulating classes, brown bag lunch discussions, interest groups, and a way to connect with people in the senior community.  I teach several book arts classes each semester and the experience has changed my life because of the friendships and our dedication to making really creative books. I also take a lot of classes and have ventured outside of my comfort zone many times—OLLI is a safe place to do that!


Thanks to OLLI for taking this photo. The title on the spine of the book is The Best and the Brightest. I will include a brief outline of the Photoshop commands I used. These steps were adapted from several DIY internet sites and use the current version of Photoshop and Word.

  1. Open Photoshop > New
  2. Set up document with width of 10″. For the height use the actual height of your book in Inches. 250 ppi.
  3. Select the Gradient Tool making sure the two sheets near the bottom of the tool list have black in the front and white in the back. Center the cursor over the center top of the document and drag down to the center bottom and release.
  4. Filter > Distort > Wave: then place 999 in Generator, Wavelength 7 and 7.
  5. Layer > New Layer
  6. Select Text. Choose a font. I like Marker Felt or Hobo Standard, size 300. Type your word and center on the document.
  7. Layer > Rastersize > Type
  8. Select Magic Wand, hold the SHIFT KEY and select each letter in the text.
  9. Select > Inverse
  10. Change to the Background Layer. Edit > Cut
  11. Turn off the Layer with the text (can delete).
  12. Save document
  13. Open Word and Print Options. Select Legal size and Landscape. Format the document with .25 in top and bottom margins.
  14. Insert the Photoshop photo. Stretch horizontally ONLY. This moves the black vertical bars further apart making them easier to see.
  15. Print on Legal paper. I prefer to use a card stock weight paper.

You now have a document that can be inserted into the book so that no measuring is necessary. Simply fold to the tops and bottoms of the bars (be sure to consider the white spaces to be a bar for folding).

The only thing I don’t like about this method is that it is hard to match the number of bars to the number of pages to be folded. I had to work with the font size to make those numbers match. I have instructions for using Illustrator that look promising and if successful, I will report back.

Fold on!

basic_18

Learn the basics about the tools, materials, and techniques required to make your own books. A survey of current book arts programs and book artists will be sure to inspire you. You will practice all of your new skills in this clever little structure. The single section is sewn using the simple pamphlet stitch. There is no stitching visible on the spine! The materials are provided and the text block contains information and techniques being taught in the course.

Bring to class: Cutting mat (or old phone book), small utility knife, small sharp scissors, metal ruler, sharp pencil, bone folder (or small wooden spoon), glue stick, bookbinder’s awl (or T-pin).

Day & Date: Thursday, Feb. 1, 2018

Time:  1:00 p.m. to 4 p.m.

Location: Humboldt Bay Aquatic Center

Register Here: Osher Lifelong Learning Institute