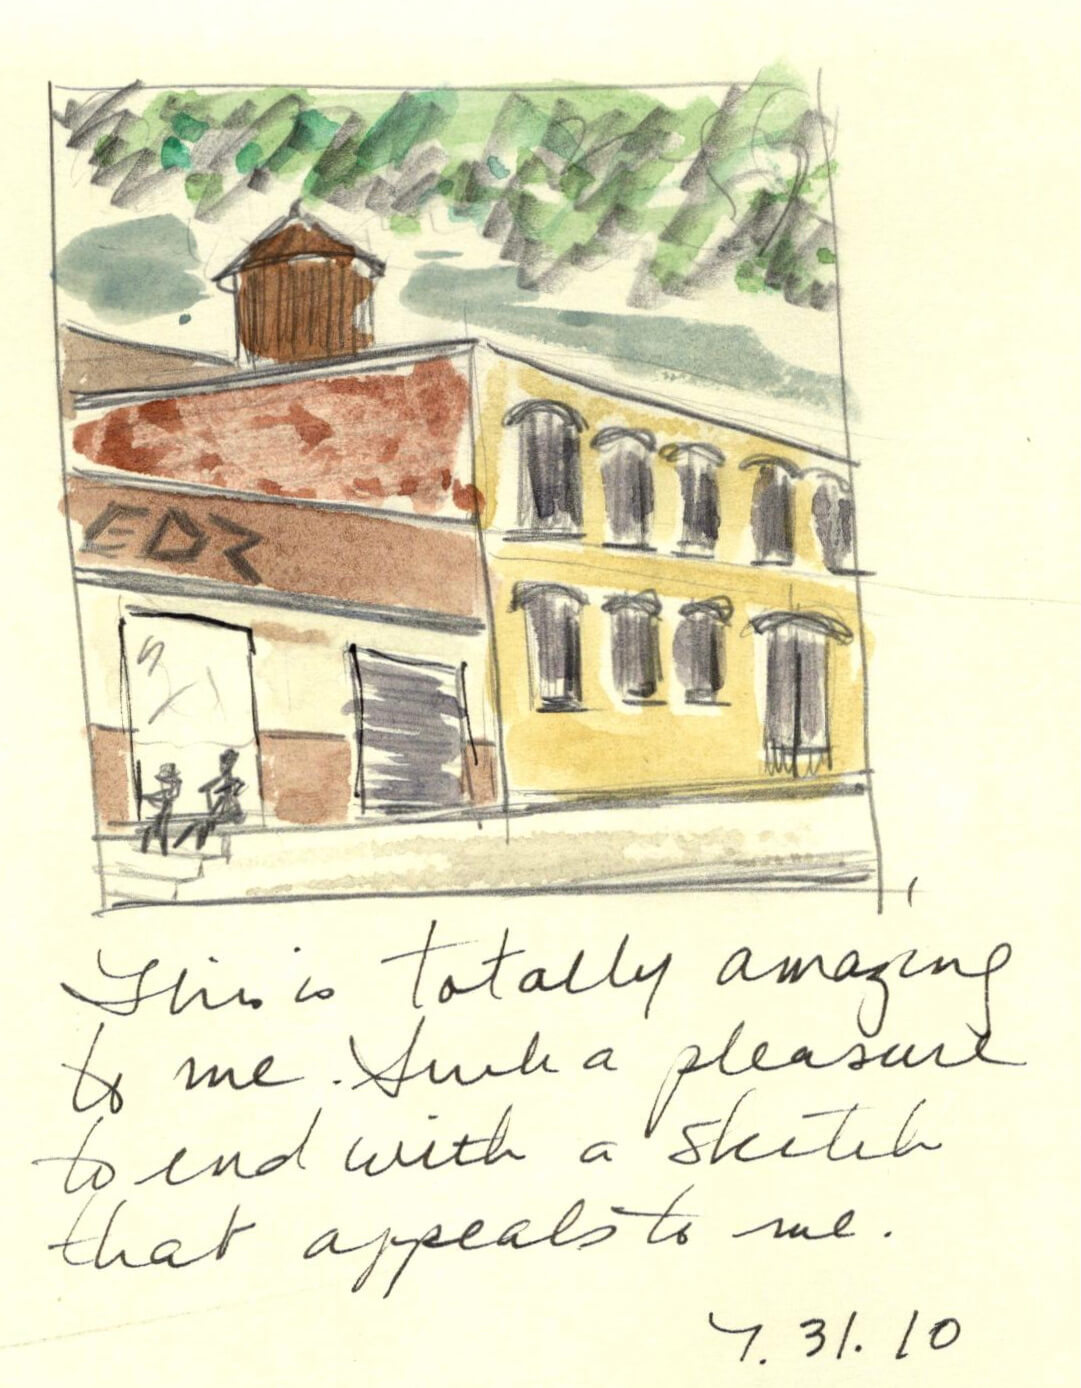
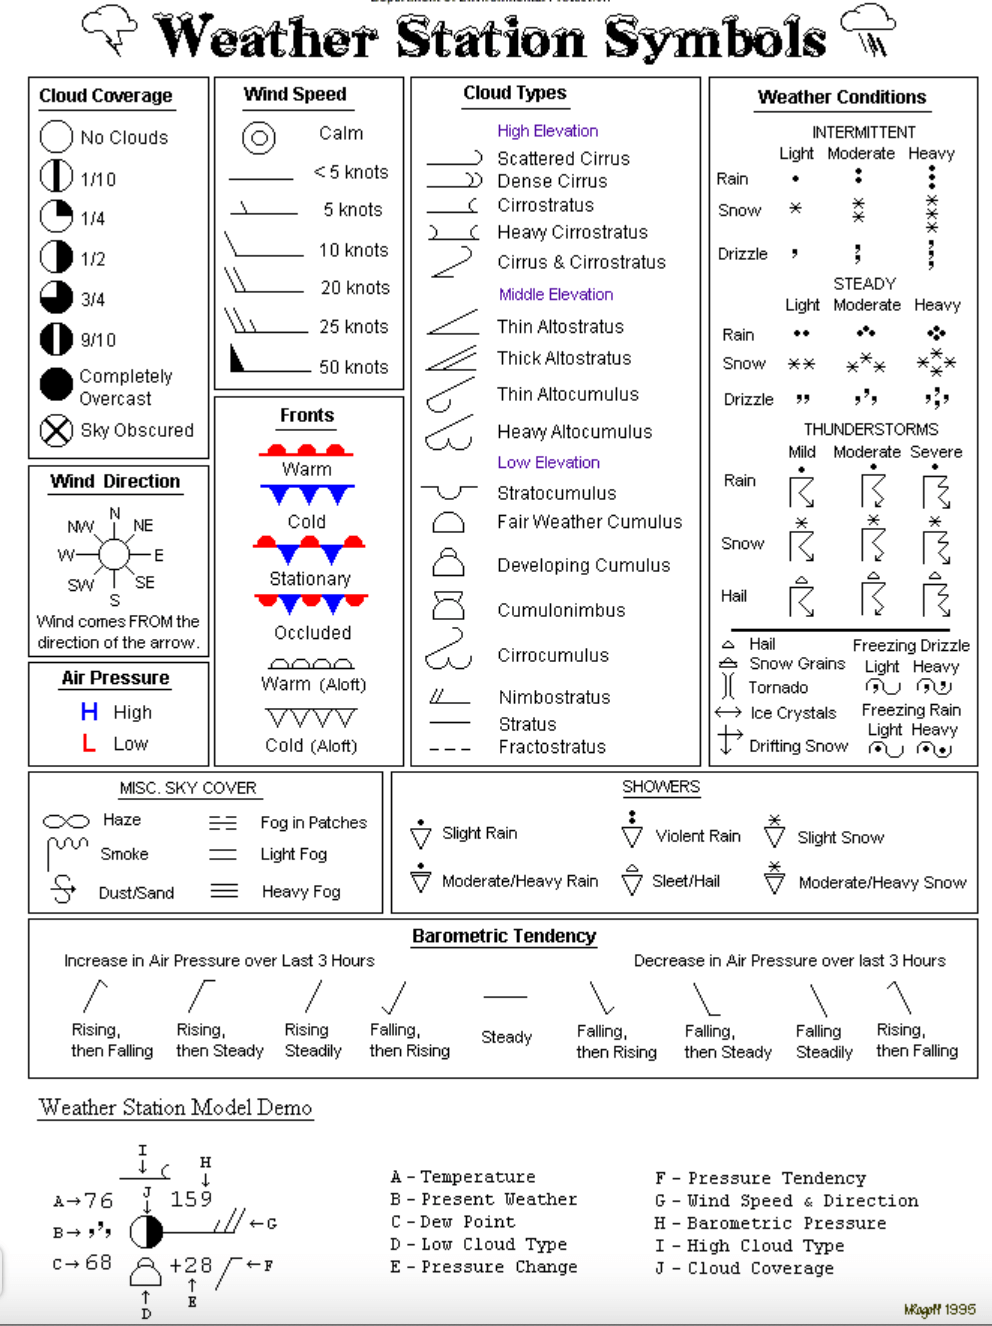
This class with Christine Elder was taught on the first day of the *Wild Wonder Nature Journaling Conference and was perfect for beginners. She had several suggestions that changed the way I approach my journaling: use my journal to explore, use drawings as a tool to understand, and value process over product, These tips were emphasized in most courses. I found them very liberating and I was felt more relaxed with the process. I also discovered that if I am really curious about the object I am drawing then the time I spend drawing, paying attention, and learning was what really matters.
The first exercise involved whole brain techniques that encouraged us to gain confidence and speed. I found the following to be most helpful.
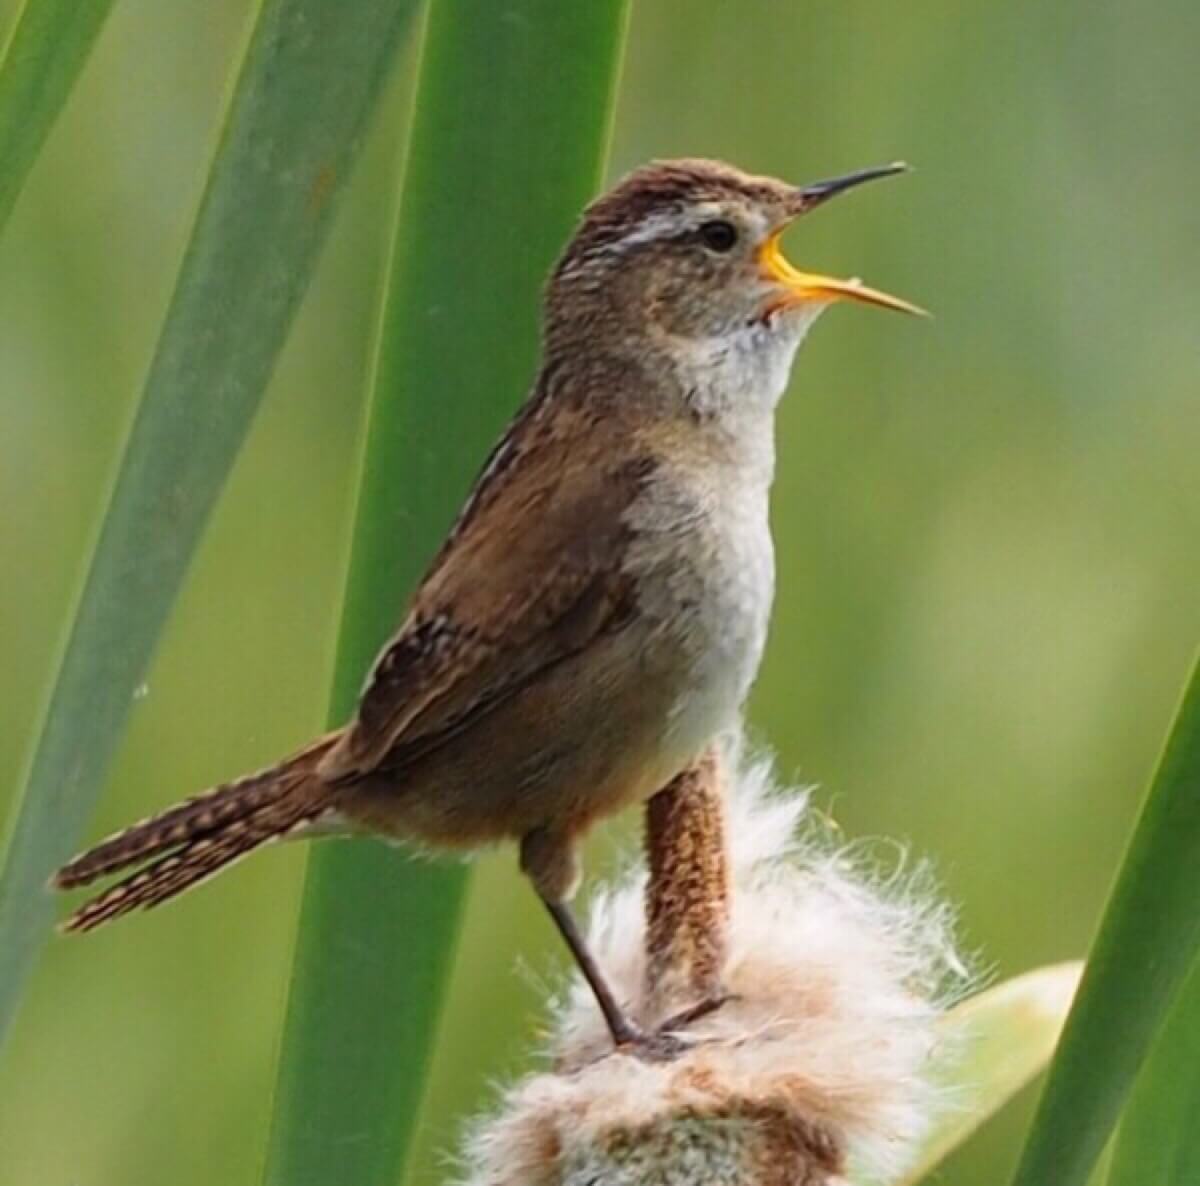
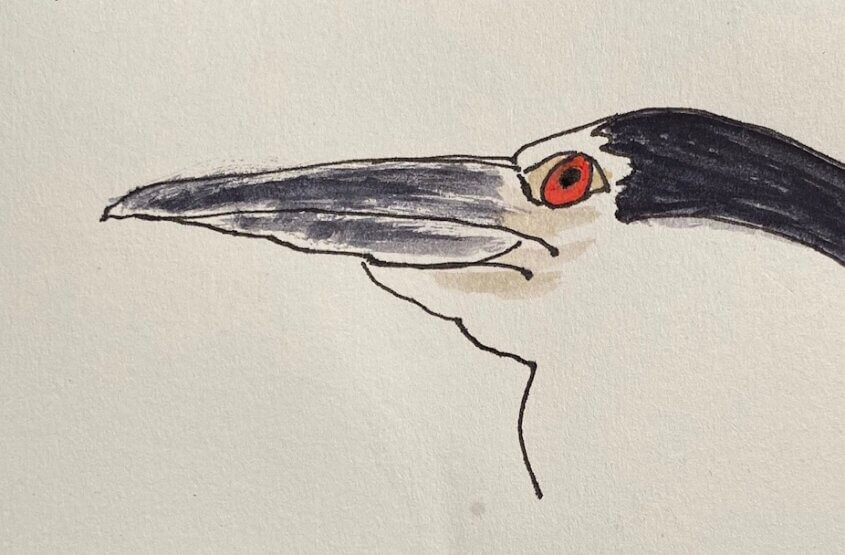
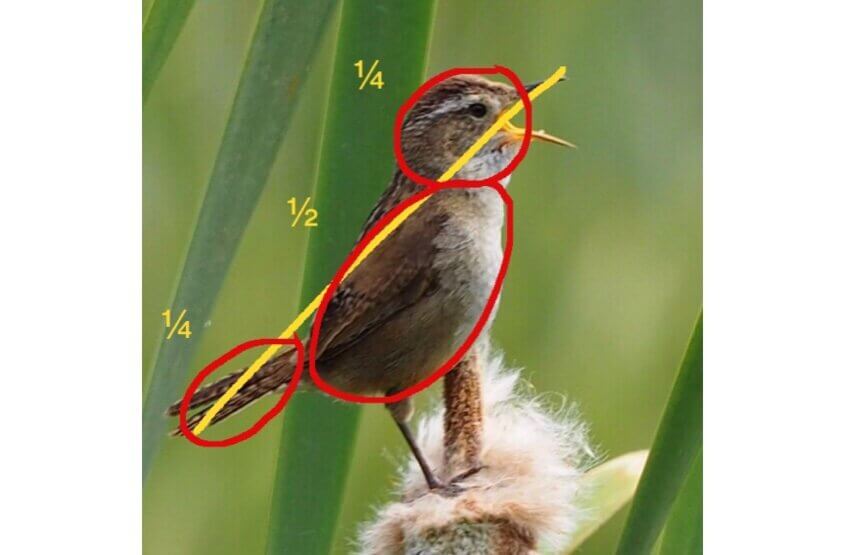
Marsh Wren, photo by Rollie Lamberson
BLOCKING IN involves drawing geometric shapes around the larger parts of the bird. Then each shape can be filled in. Now I can relax – I have the basic shape.
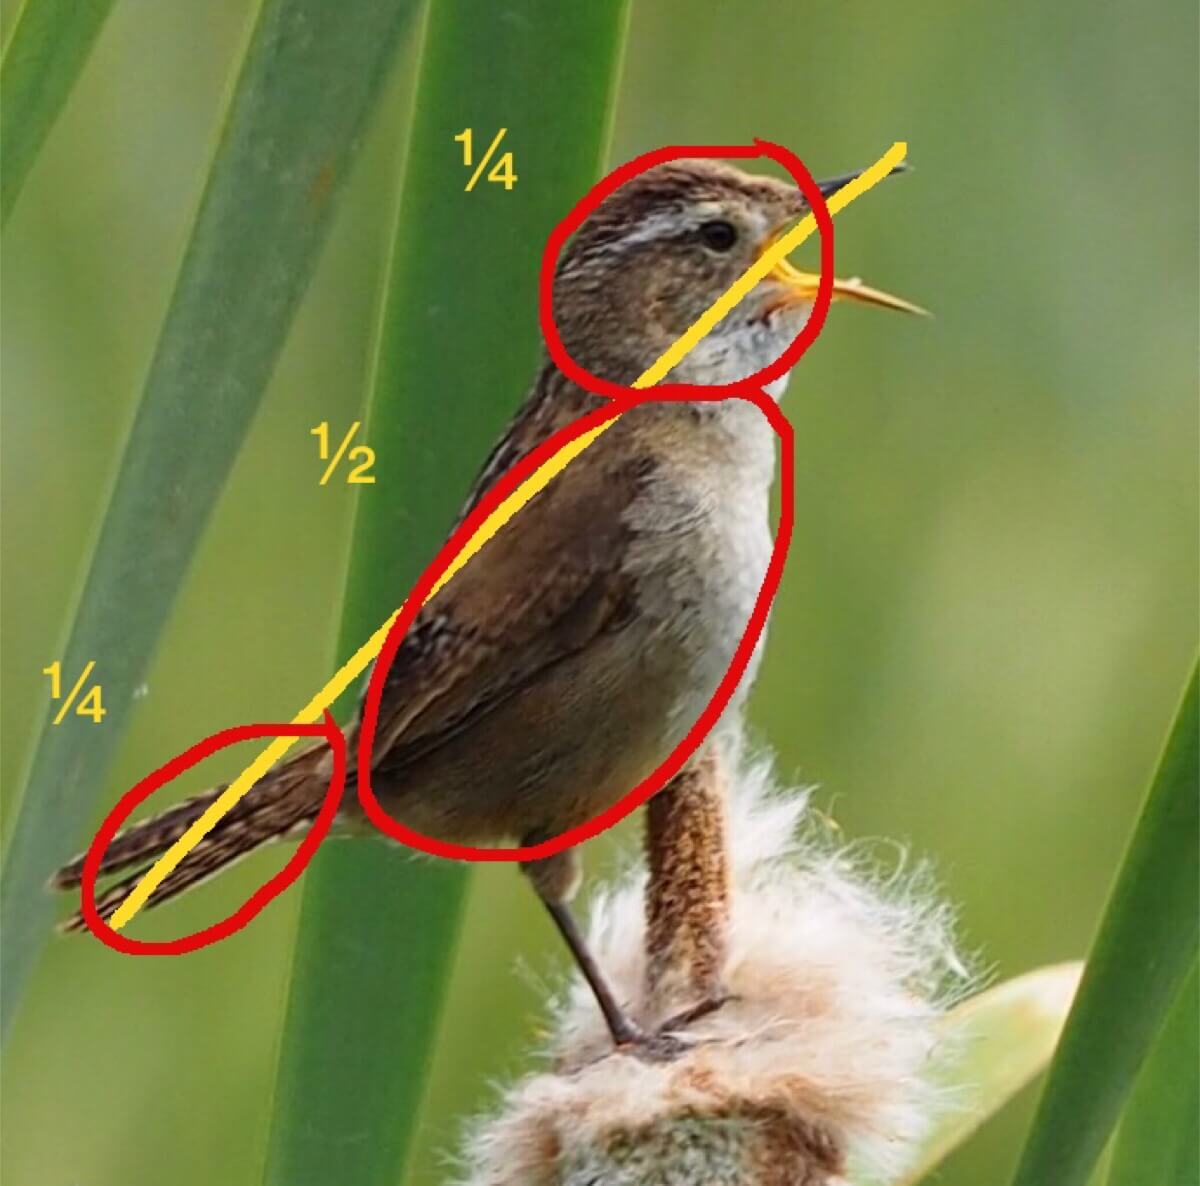
 BLOCKING INPROPORTIONS requires an imaginary line along the length of the object and then the larger parts of the bird are judged to be ¼, ⅓, ½, etc. parts of the line. I like this to get body proportions recorded correctly.
 PROPORTIONSALIGNMENT helps with general direction of major parts of the bird. N, S, E, W, SE, NW etc.
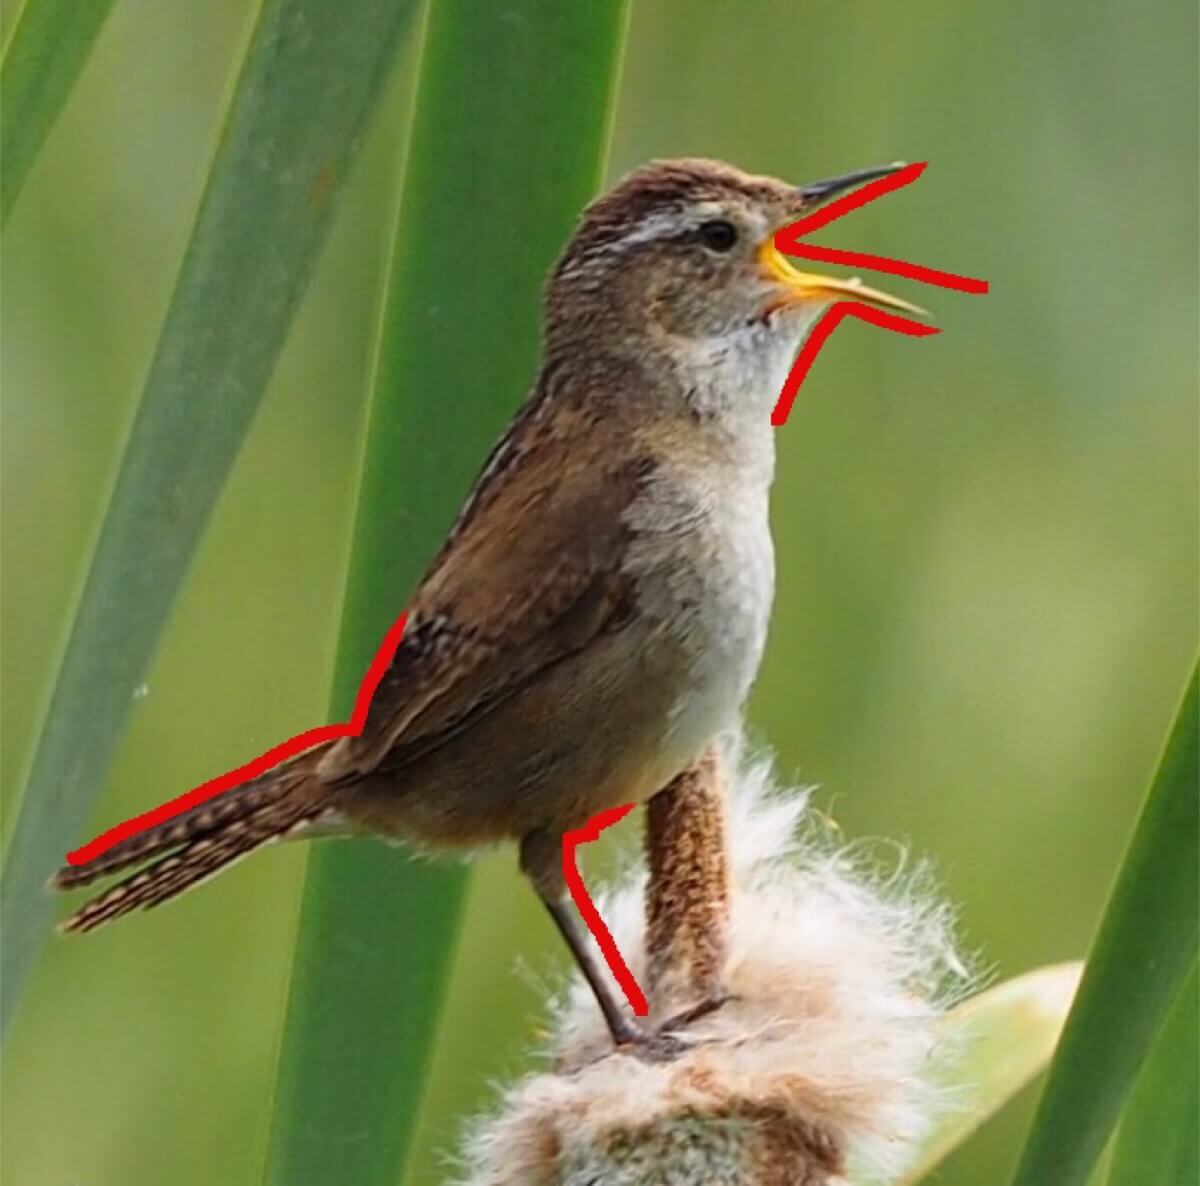
 ALIGNMENTFLOW LINES is a technique more like contour drawing. I would use this before ALIGNMENT but it depends on the object!
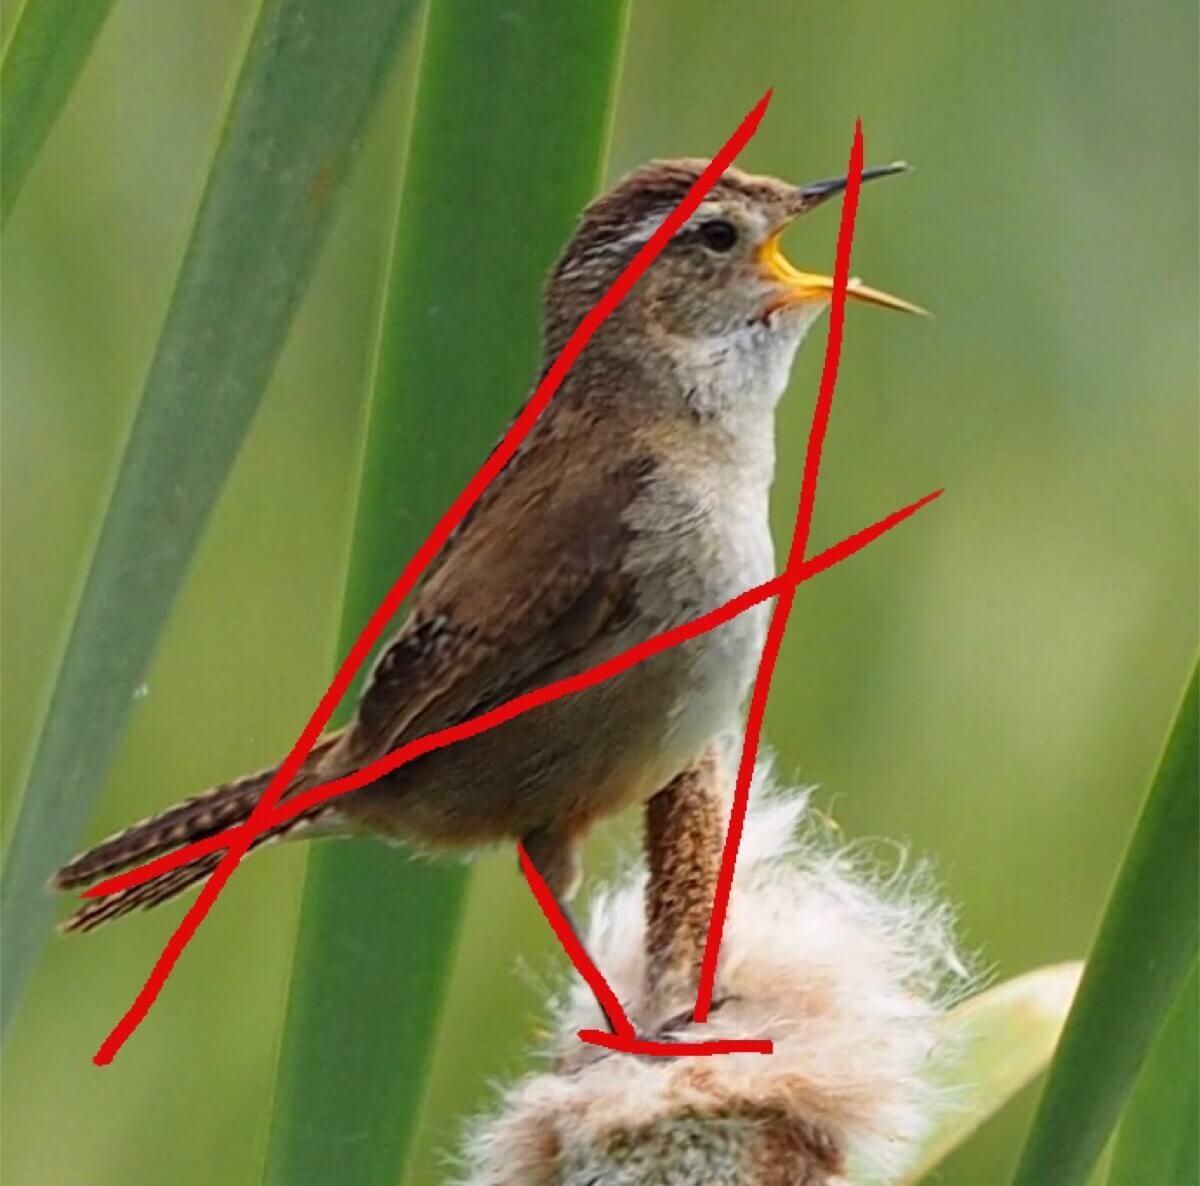
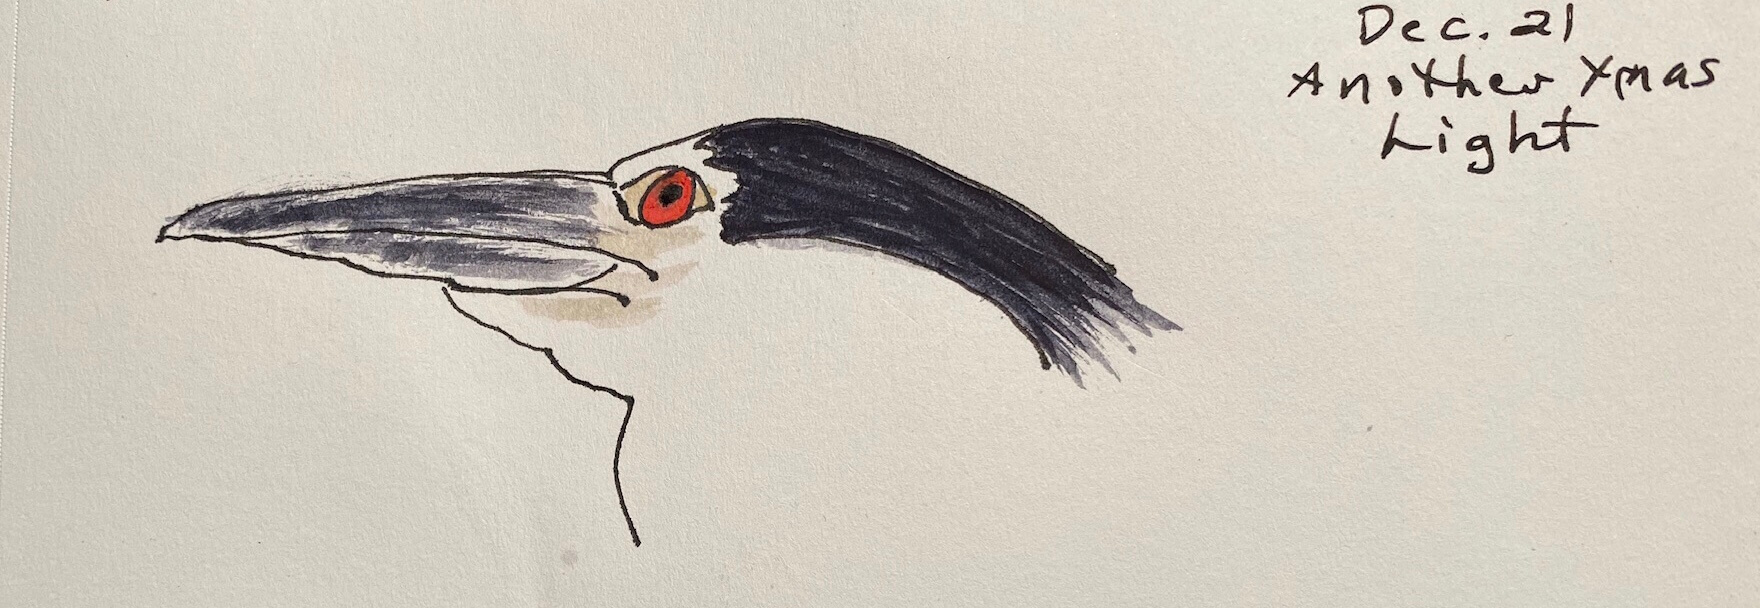
 FLOW LINESANGLES. This bird is all about angles and this technique will block them in for you.
 ANGLESWhen using one of these techniques be sure relax, avoid erasing, and enjoy yourself!
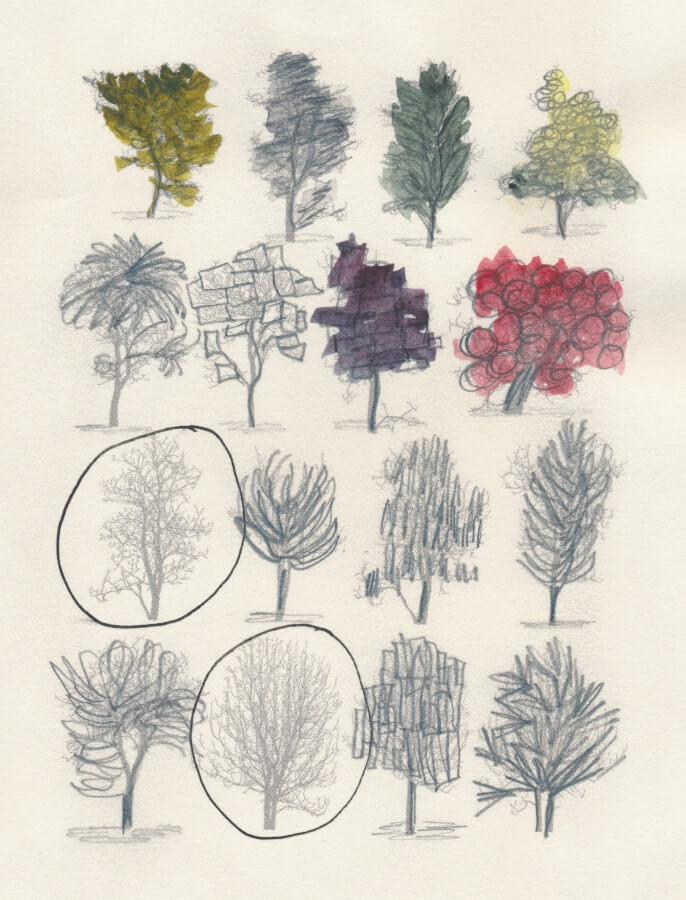
Another part of the workshop involved techniques similar to exercises from Drawing From the Right Side of the Brain written by Betty Edwards – my favorite being drawing things upside down (the object or you!) with the purpose of encouraging you to let go of what you think the object looks like.
Be sure to enjoy the website of Christine Elder. She has wonderful tutorials, online classes, and a great photo of how she draws with the help of a spotting scope!
APPLICATION:
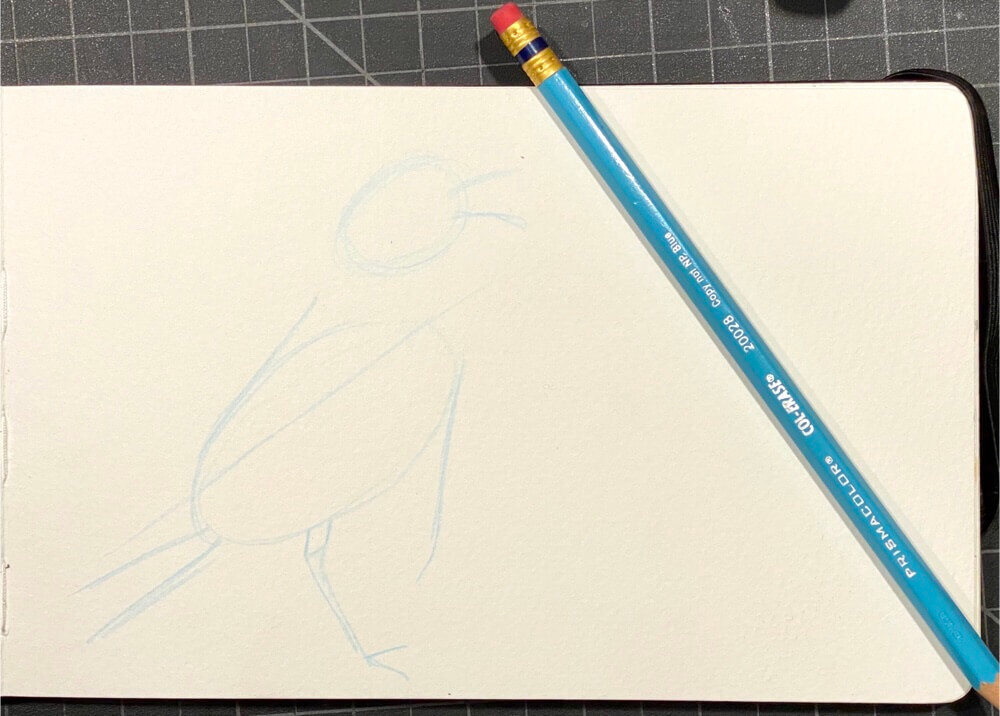
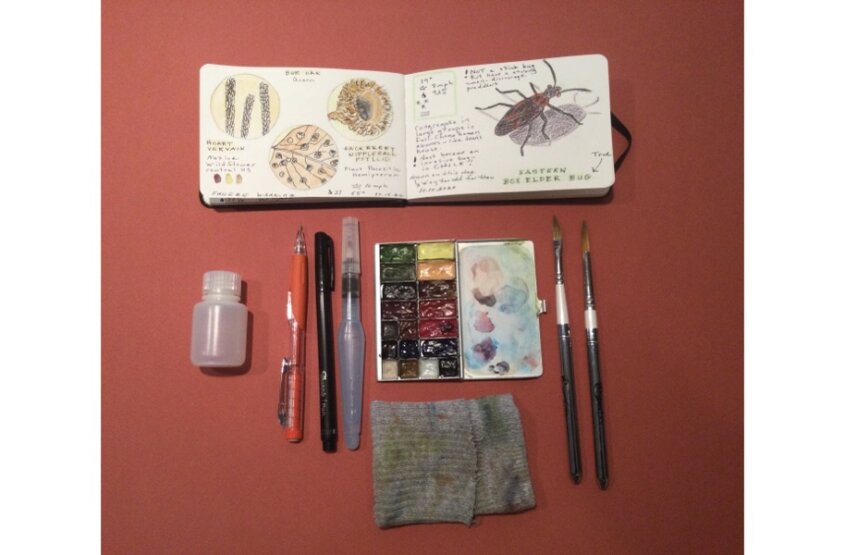
I’m not sure I’ve ever drawn a bird. I like things that don’t move, like buildings. So for now I will be better off if I draw birds from photos. When faced with new things I read Austin Kleon for inspiration. He is an artist and the author. Steal Like an Artist, and Keep Going. I cannot recommend them highly enough. He is an advocate of “quantity not quality” and also states that “copying is how I learn, it’s a way to understand what’s really going on, and drawing is a way of slowing down long enough to really look at something.” So with that advice I started on the outline of the bird. I ended up using Alignment and Blocking-In techniques. I used a Prismacolor Col-Erase pencil as recommended by nature journalist John Muir Laws; the pencil produces a very light color (look carefully at the photo – the light blue lines are there). It erases but you can paint or draw right over it and it won’t show.
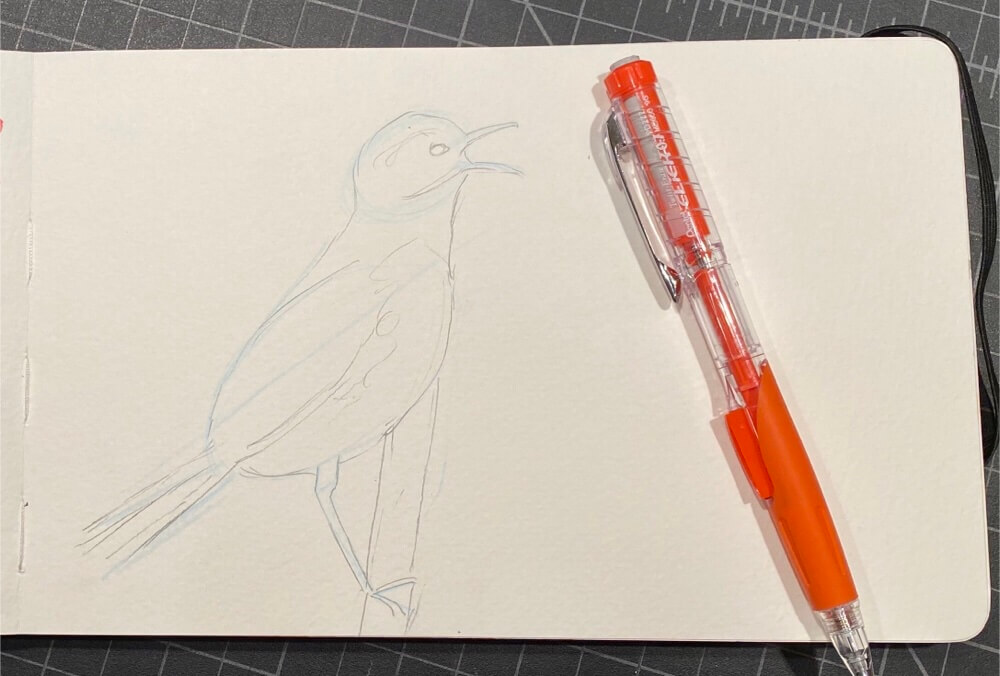
Next I used my mechanical pencil – Pentel Click 0.7 lead – to sketch the contour.
Using watercolor, white qouache, and pen I drew this. I came back several times to intensify colors and add some white. Questions came up while I was drawing (Good thing!) I did some online research at The Cornell Lab. I record questions & answers on my page. Due to hearing loss I am unable to hear birds so I especially appreciated finding some links to the song of this little Marsh Wren.
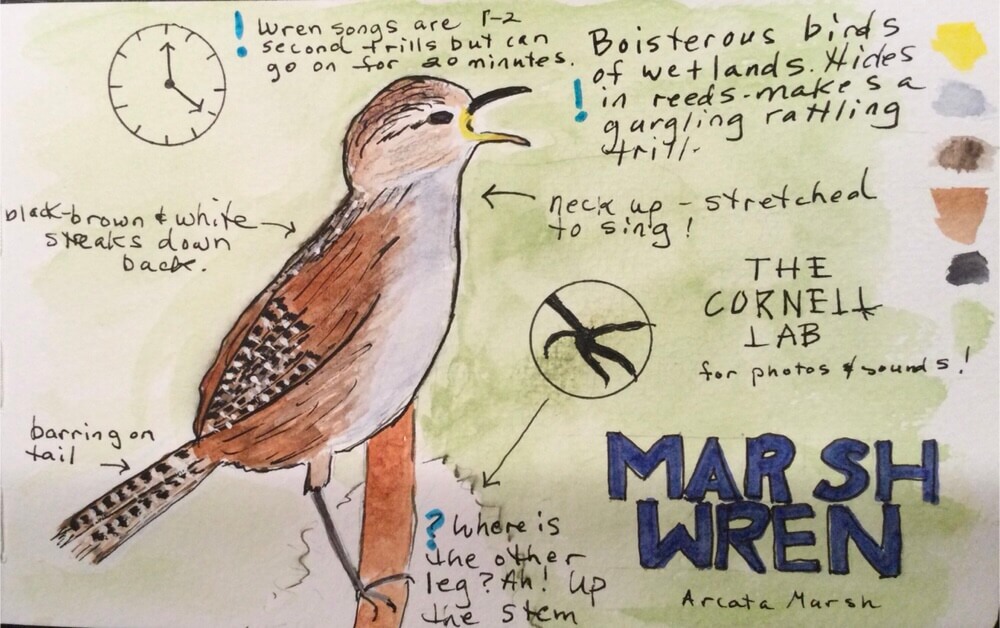
This drawing (and many others I did before settling with this one) changed the way I look at birds AND THIS IS THE MOST IMPORTANT PART OF NATURE JOURNALING!!! I spotted a sparrow in my backyard this morning and was surprised that the head was settled right down into it’s shoulders. It was then that I realized that the Marsh Wren’s head was elevated because it was singing! That stretching must open the airways making it’s chirps more powerful. Stretching also makes him look longer than he would be at rest. Amazing little birds.
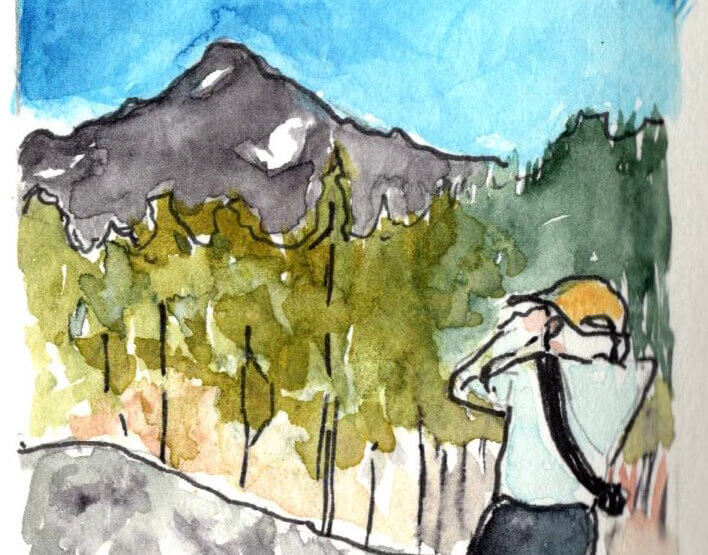
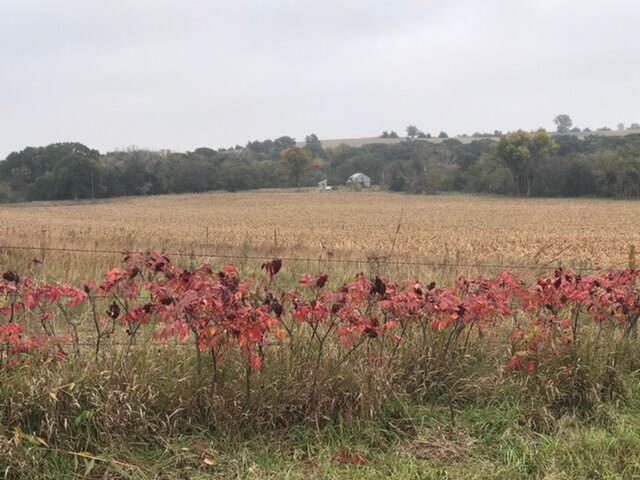
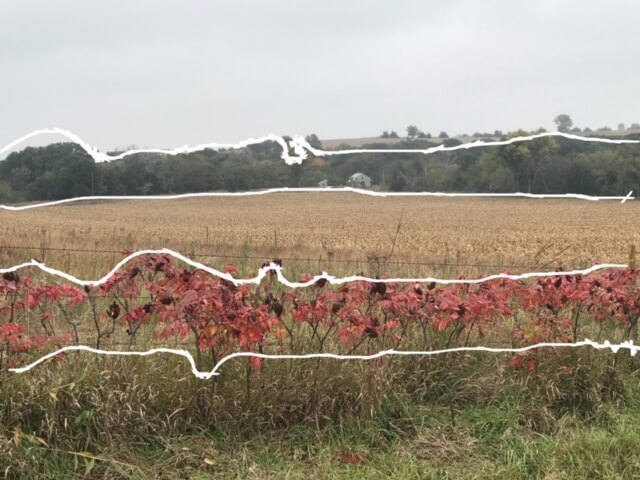
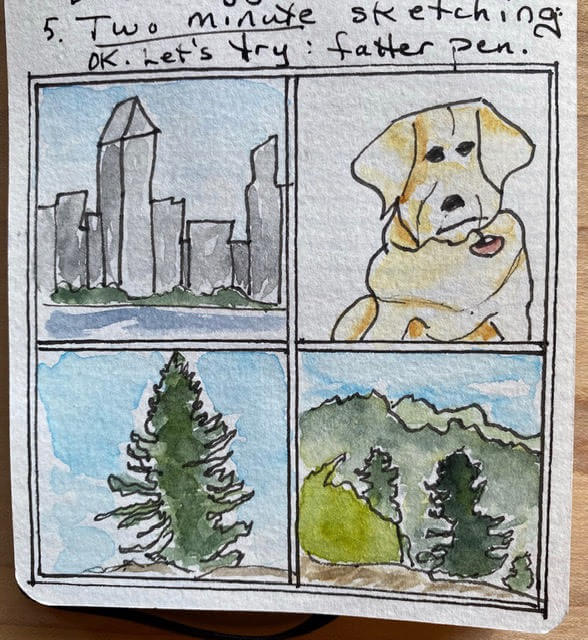
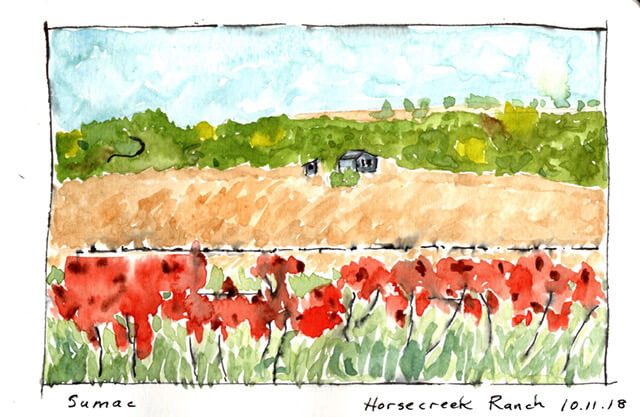 In nature journaling landscapitos have a number of advantages. They can be drawn and painted quickly enabling you to keep up with your hiking buddies. They document places that captured your attention and build memories of the experience – your mind will fill in the rest of the details. In general try to include 3 regions with darker regions in the foreground and the lightest in the background. Marley Peifer provides instruction and a video if you want to explore!
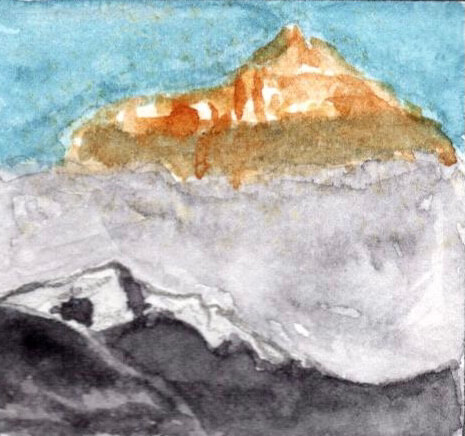
 Gobi Desert, Mongolia (5″ x 7″)
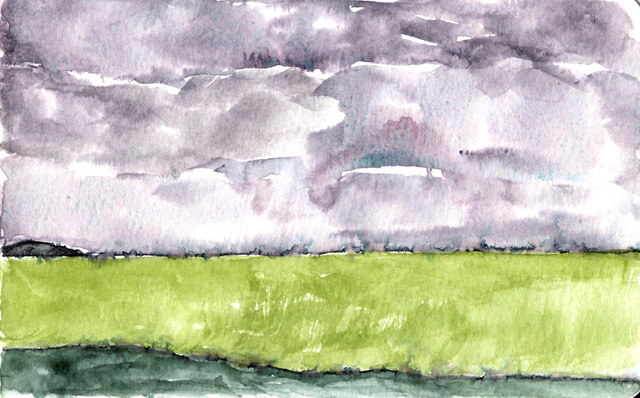


 Every Day Journal
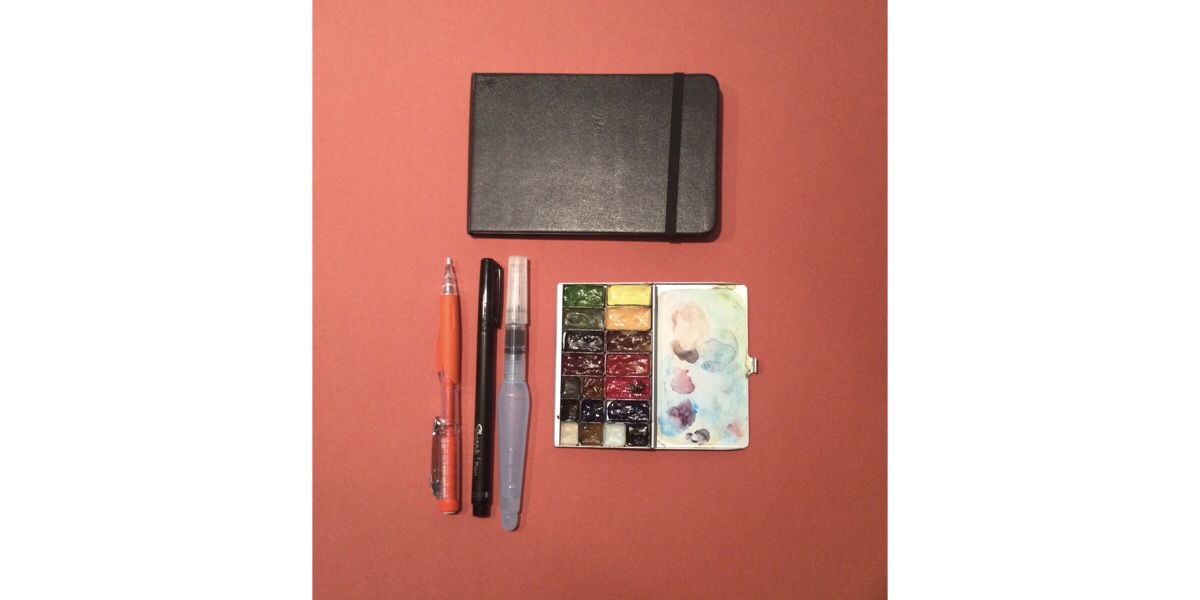 Basic Nature Journal
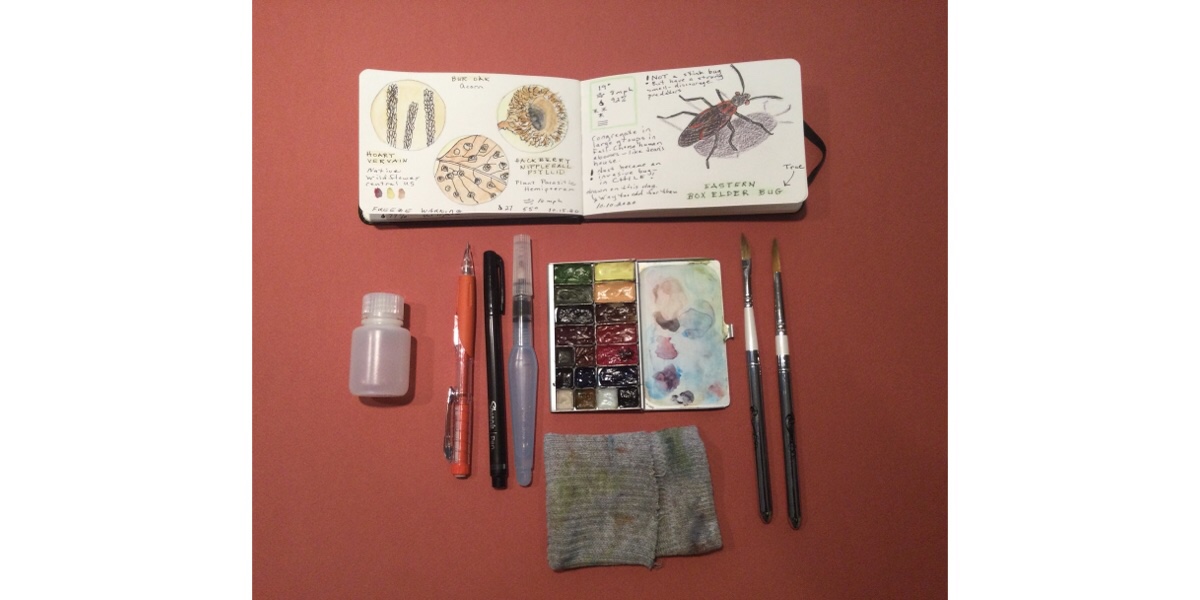 Enhanced Basic Journal
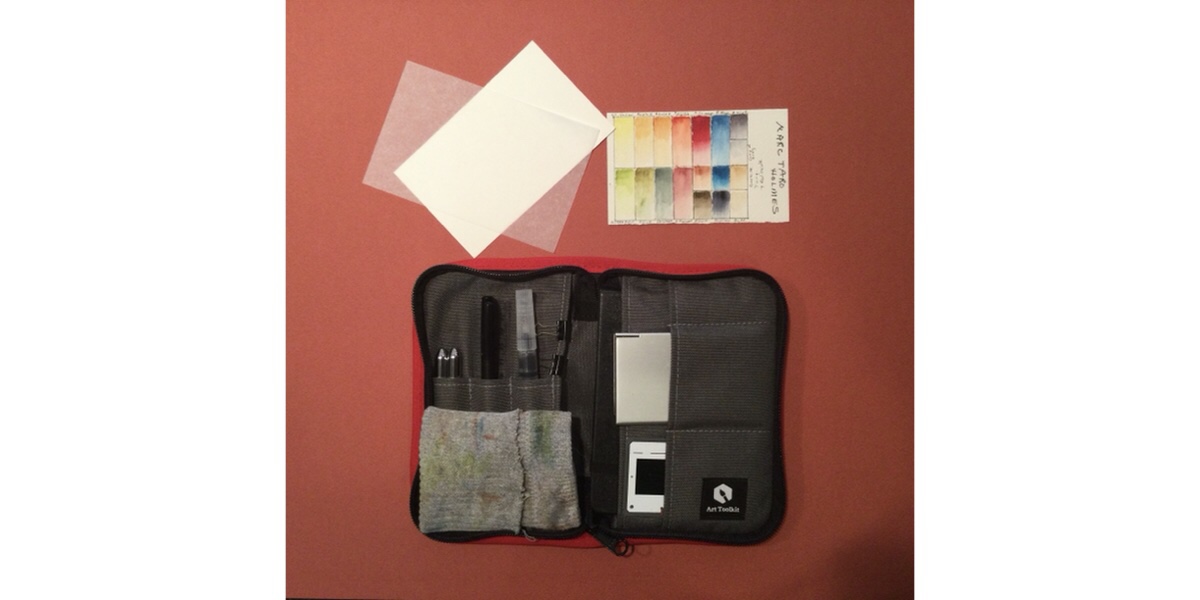 Art Kit
 Optional