Exposed spines are versatile, attractive, and provide opportunities to enhance the artistic qualities of the book.

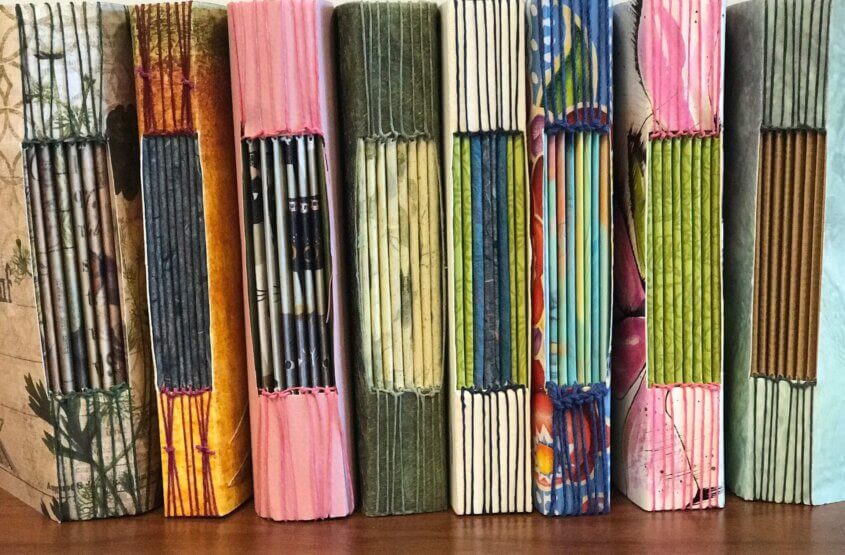
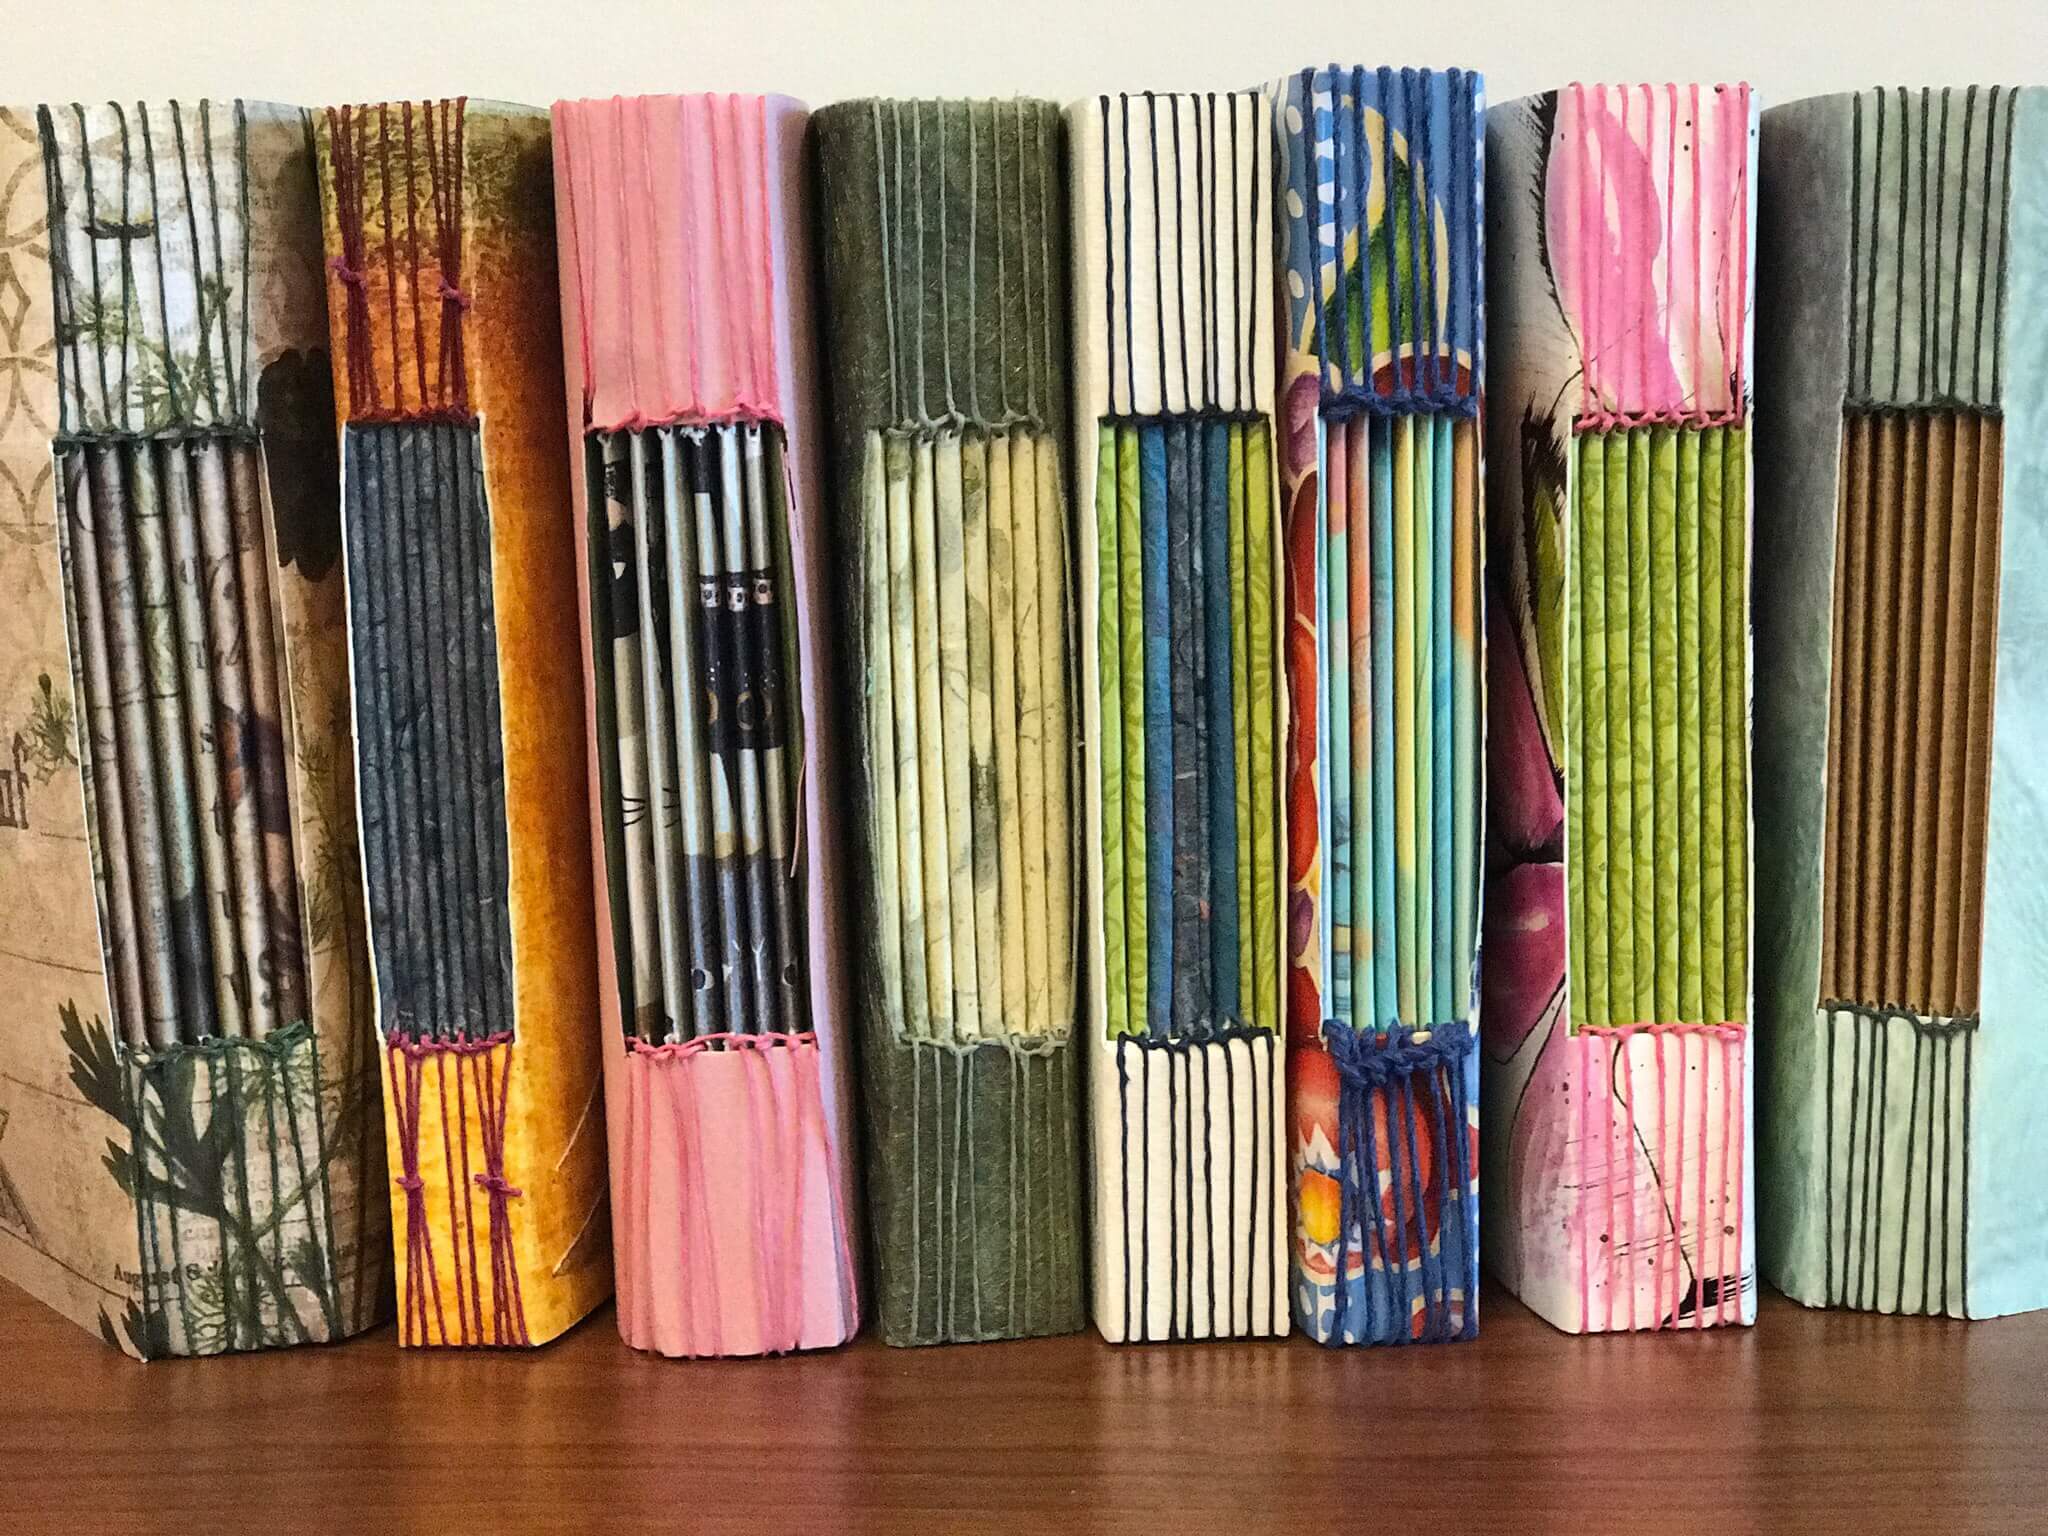
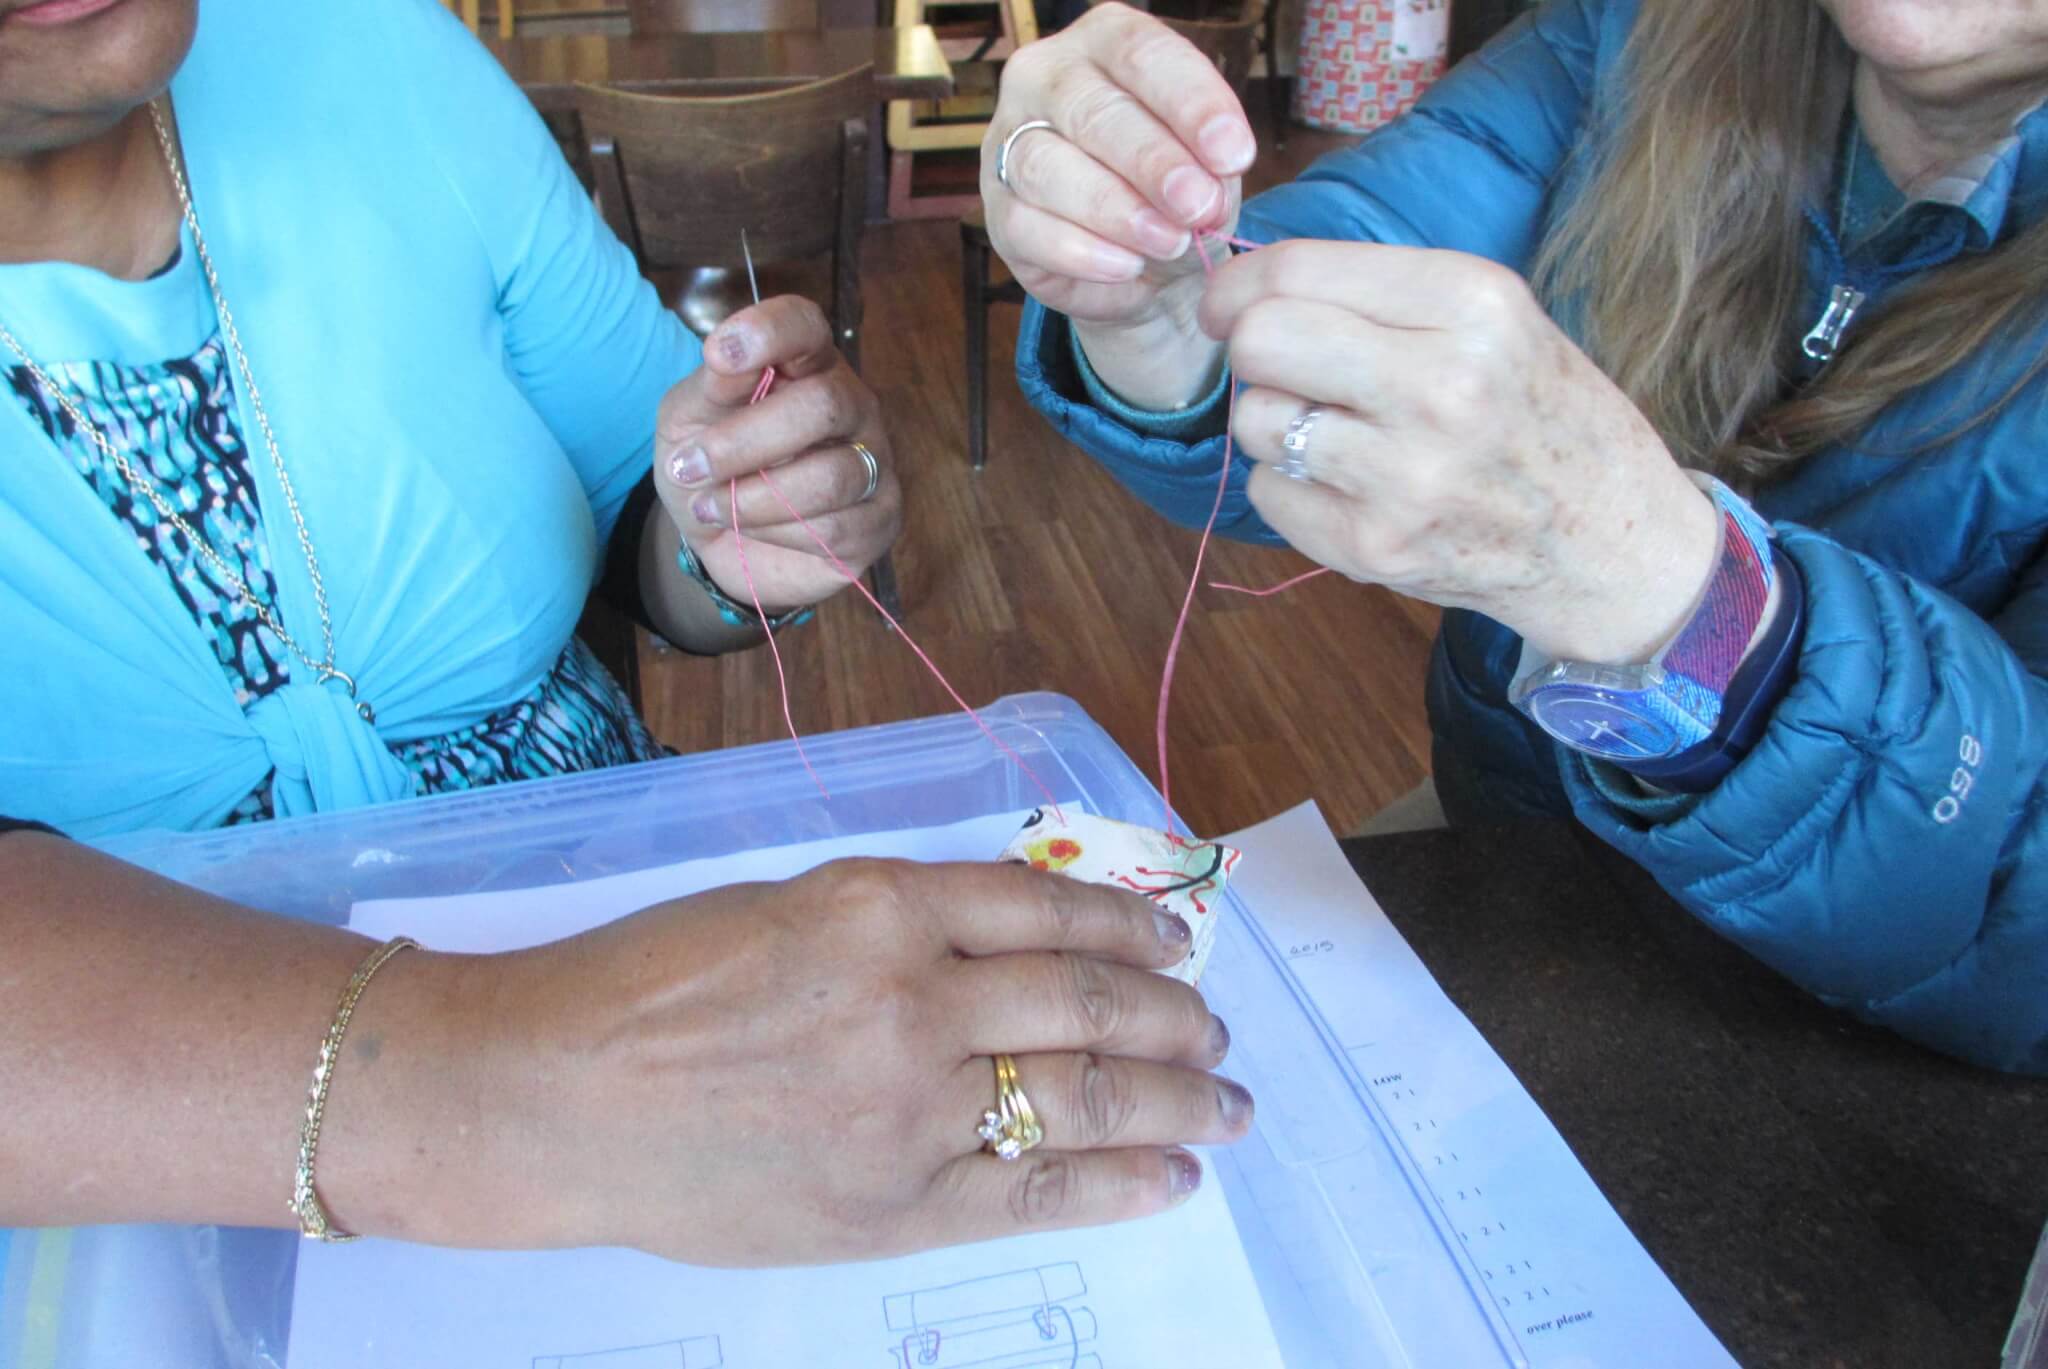
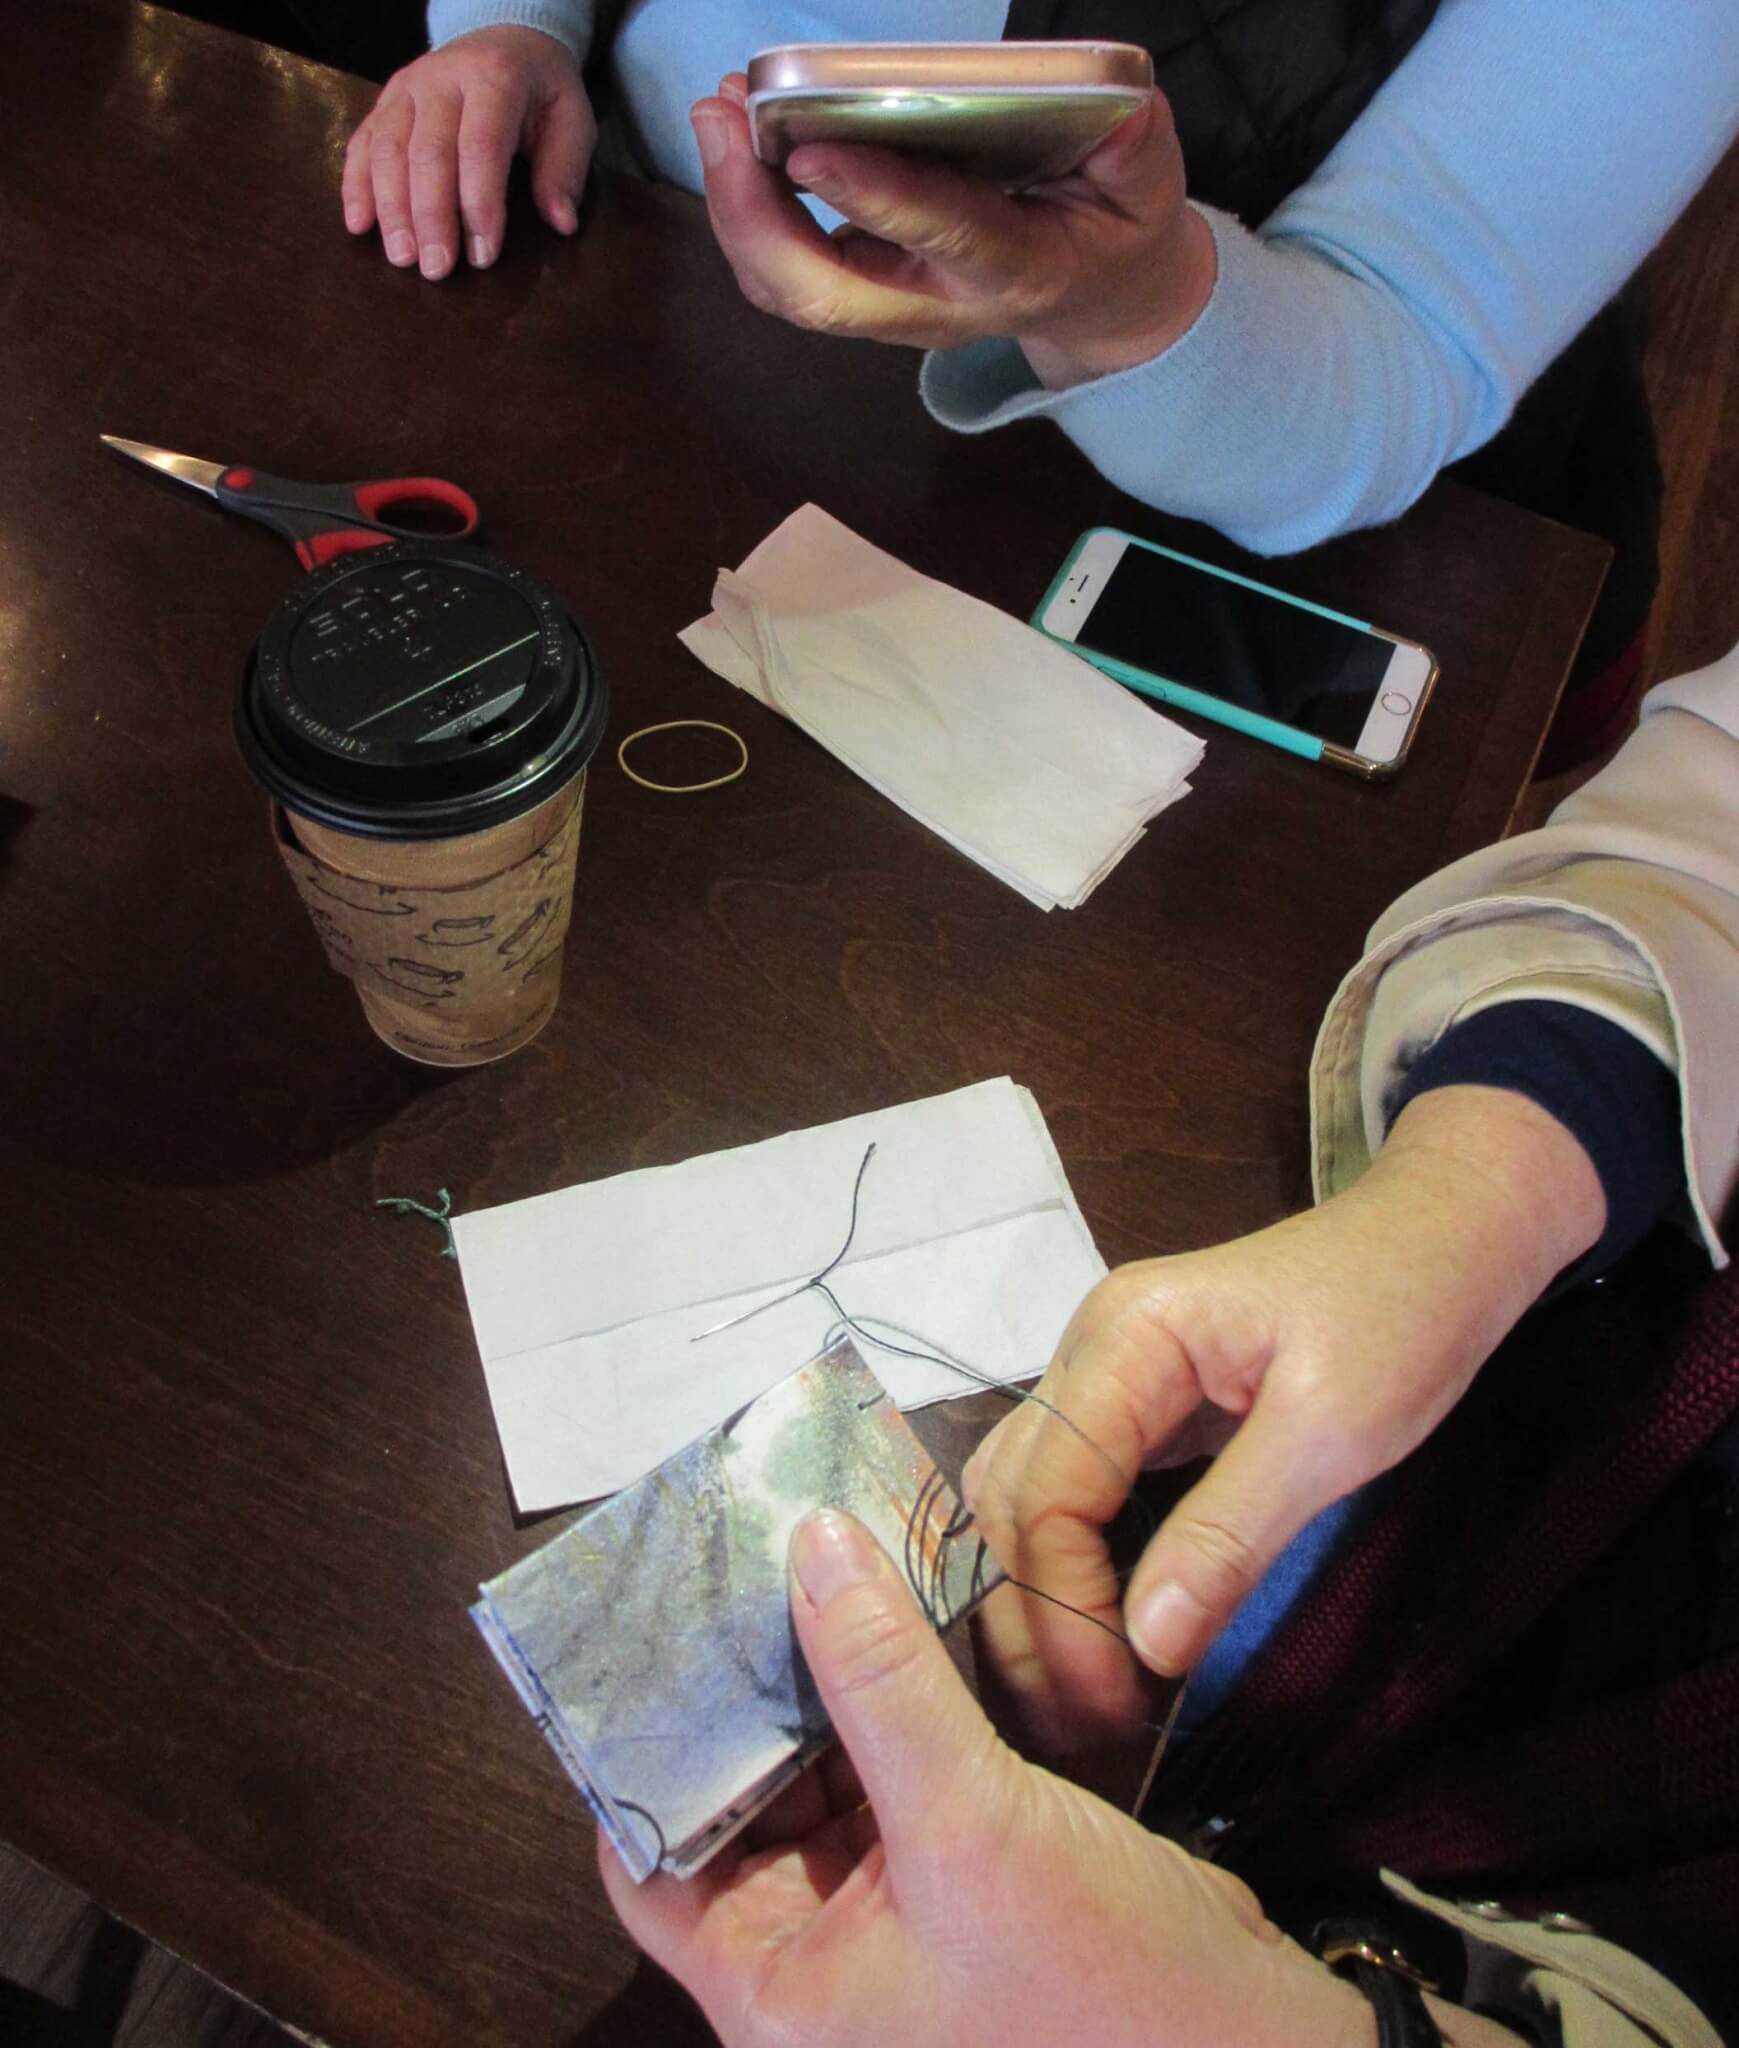
After my OLLI Book Arts classes I like to meet with students the following week to check on their finished books. At this point we are all teachers because we’ve figured out some things and discovered other possibilities. We gather around a little table in Humboldt’s Coffee and Chocolate in Old Town Eureka, and enjoy the artist exchange in what can be a sunny location (we are getting there!). These are the books that were shared and thank you all so very much!

Buttonhole Five

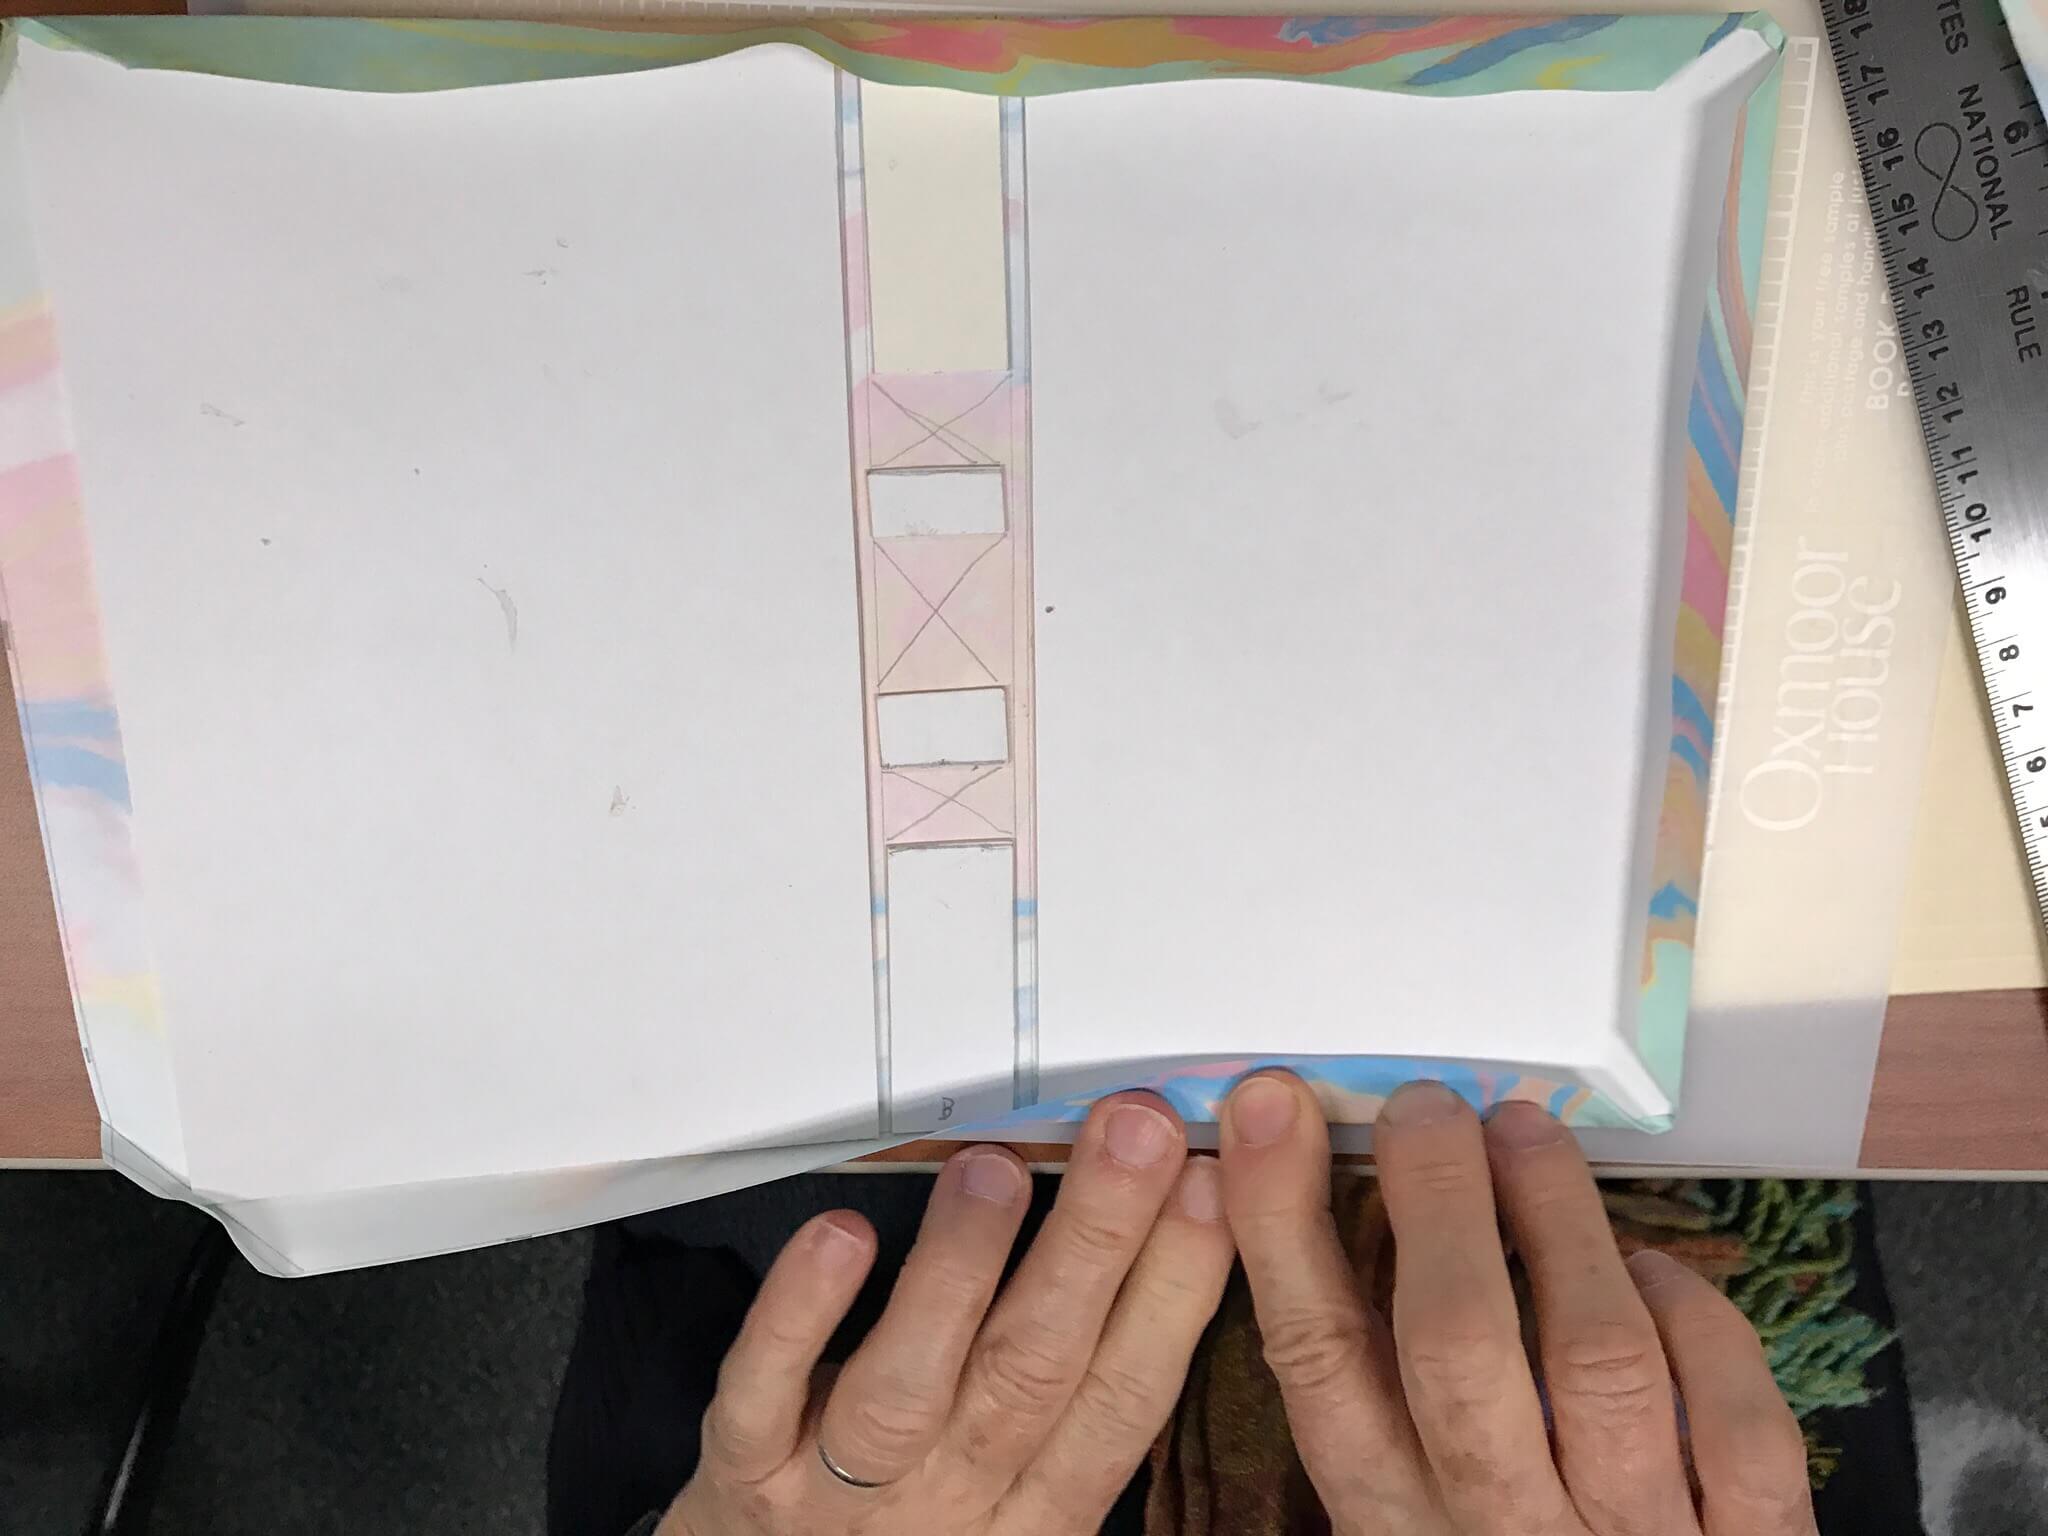
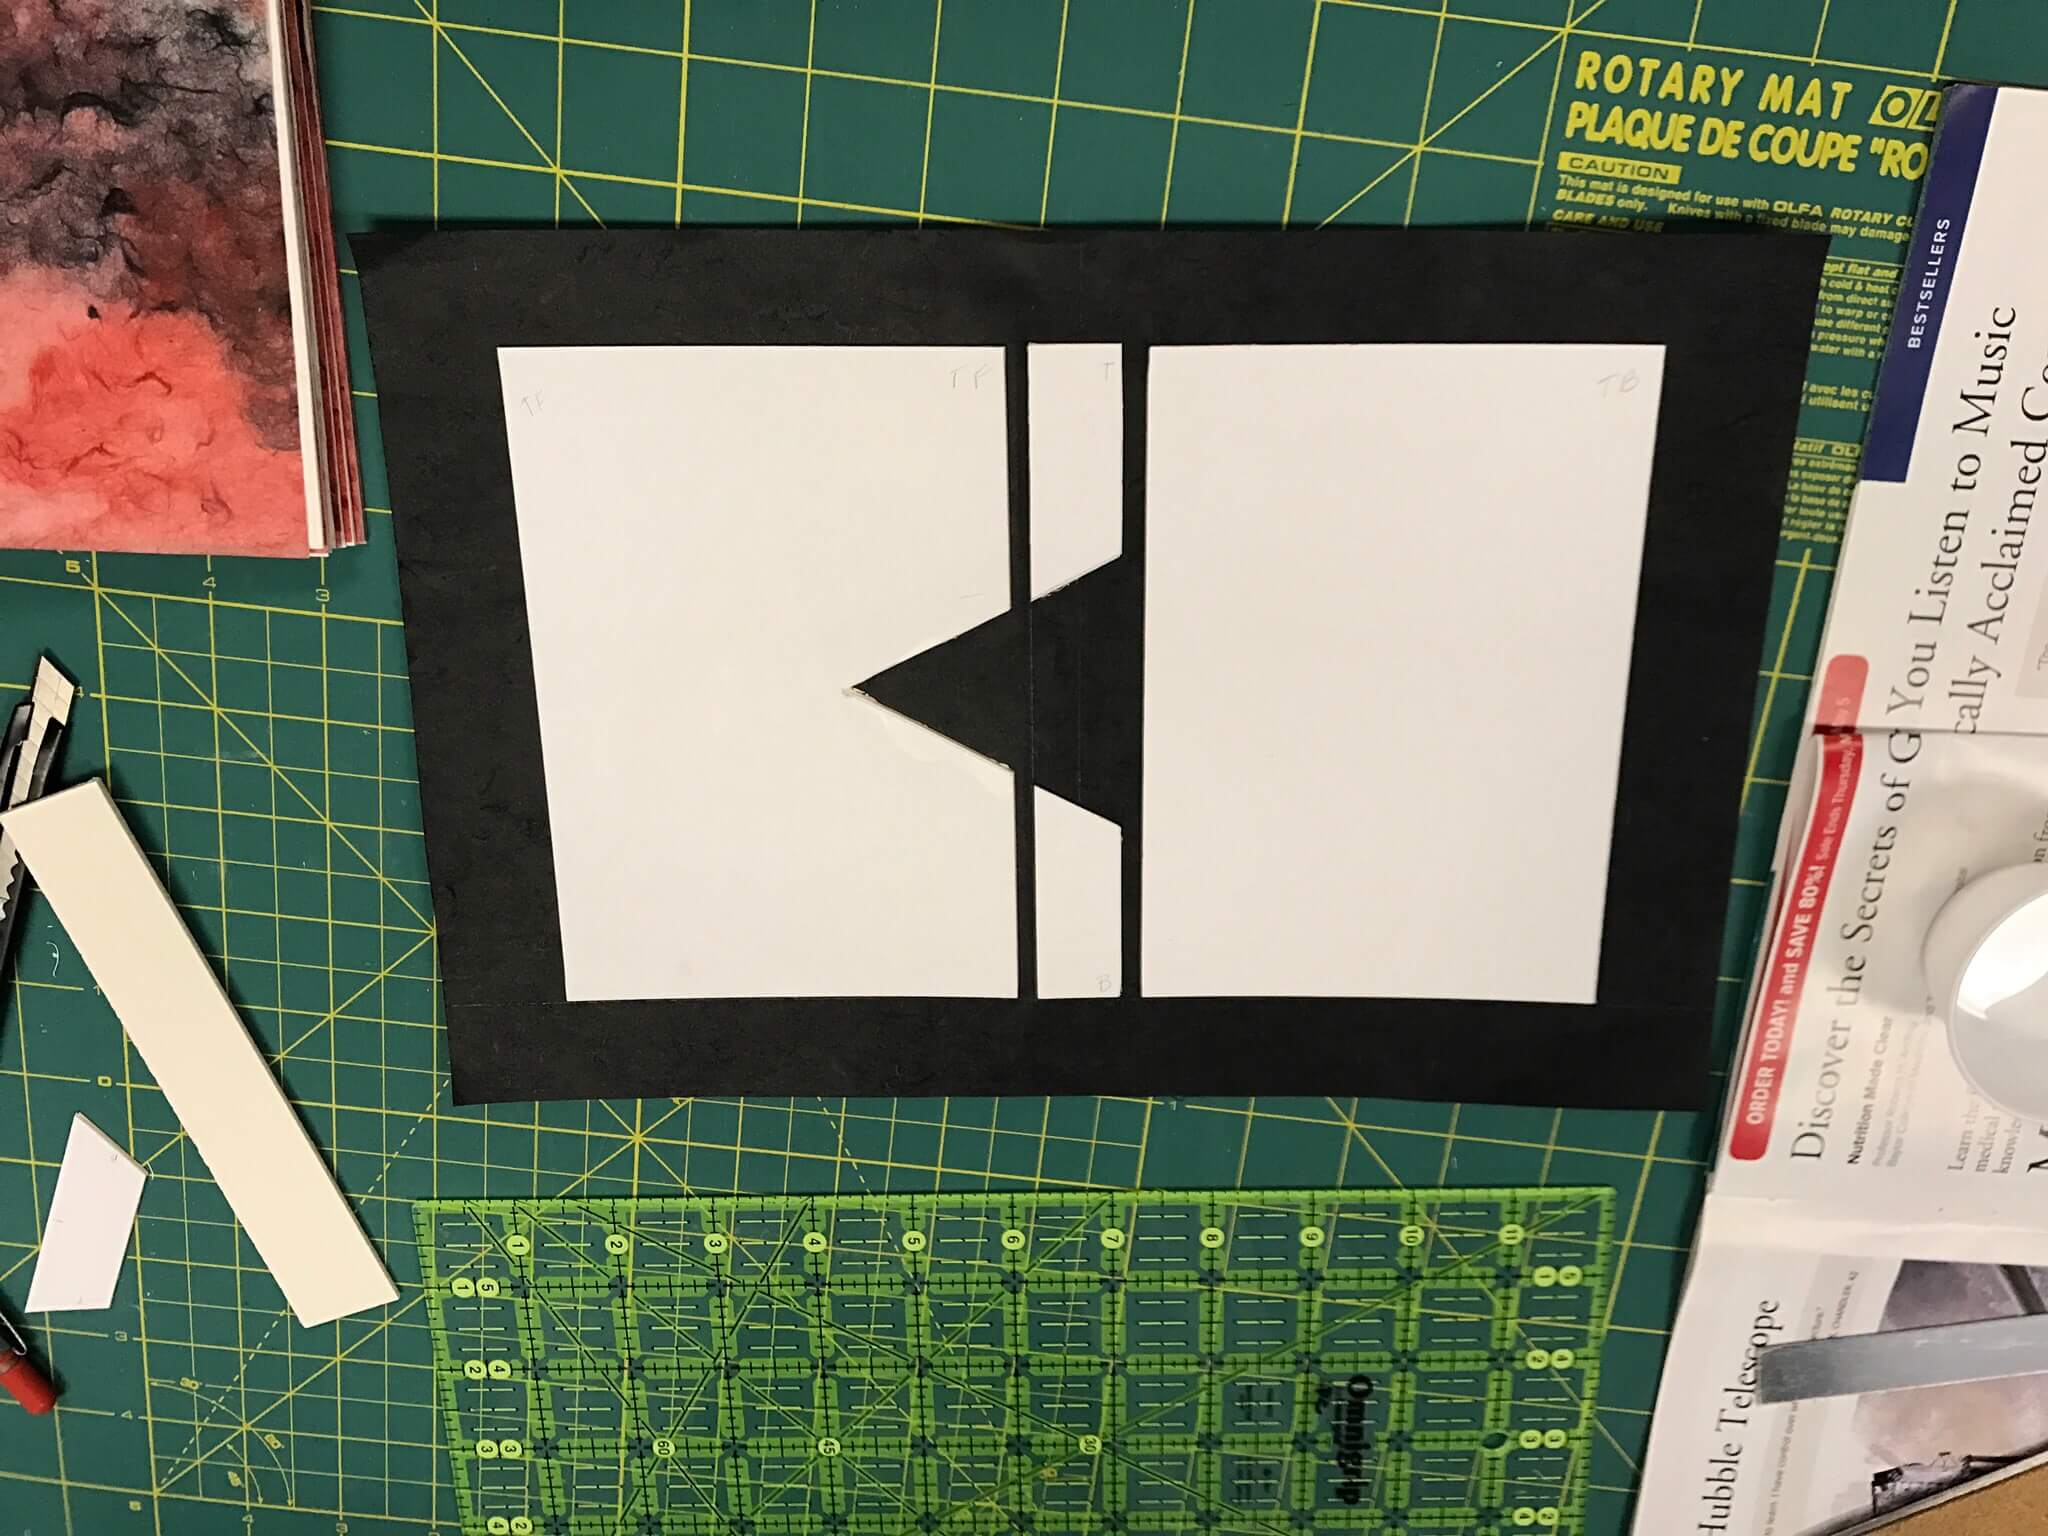
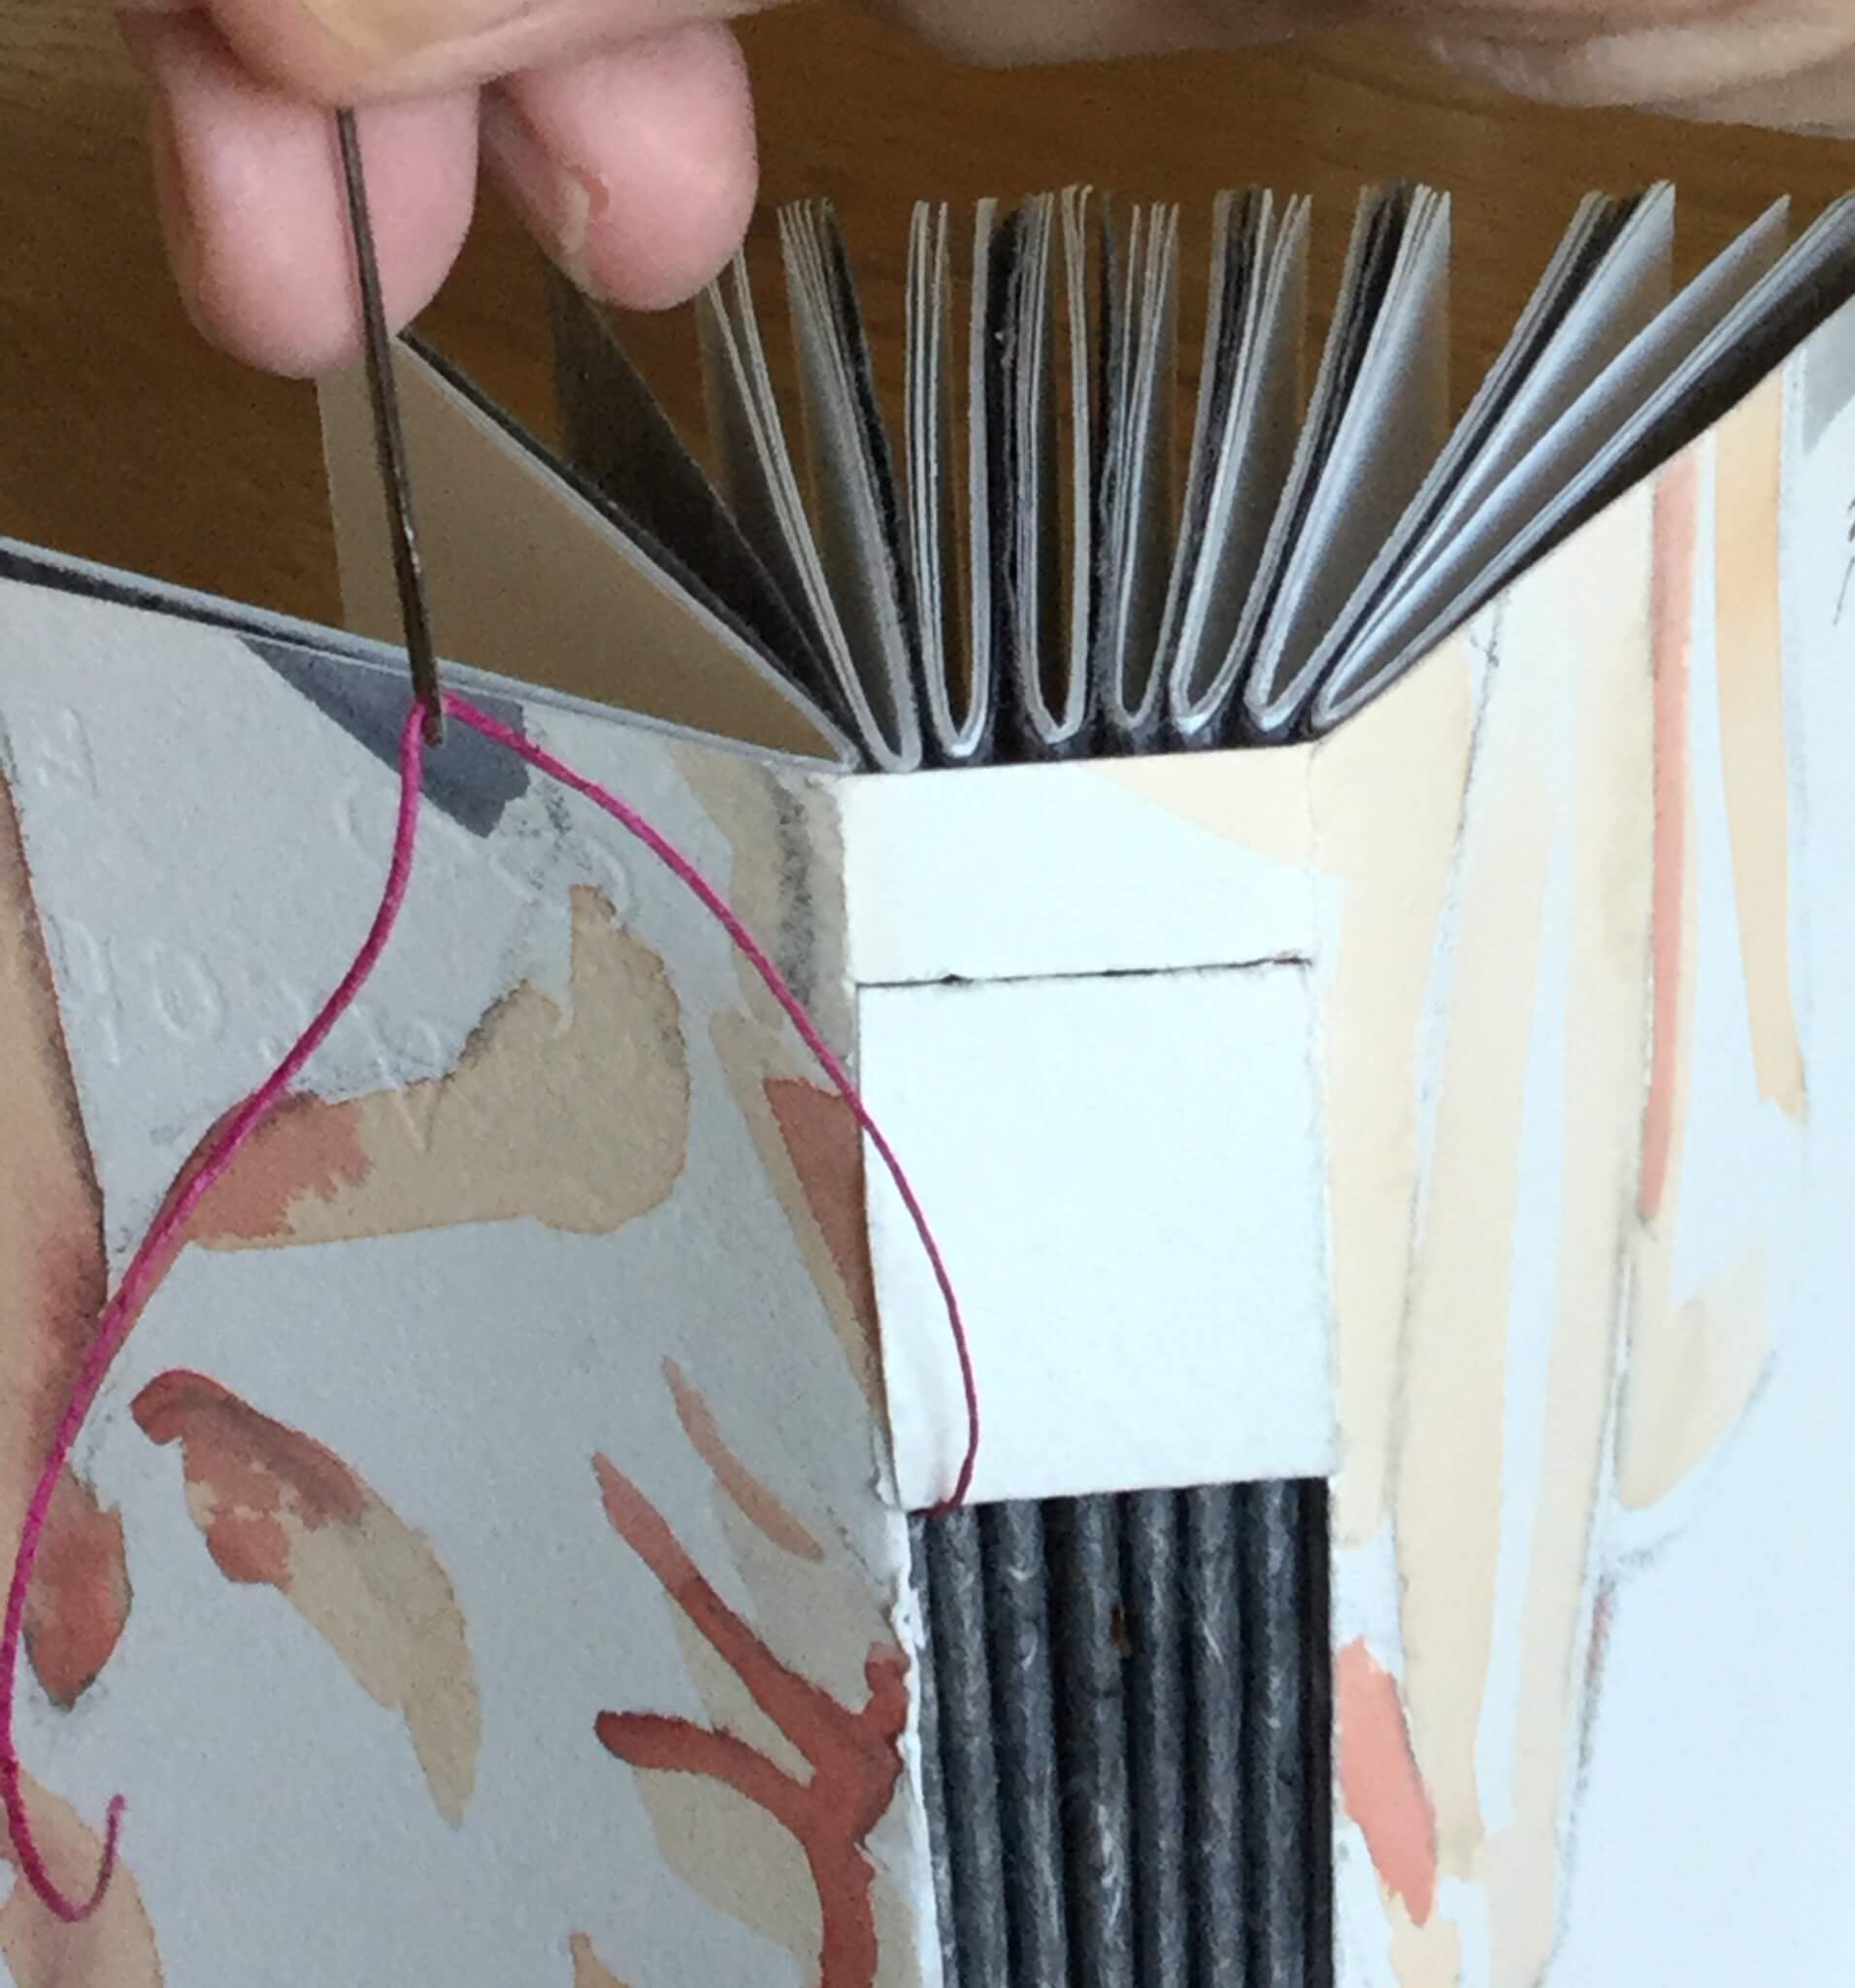
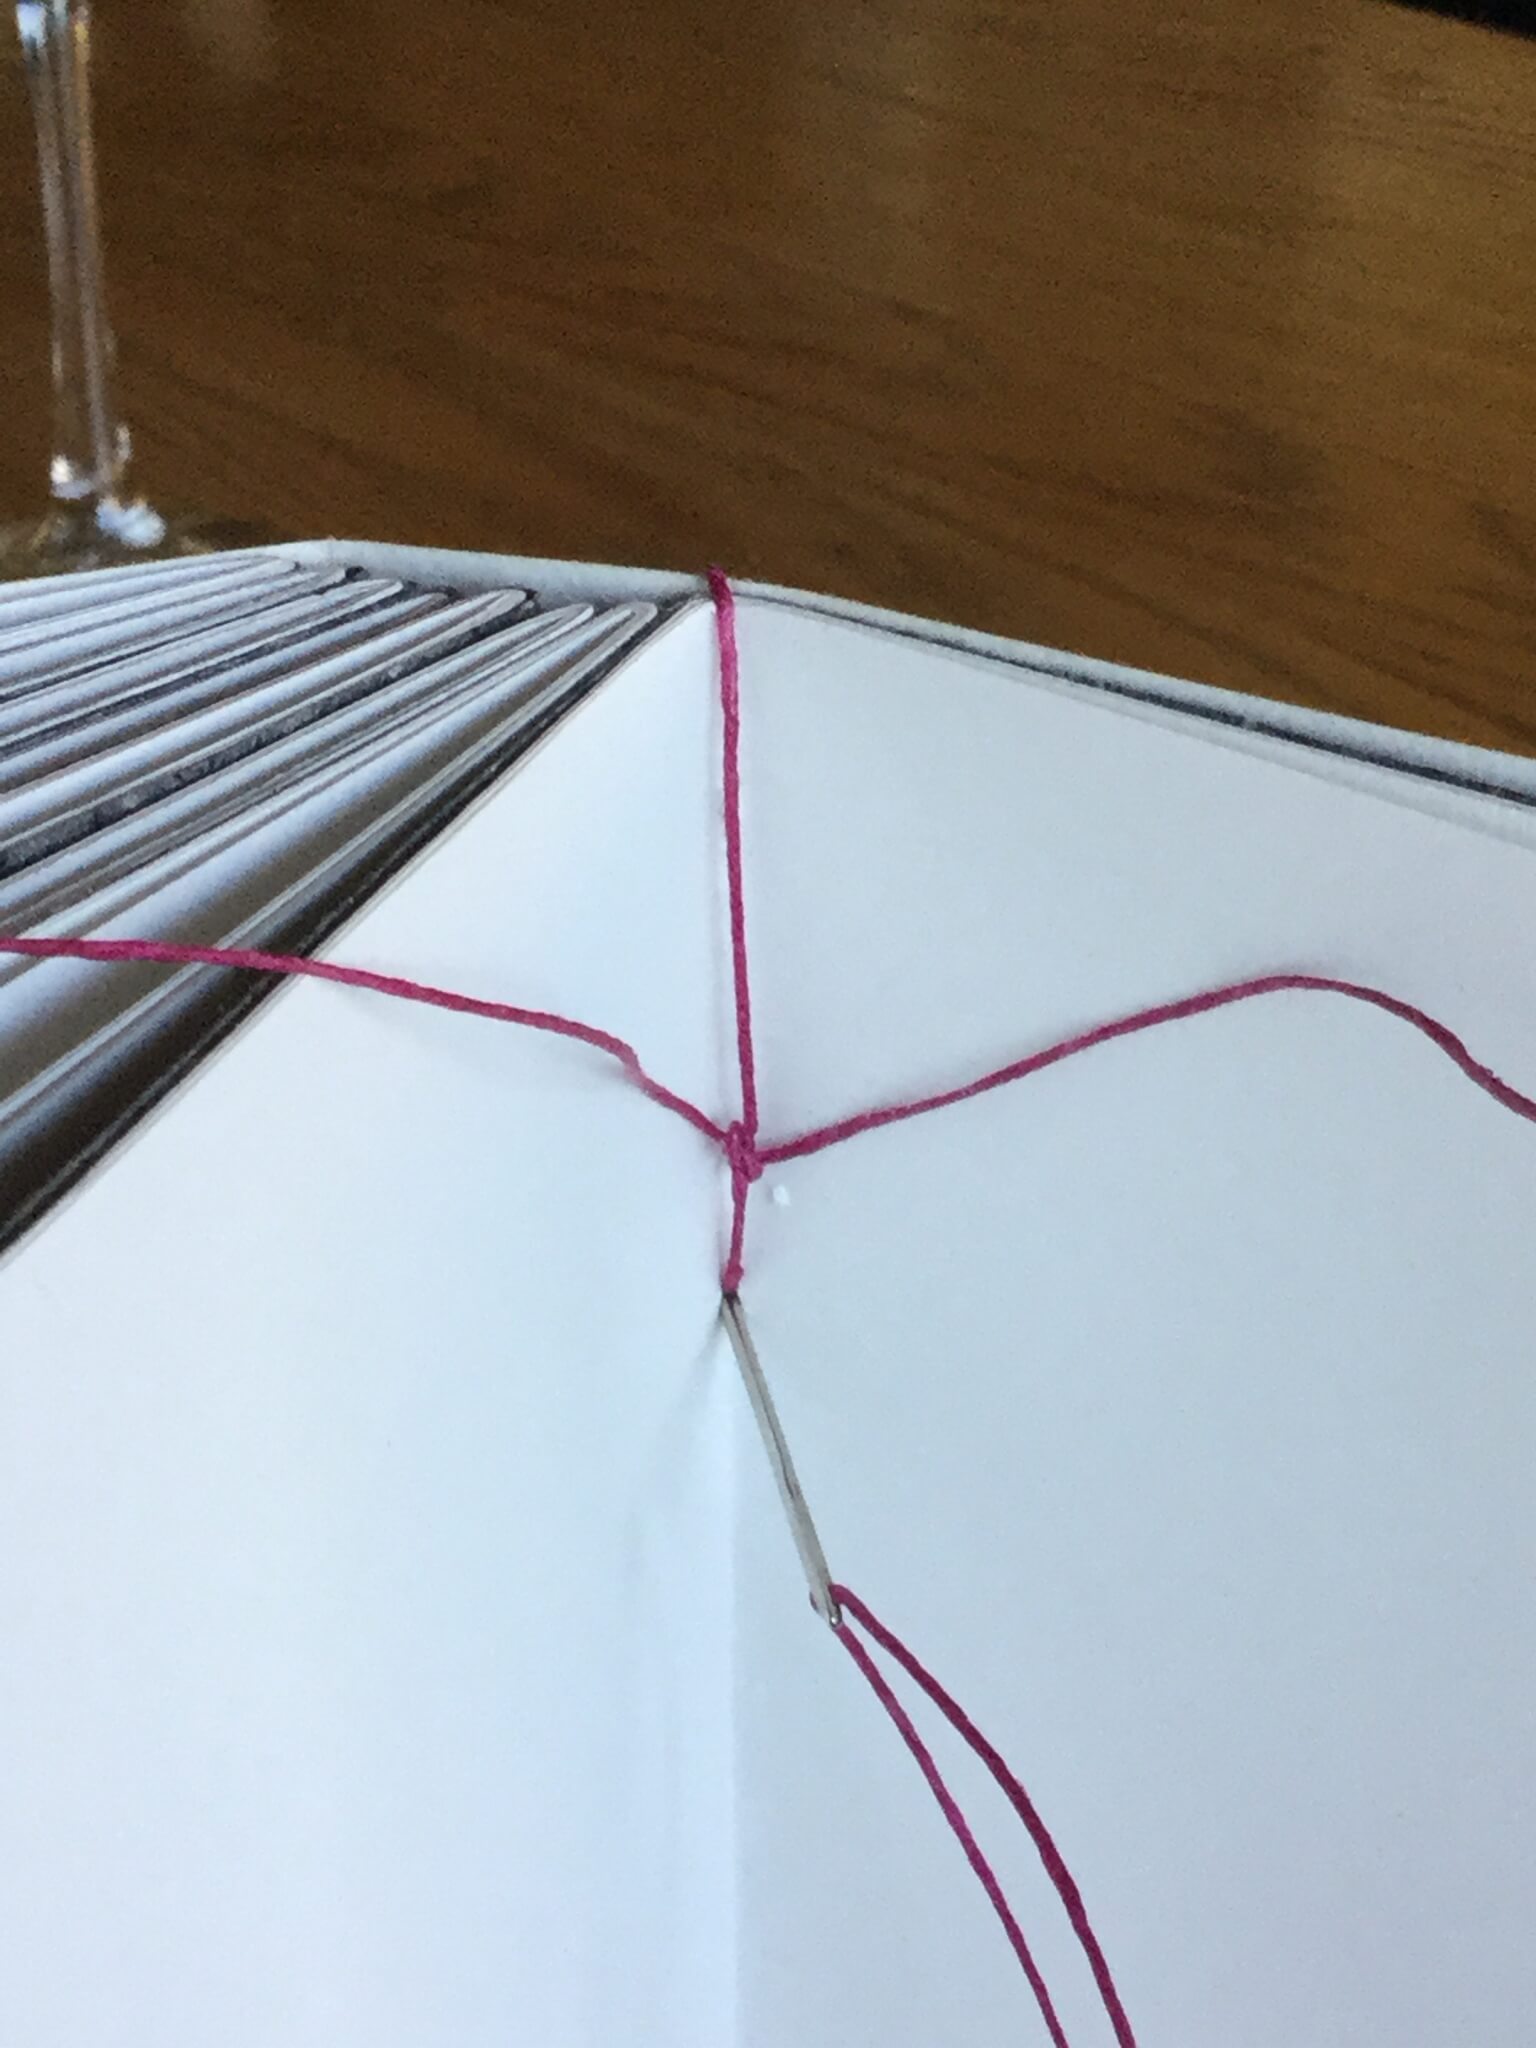
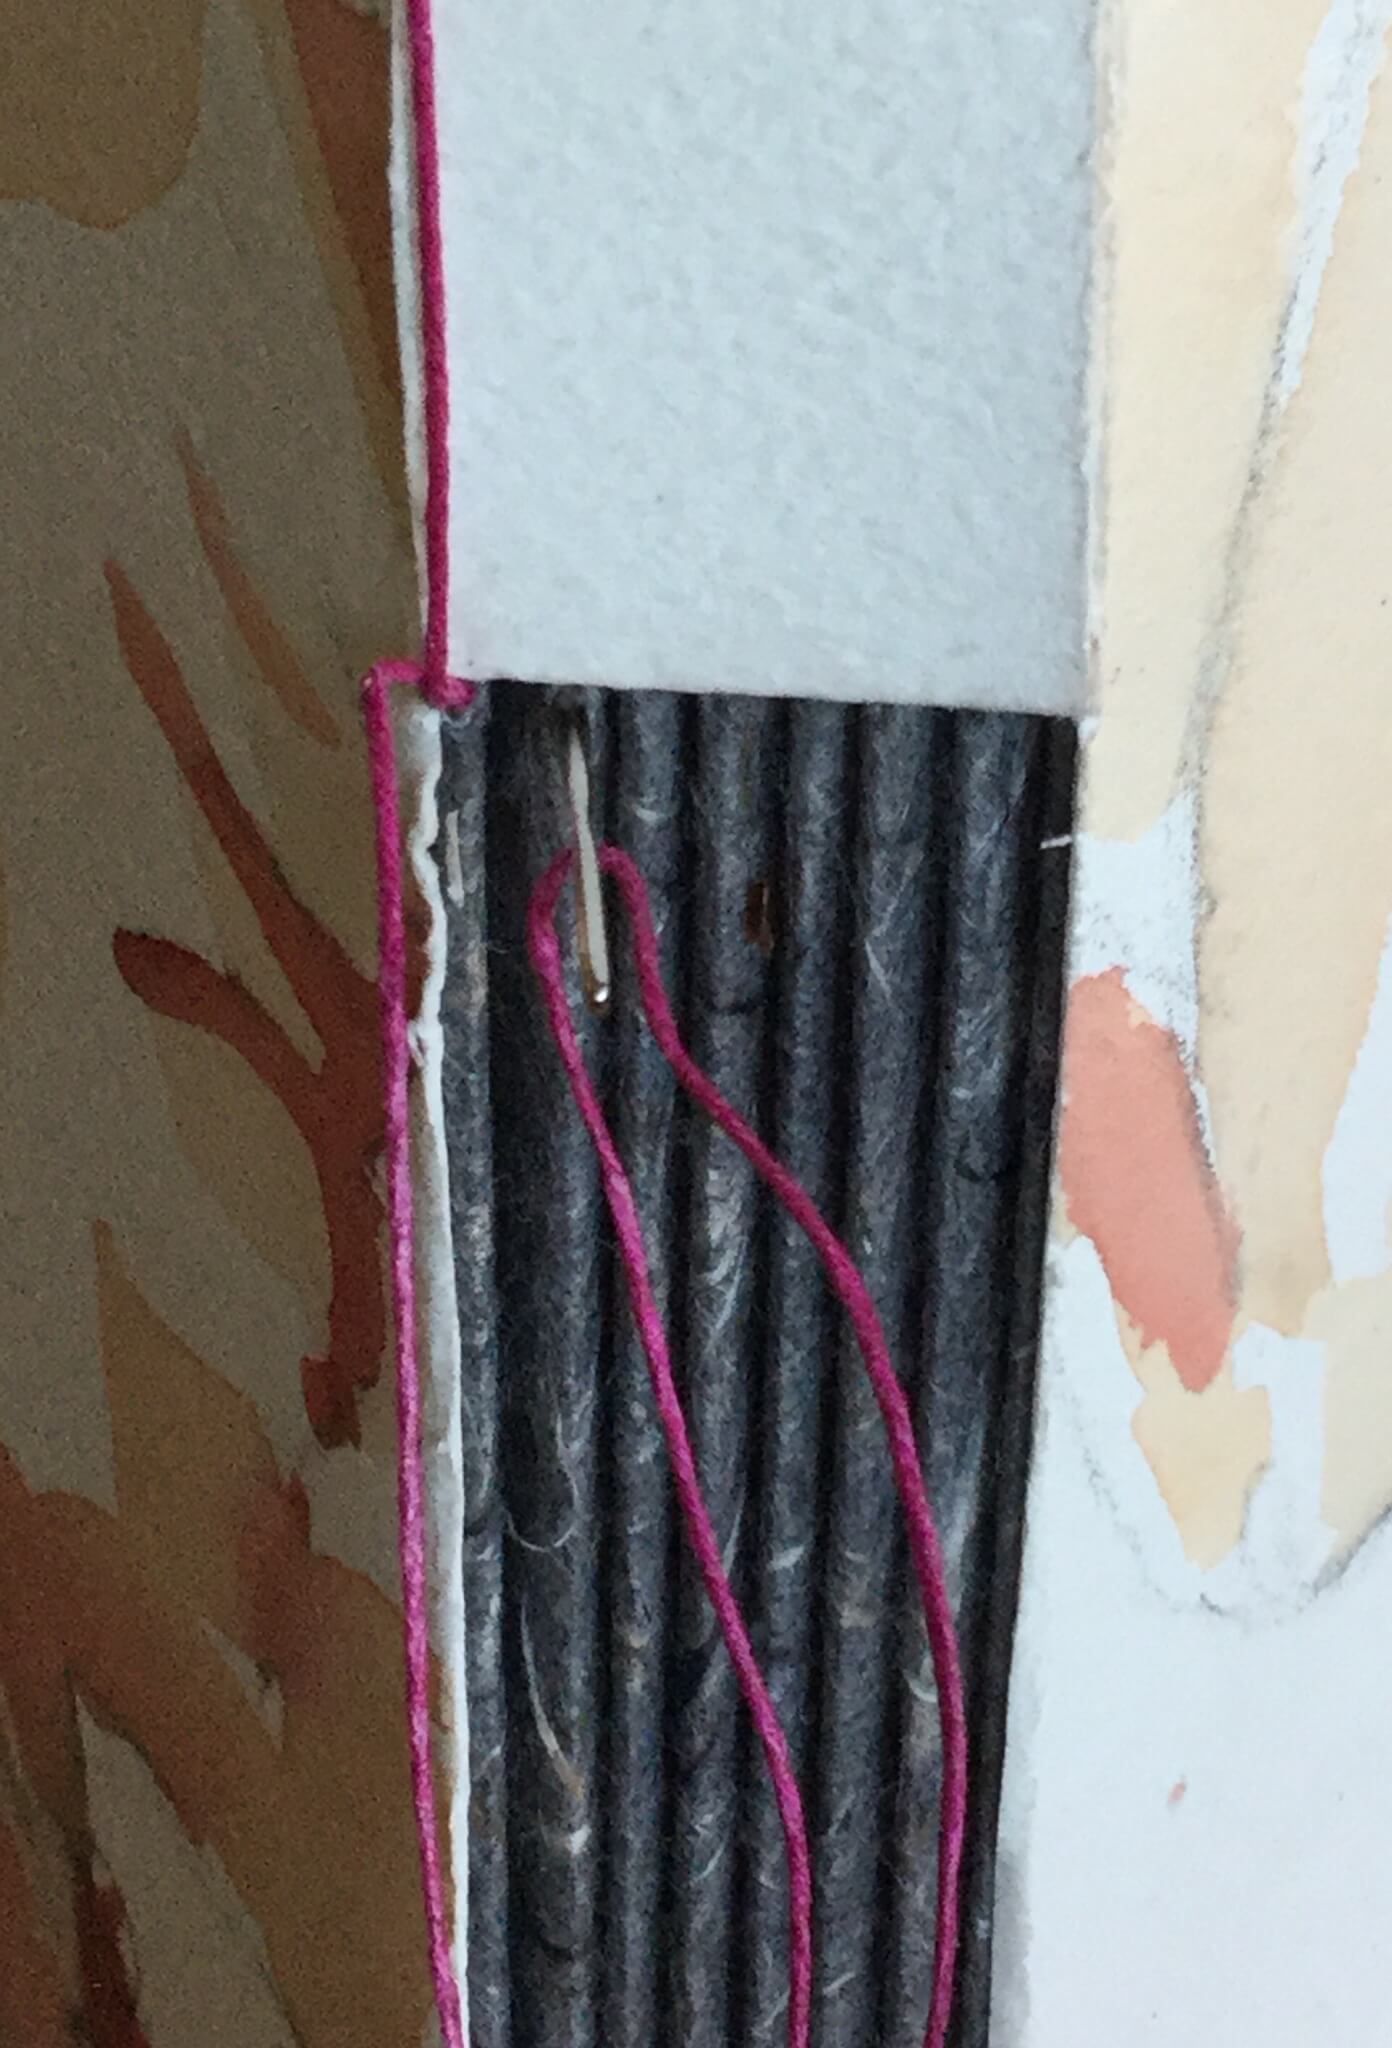
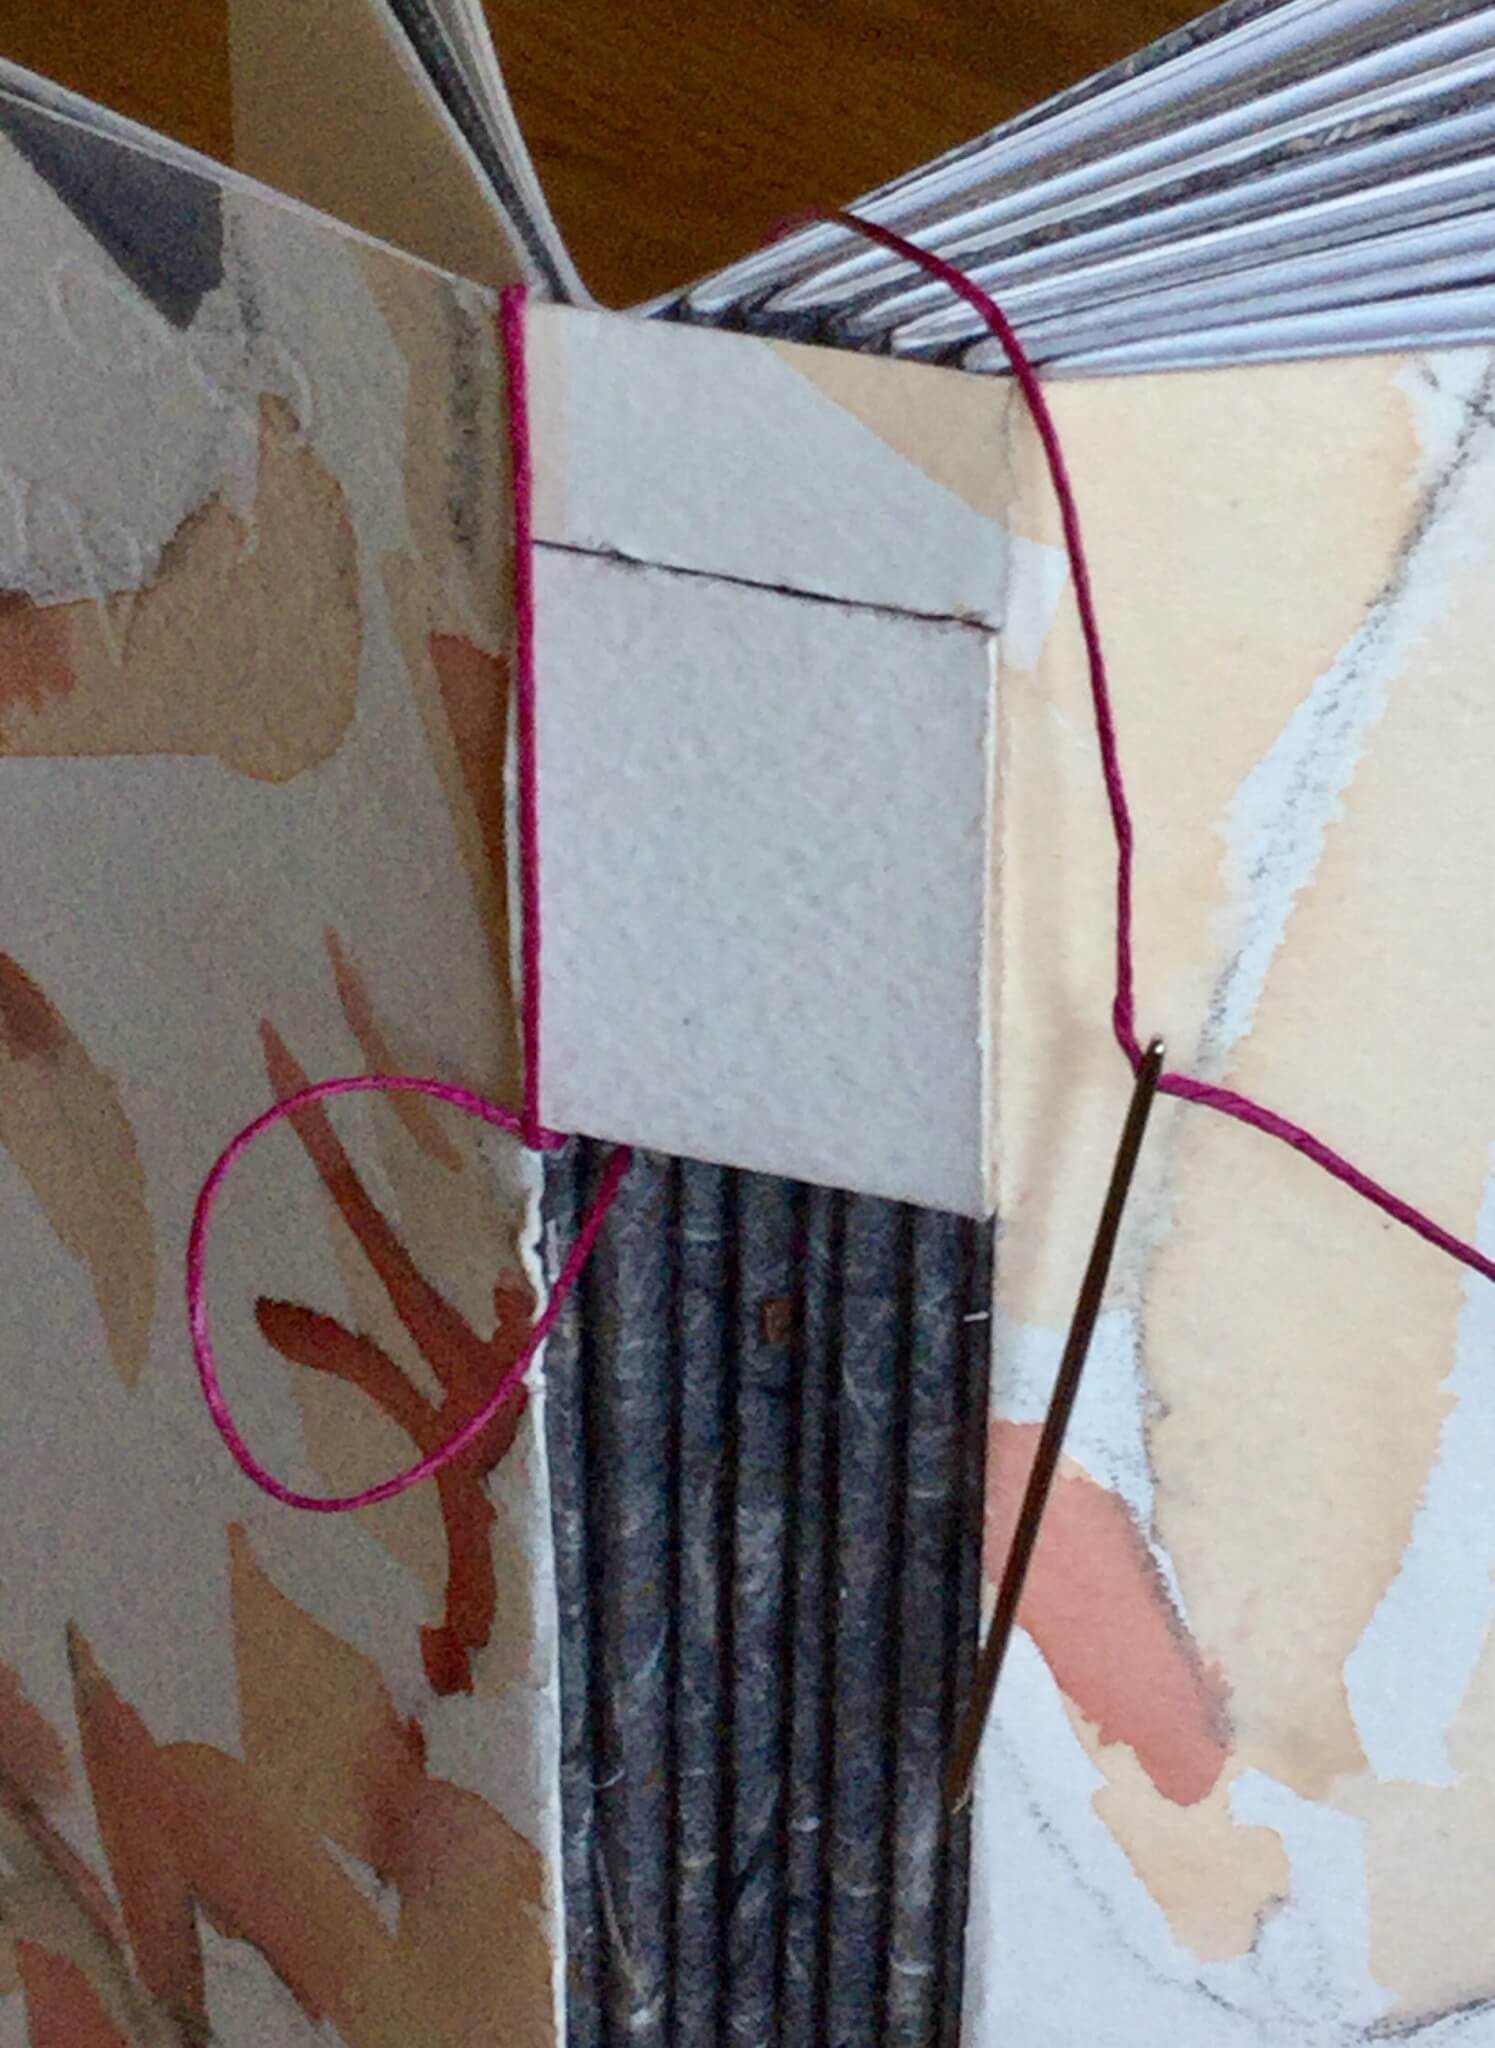
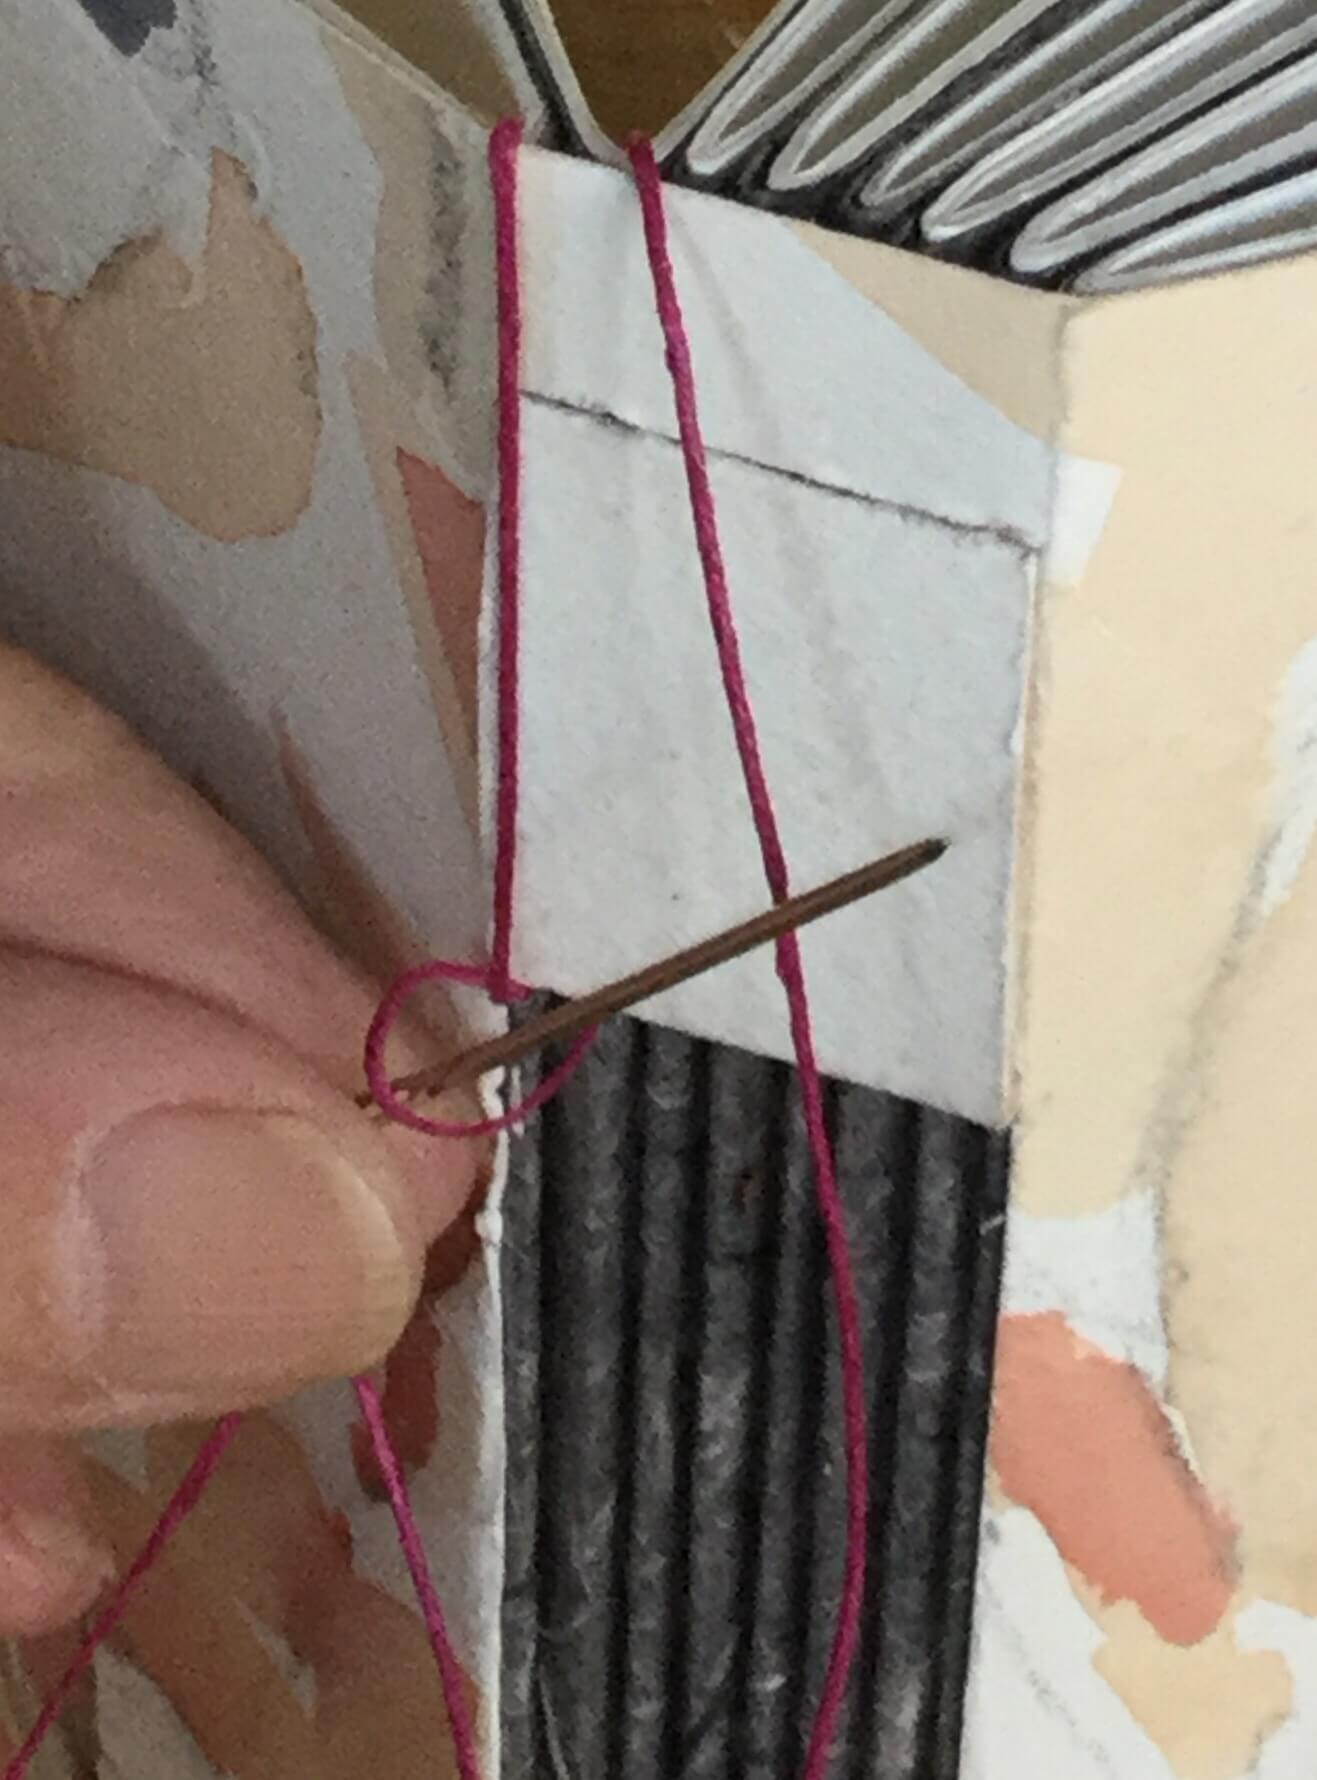
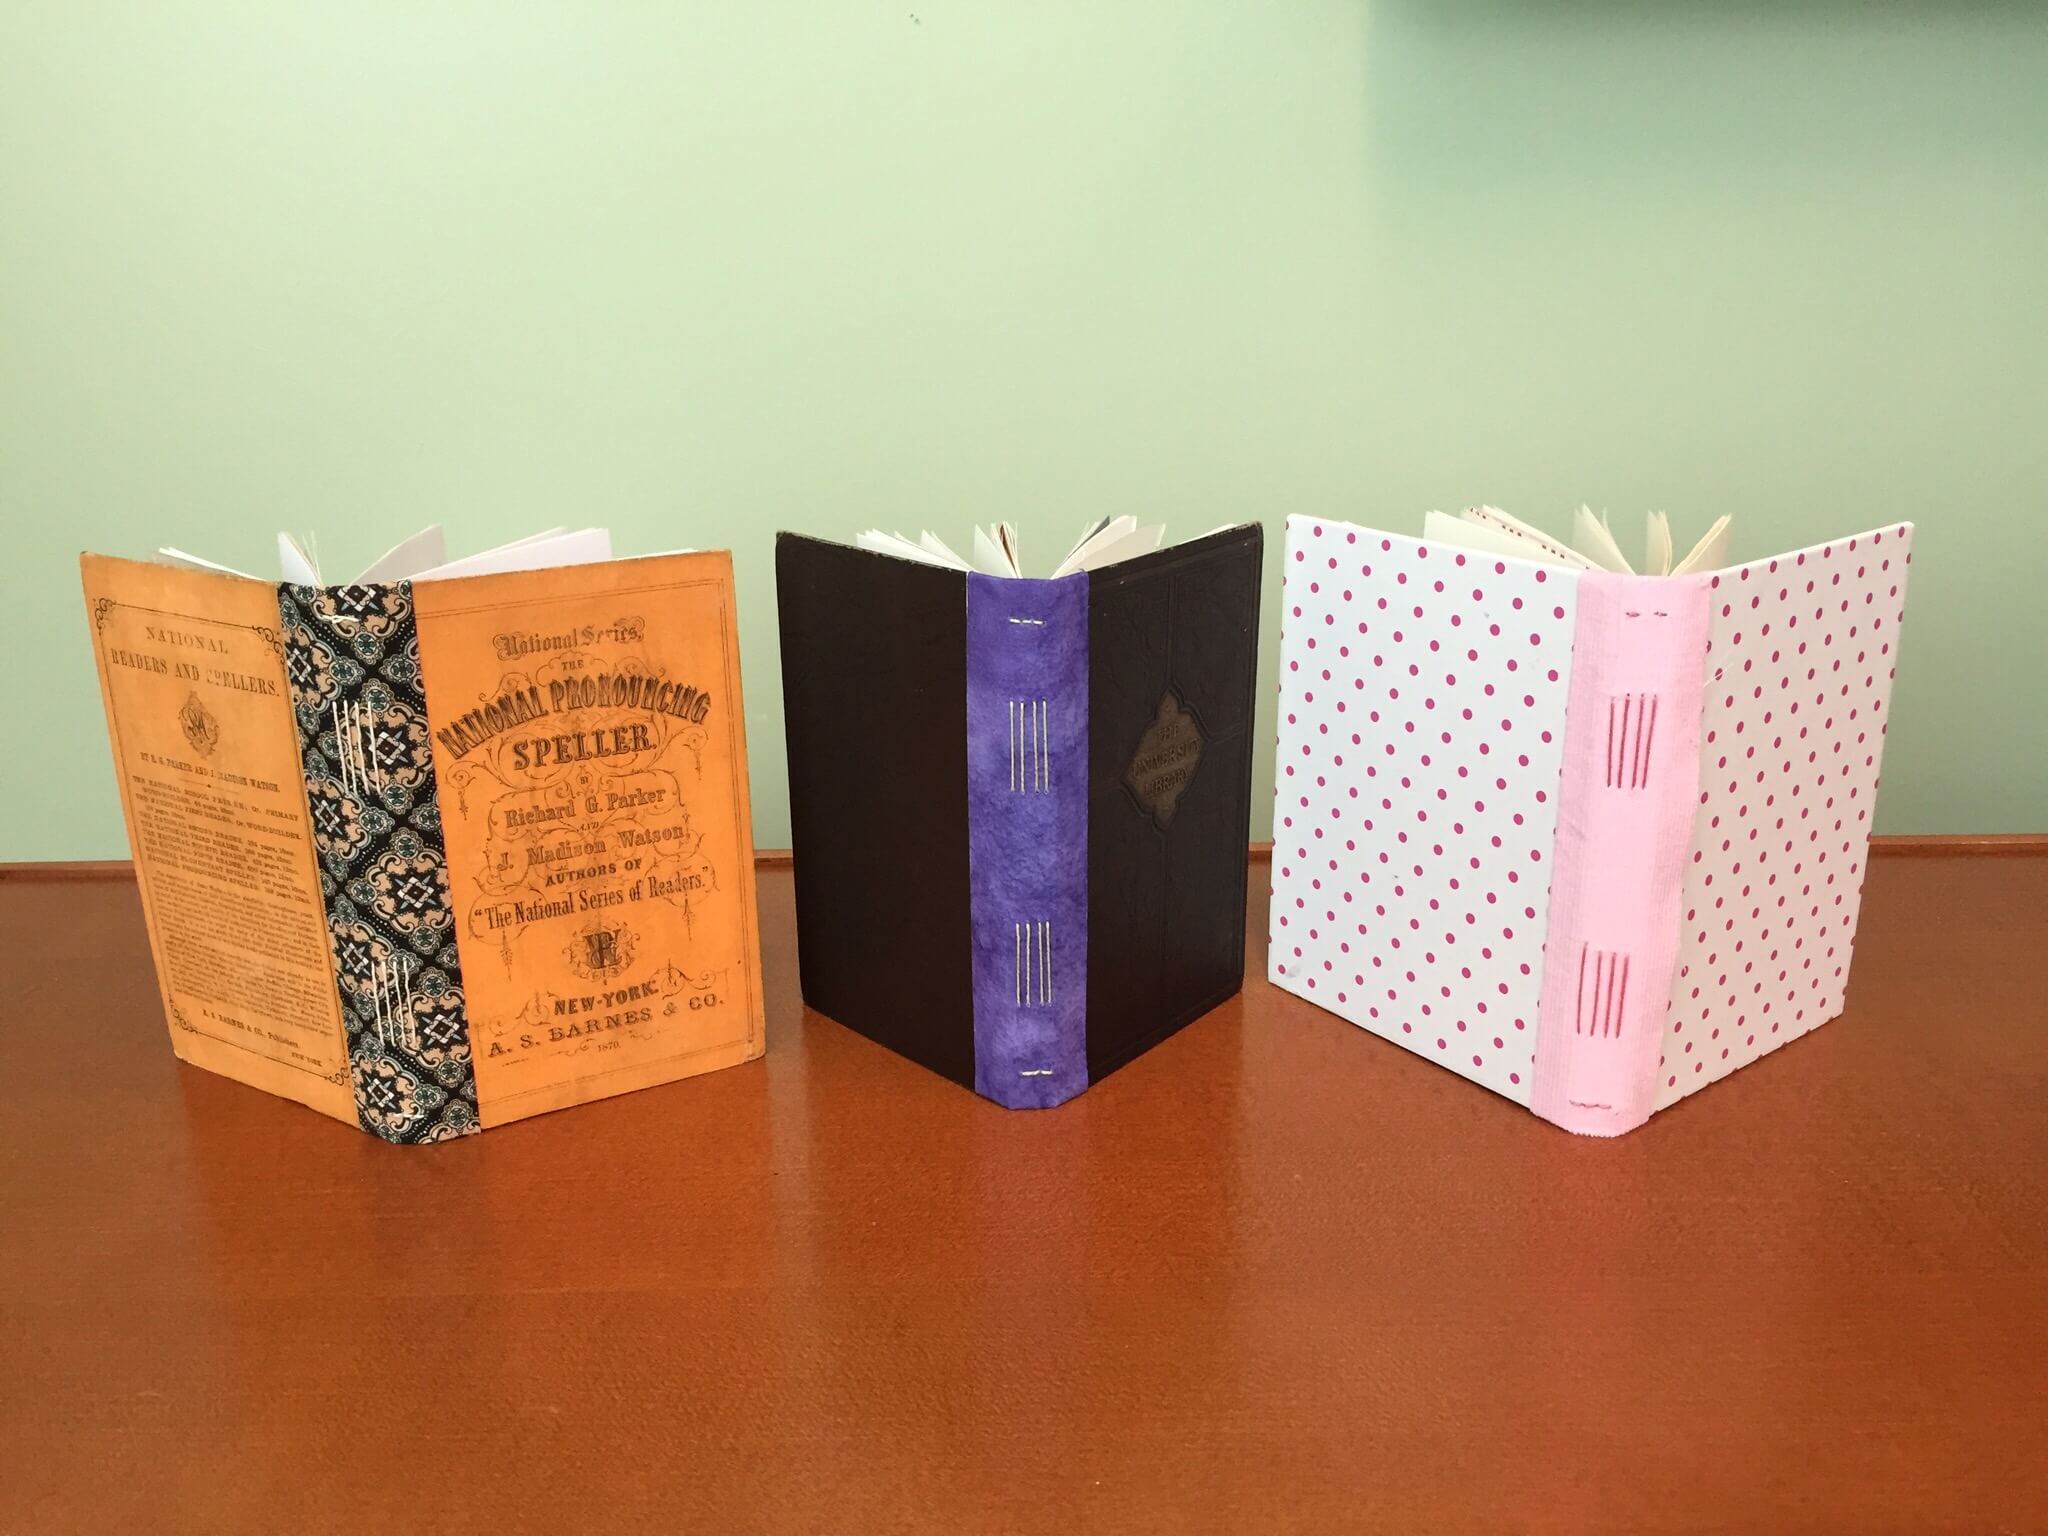
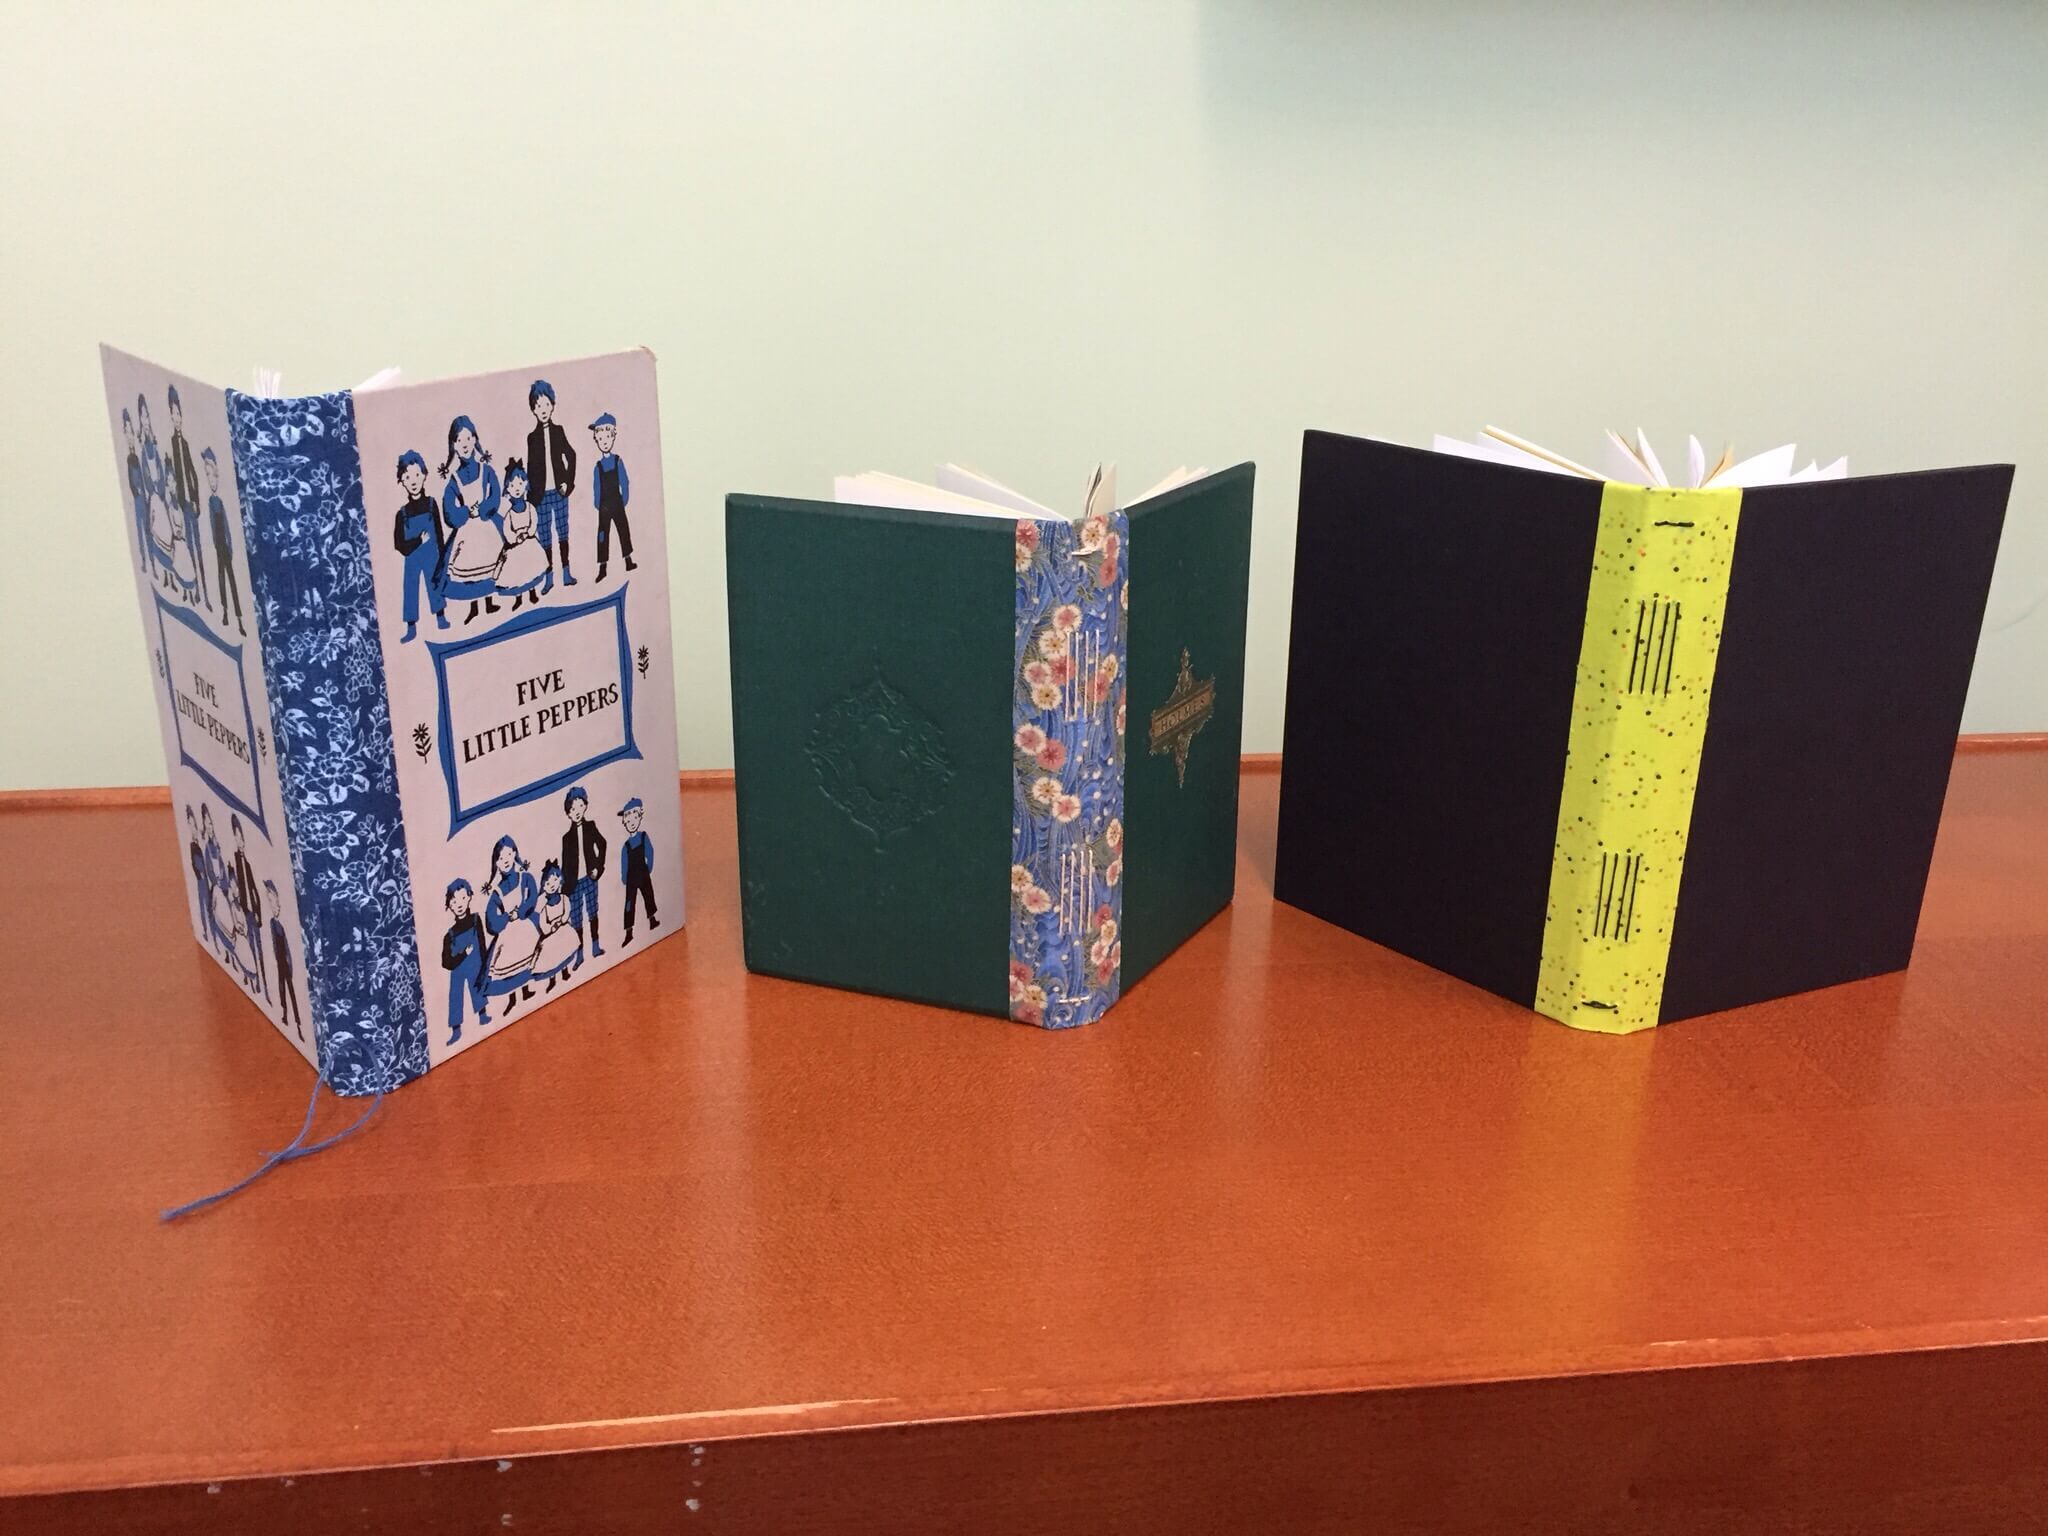
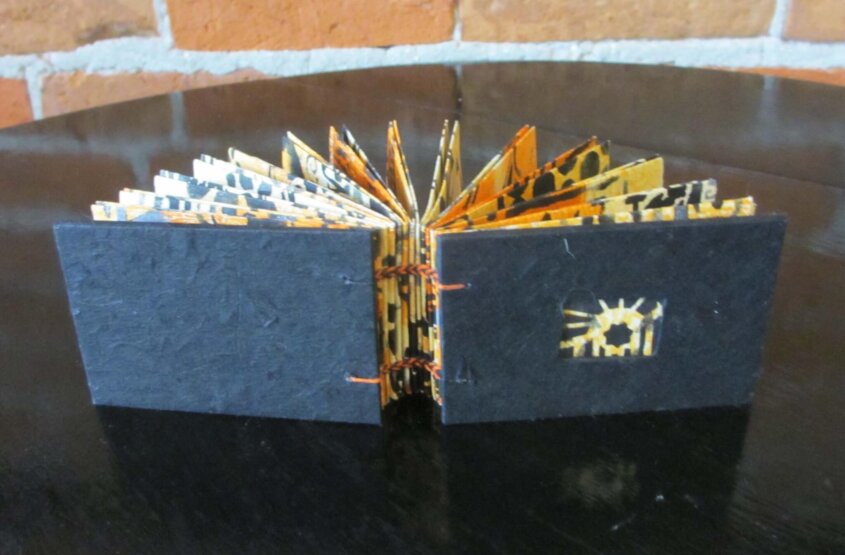
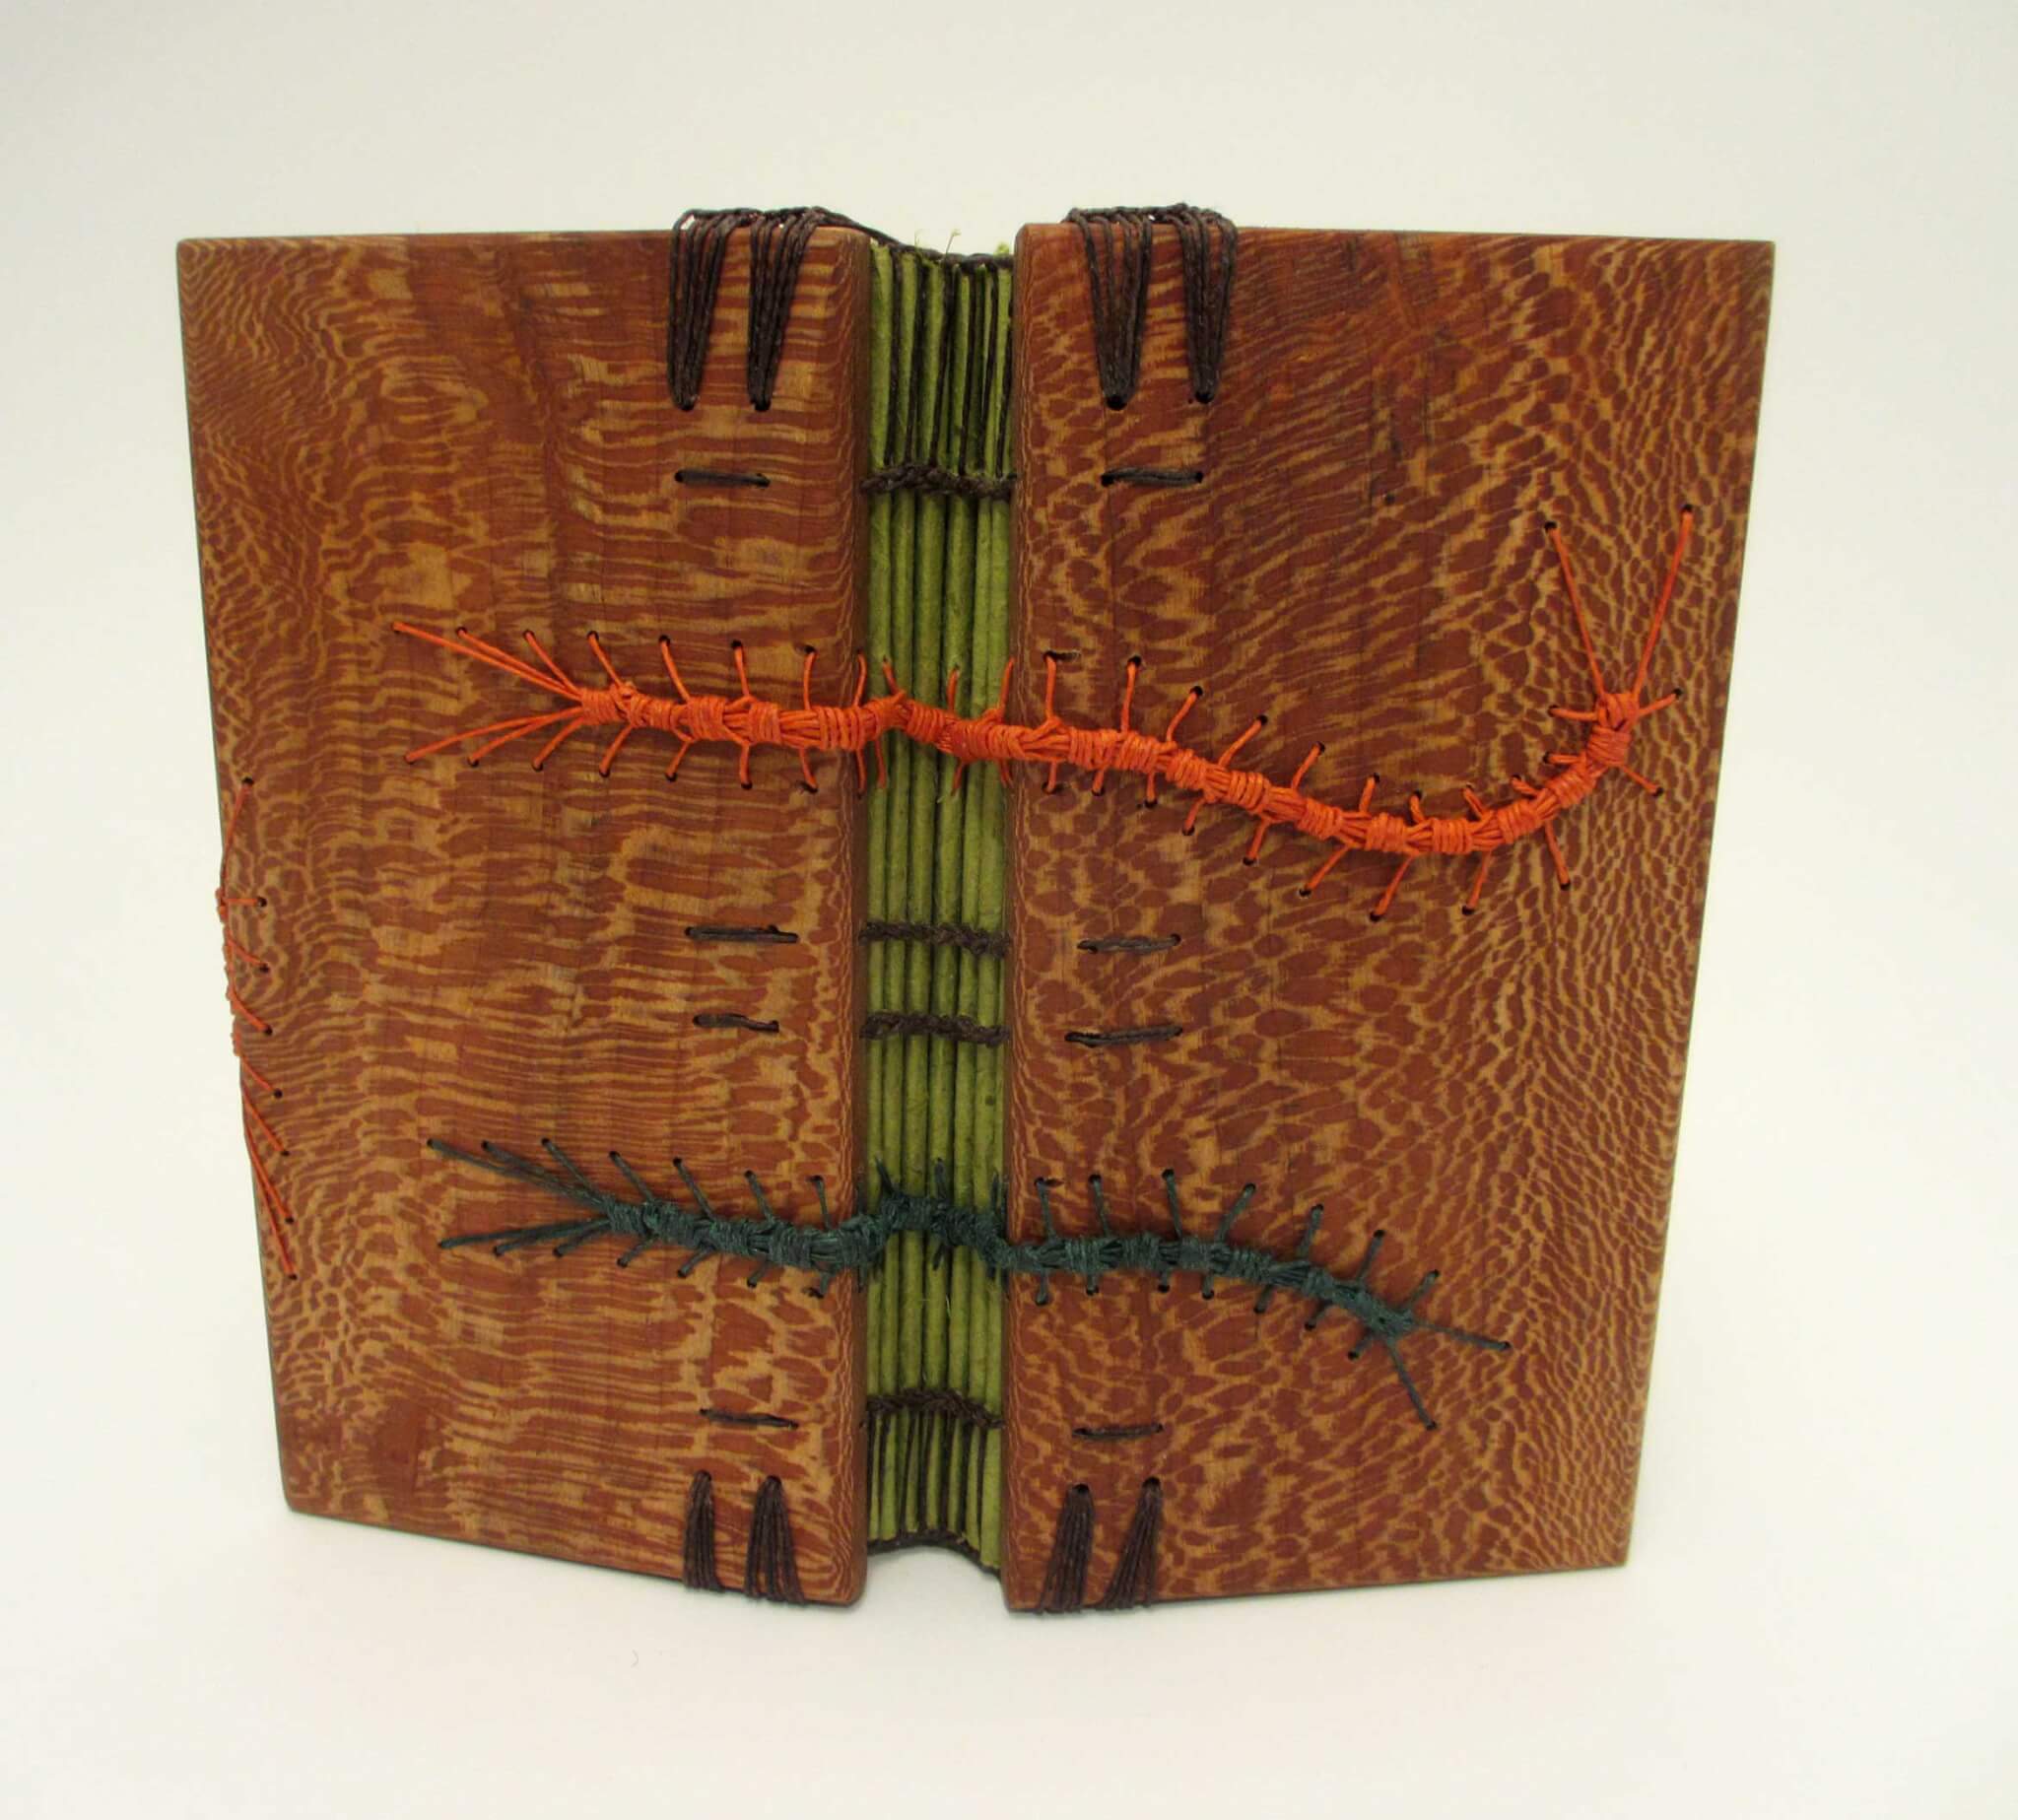
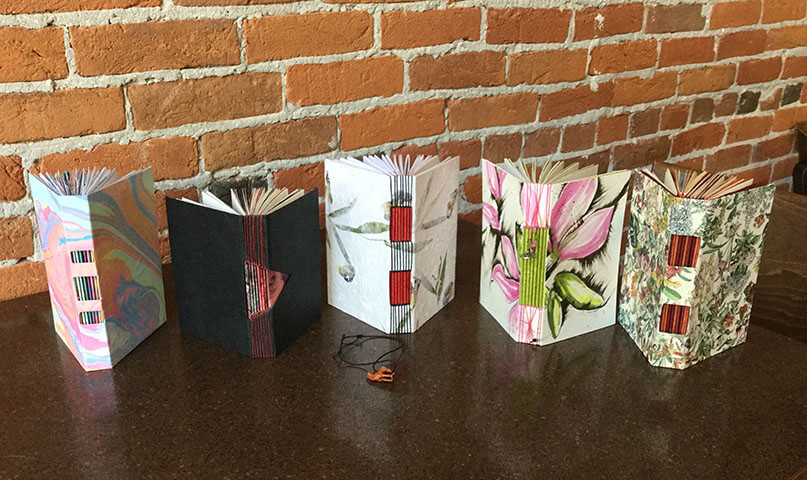
From left to right: Charlene is ready to sew, Pat’s triangle opening is beautifully sewn, Edge decided to sew the middle section trying a Buttonhole Stitch rather than a longstitch, Donna used a bowtie to pull threads together and she added beads, and Dolly is ready to sew. In class I demonstrated a simple rectangular opening so they all headed off on an adventure with their books.

Buttonhole

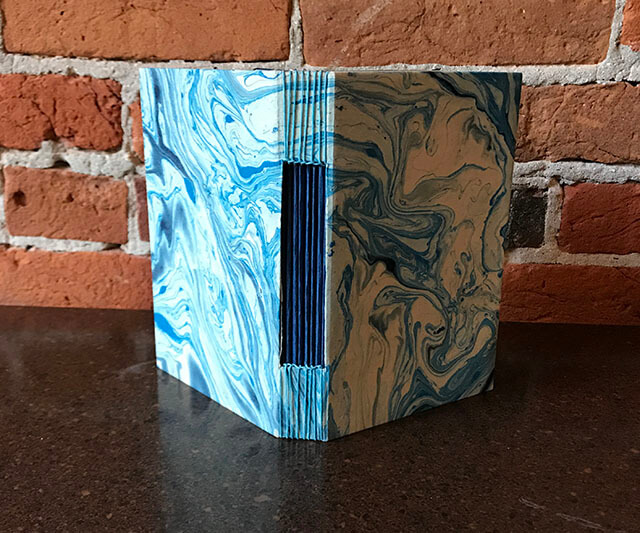
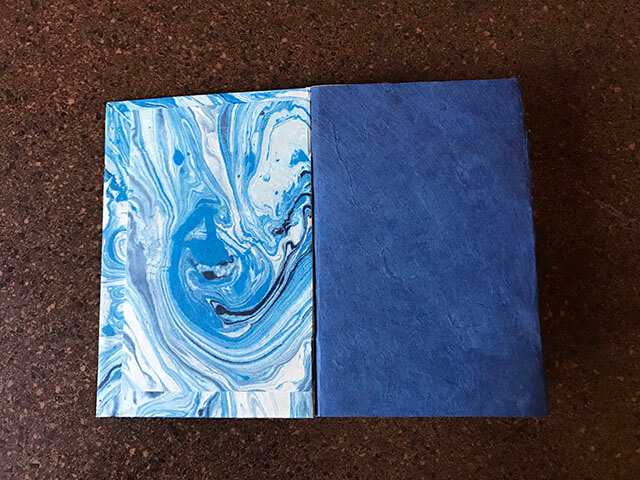
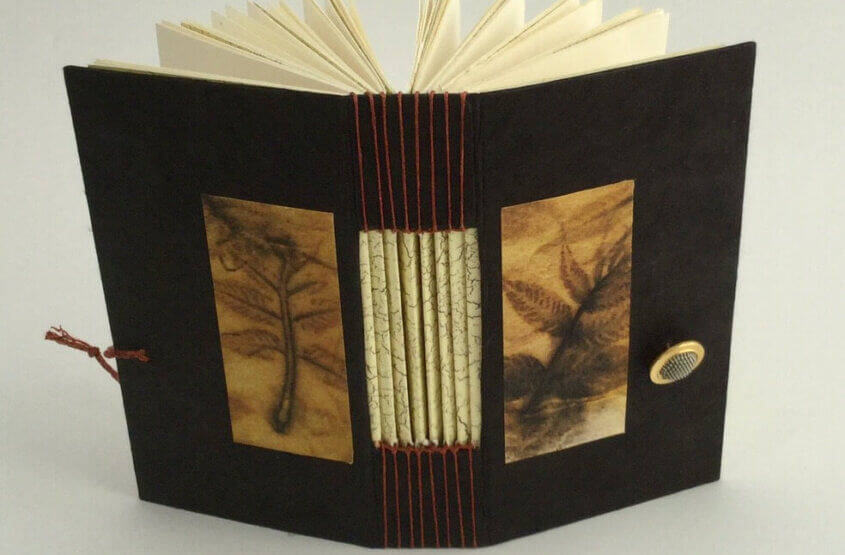
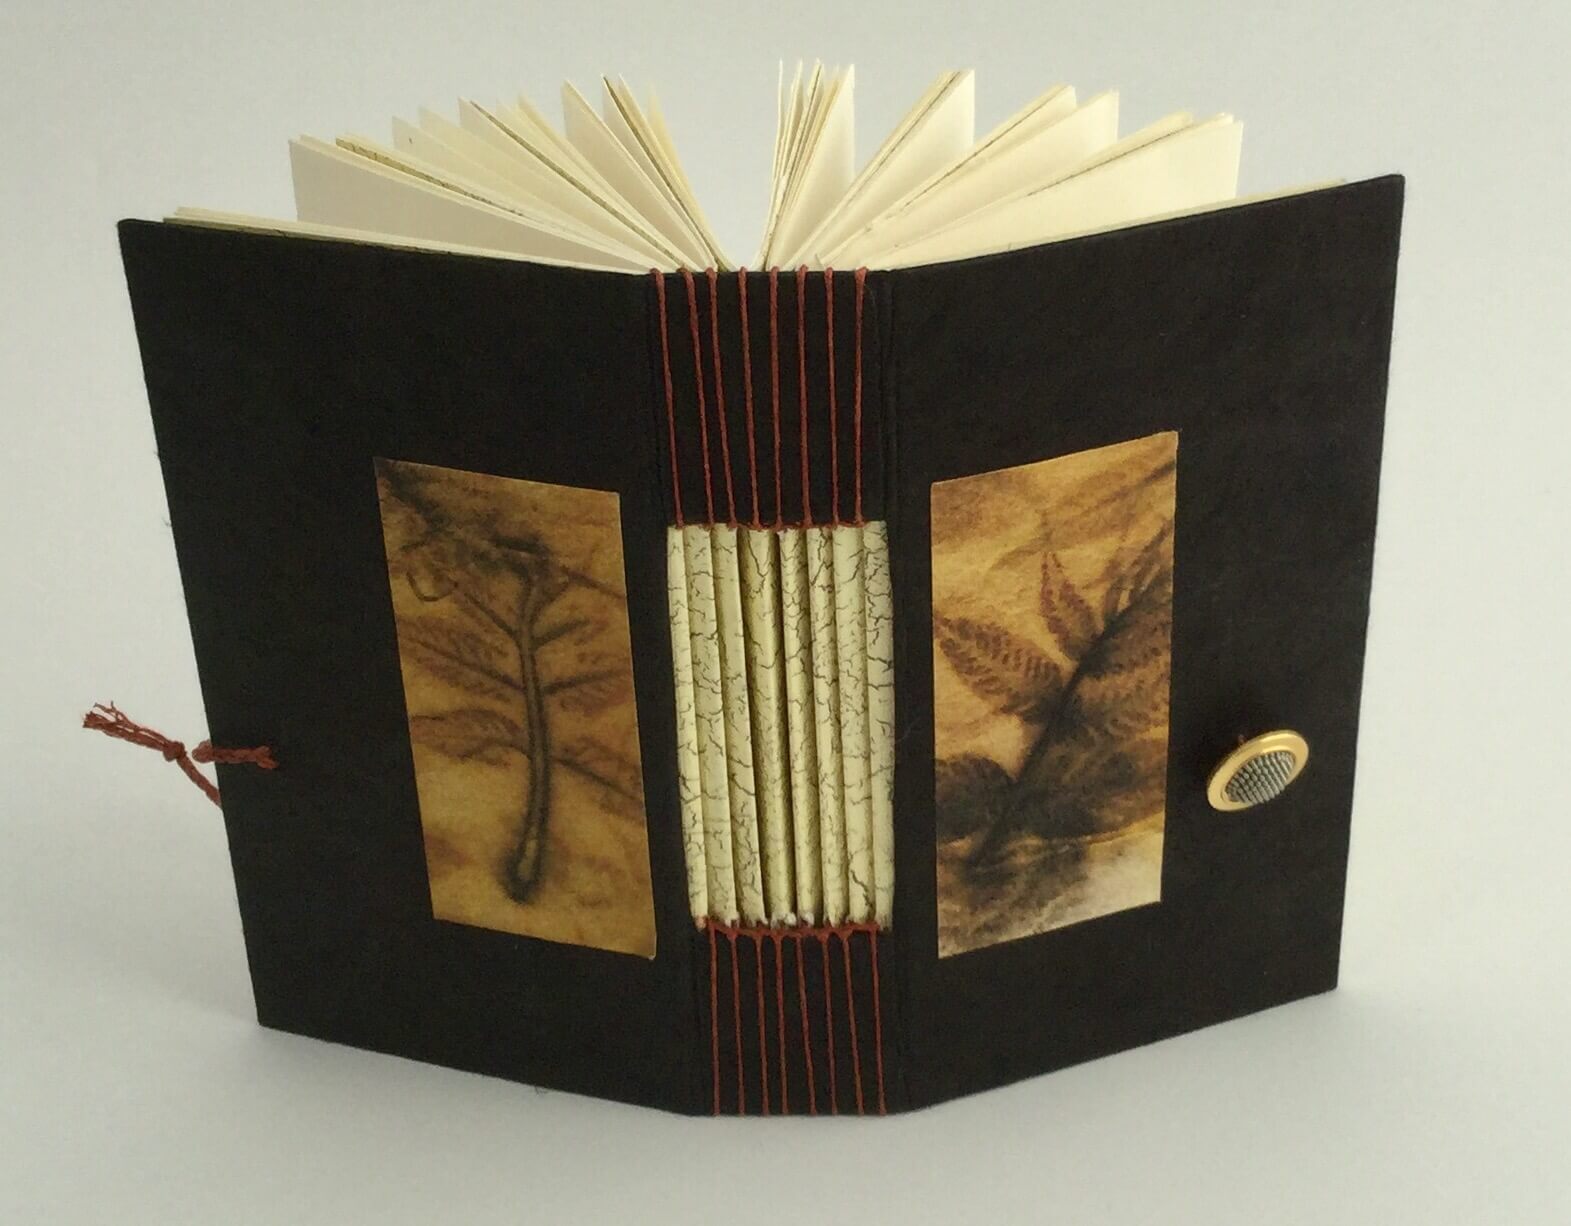
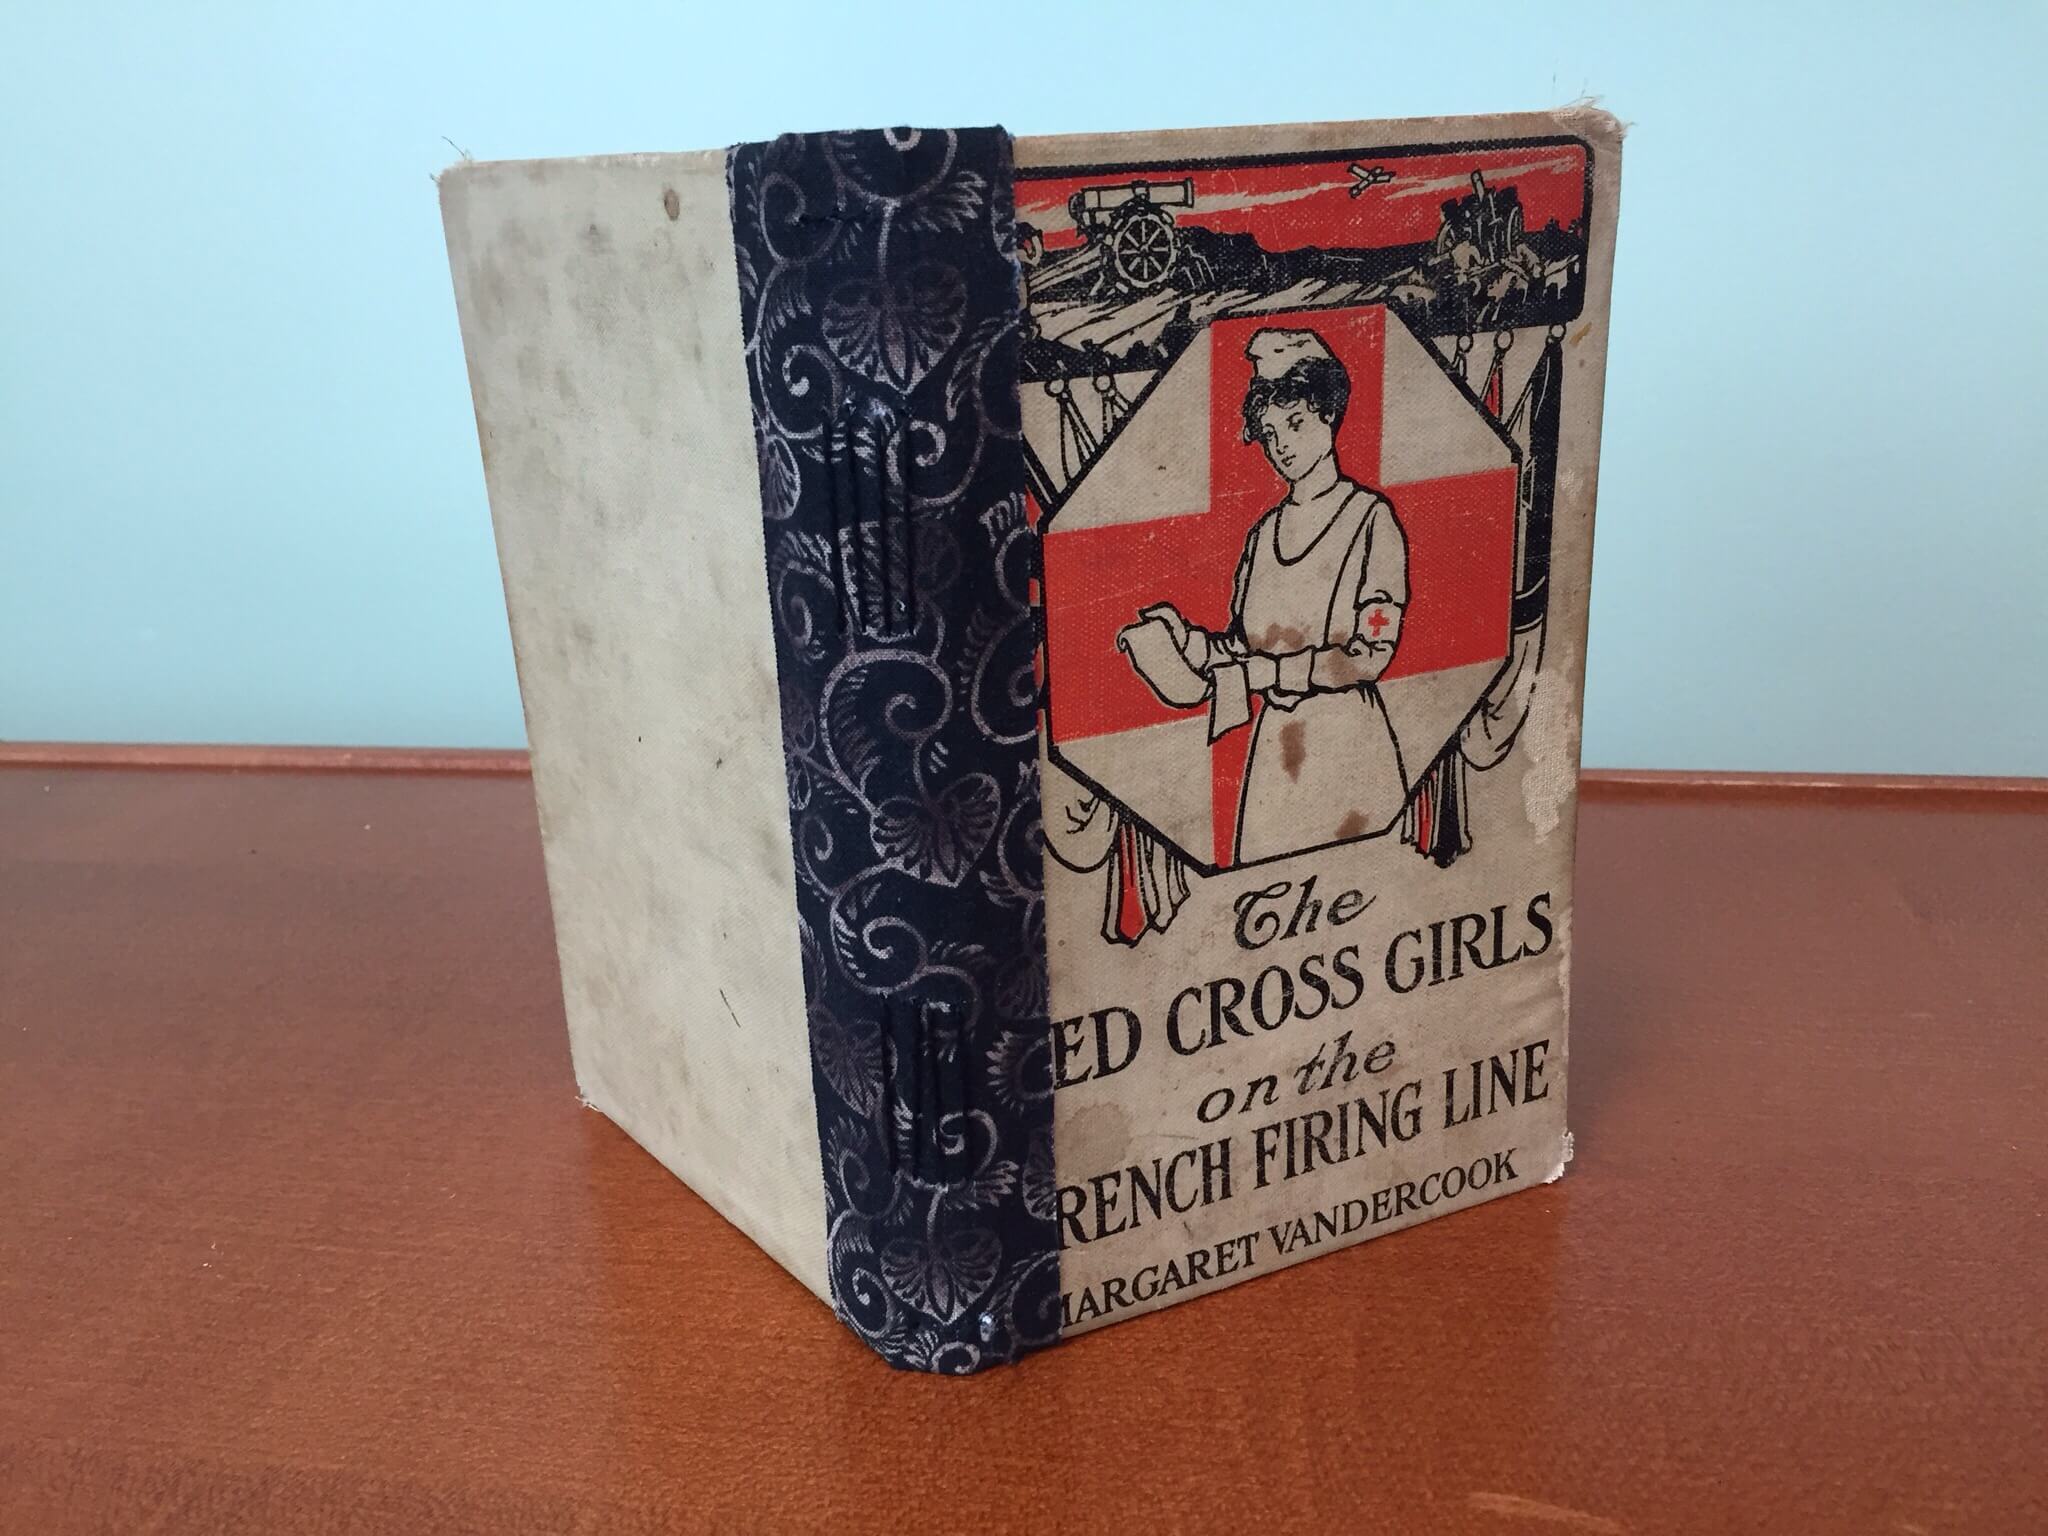
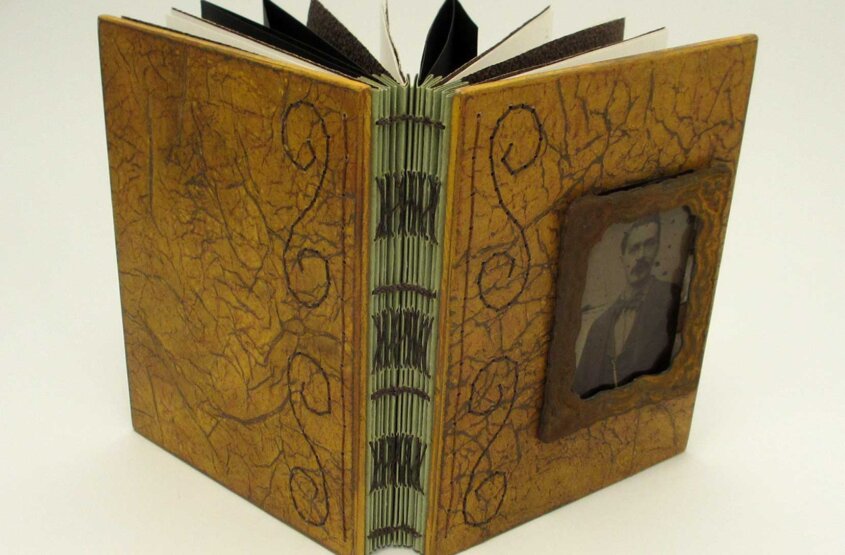
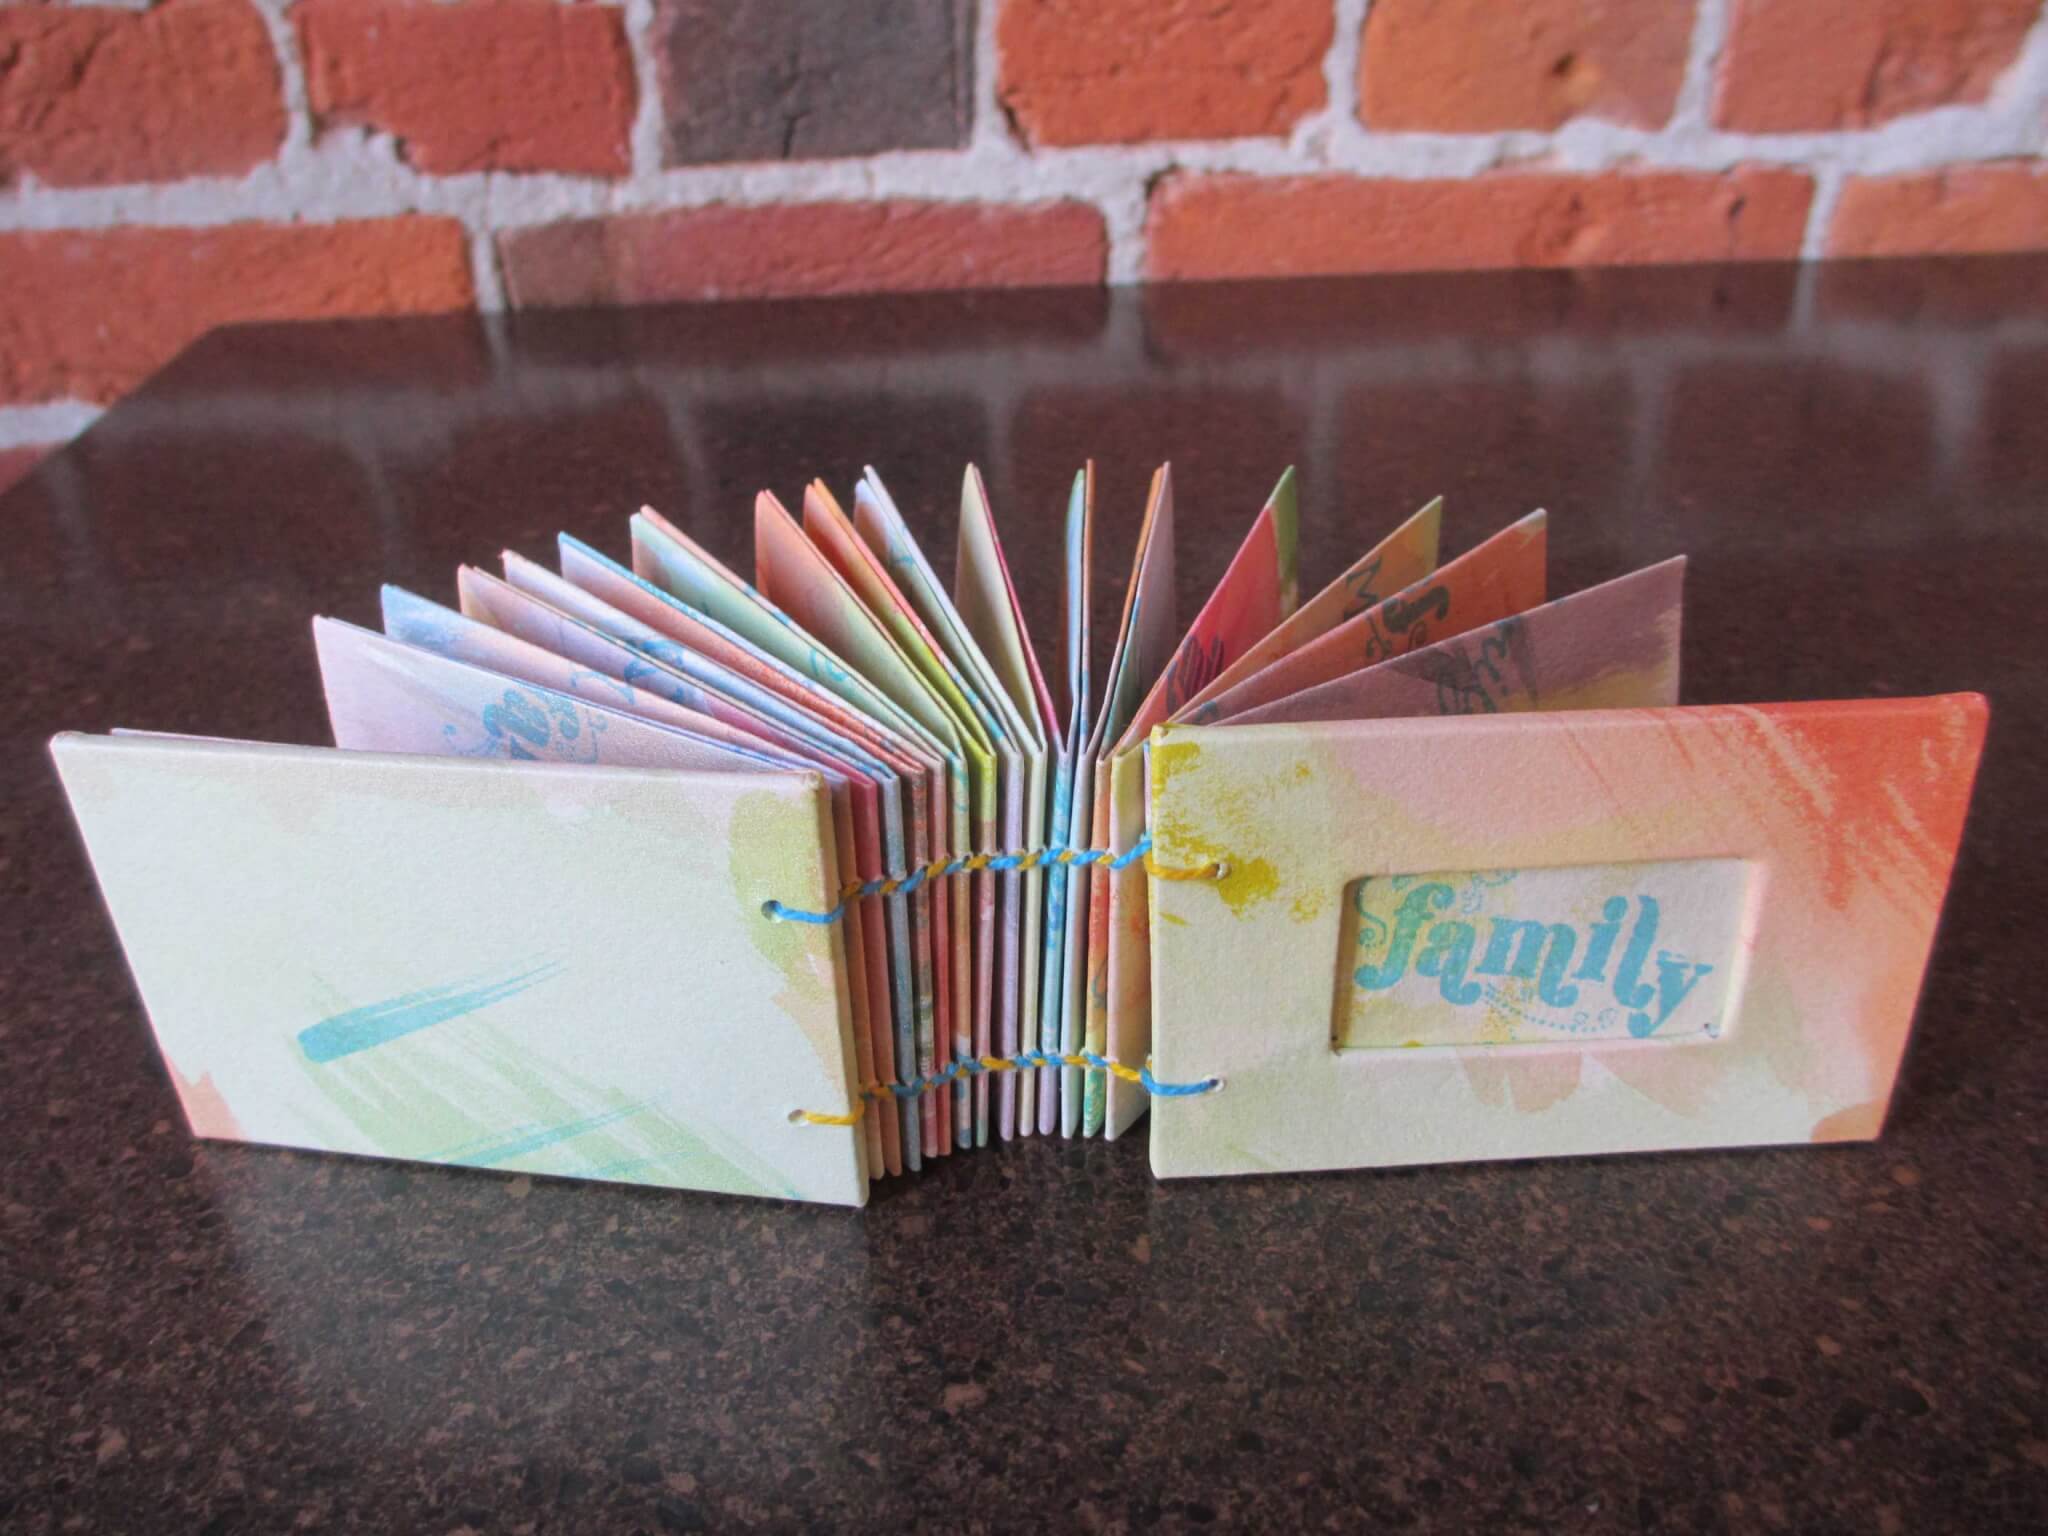
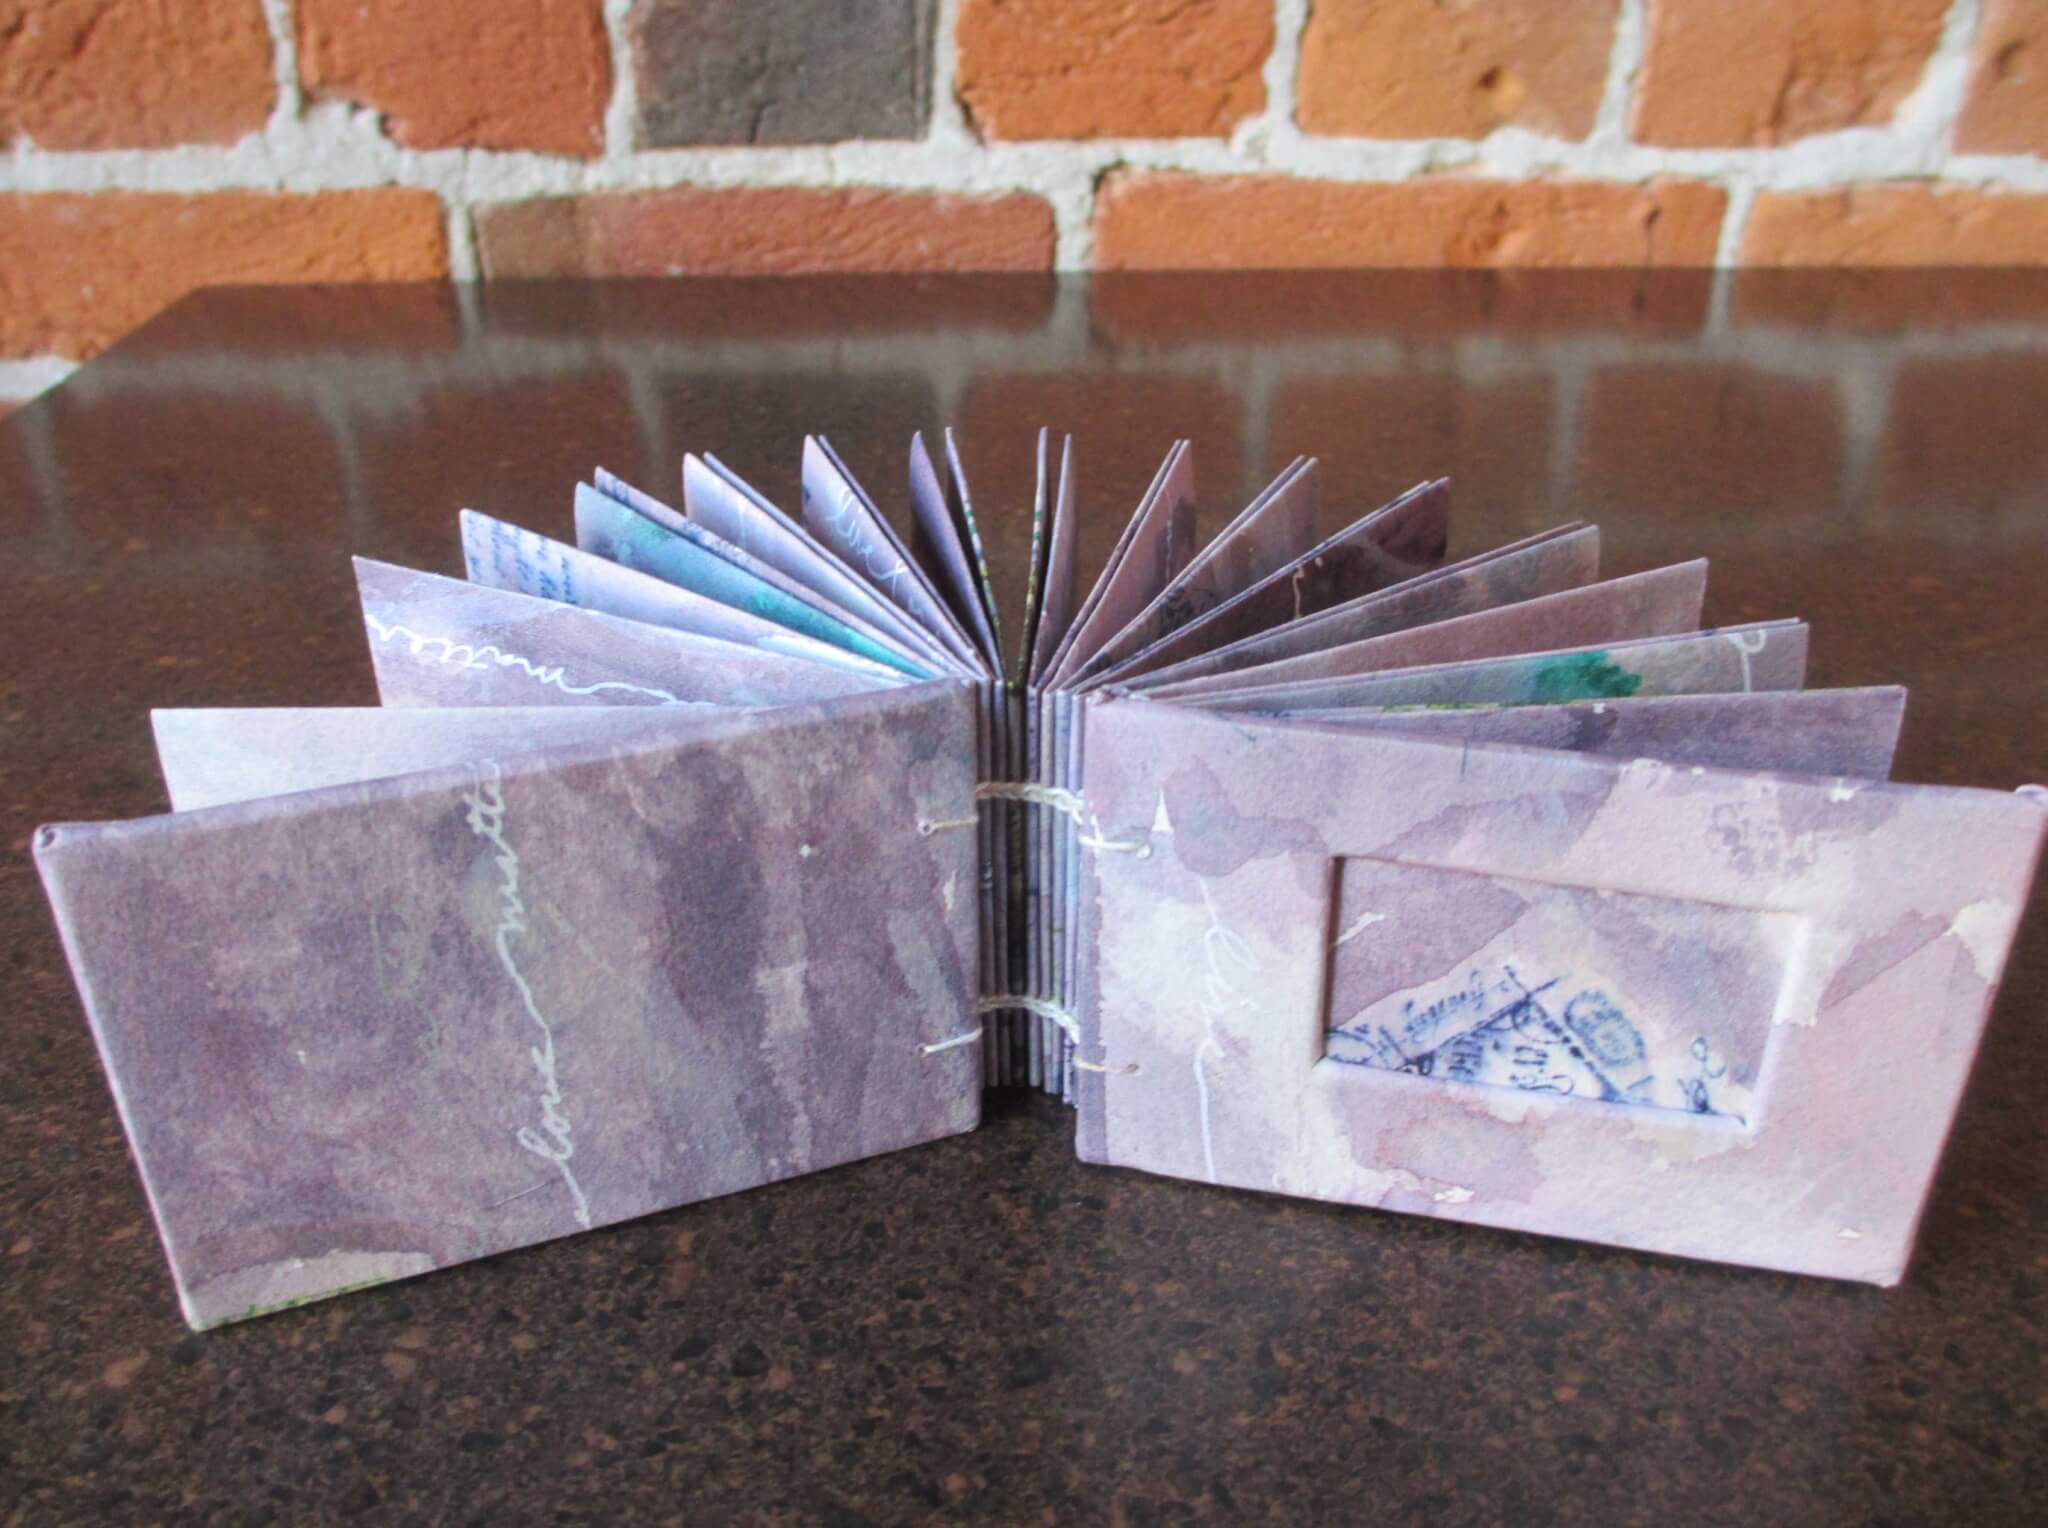
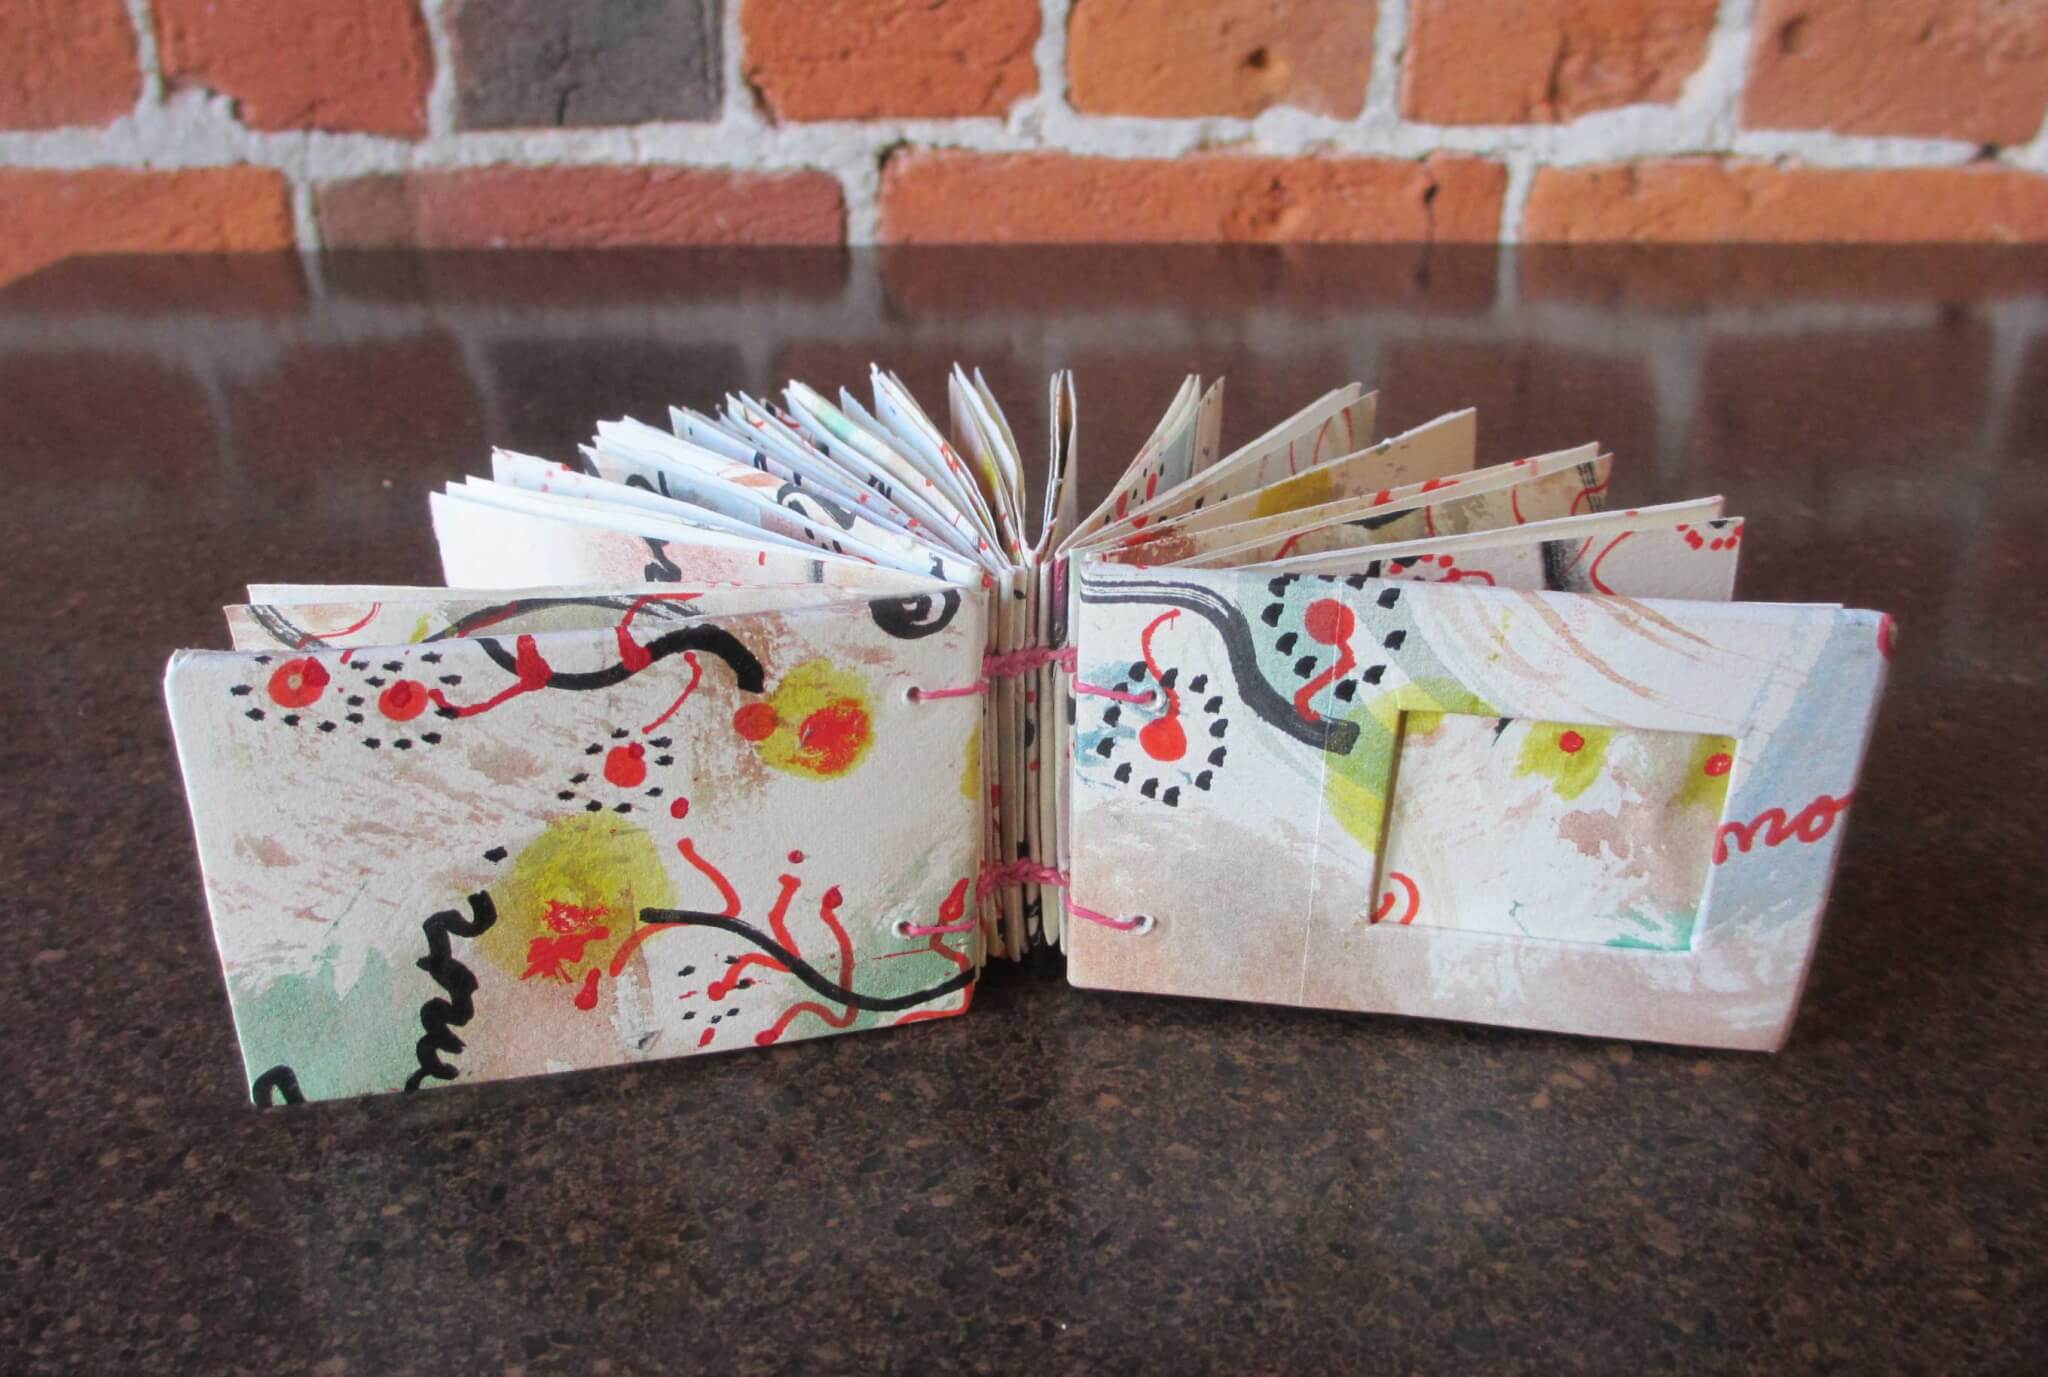
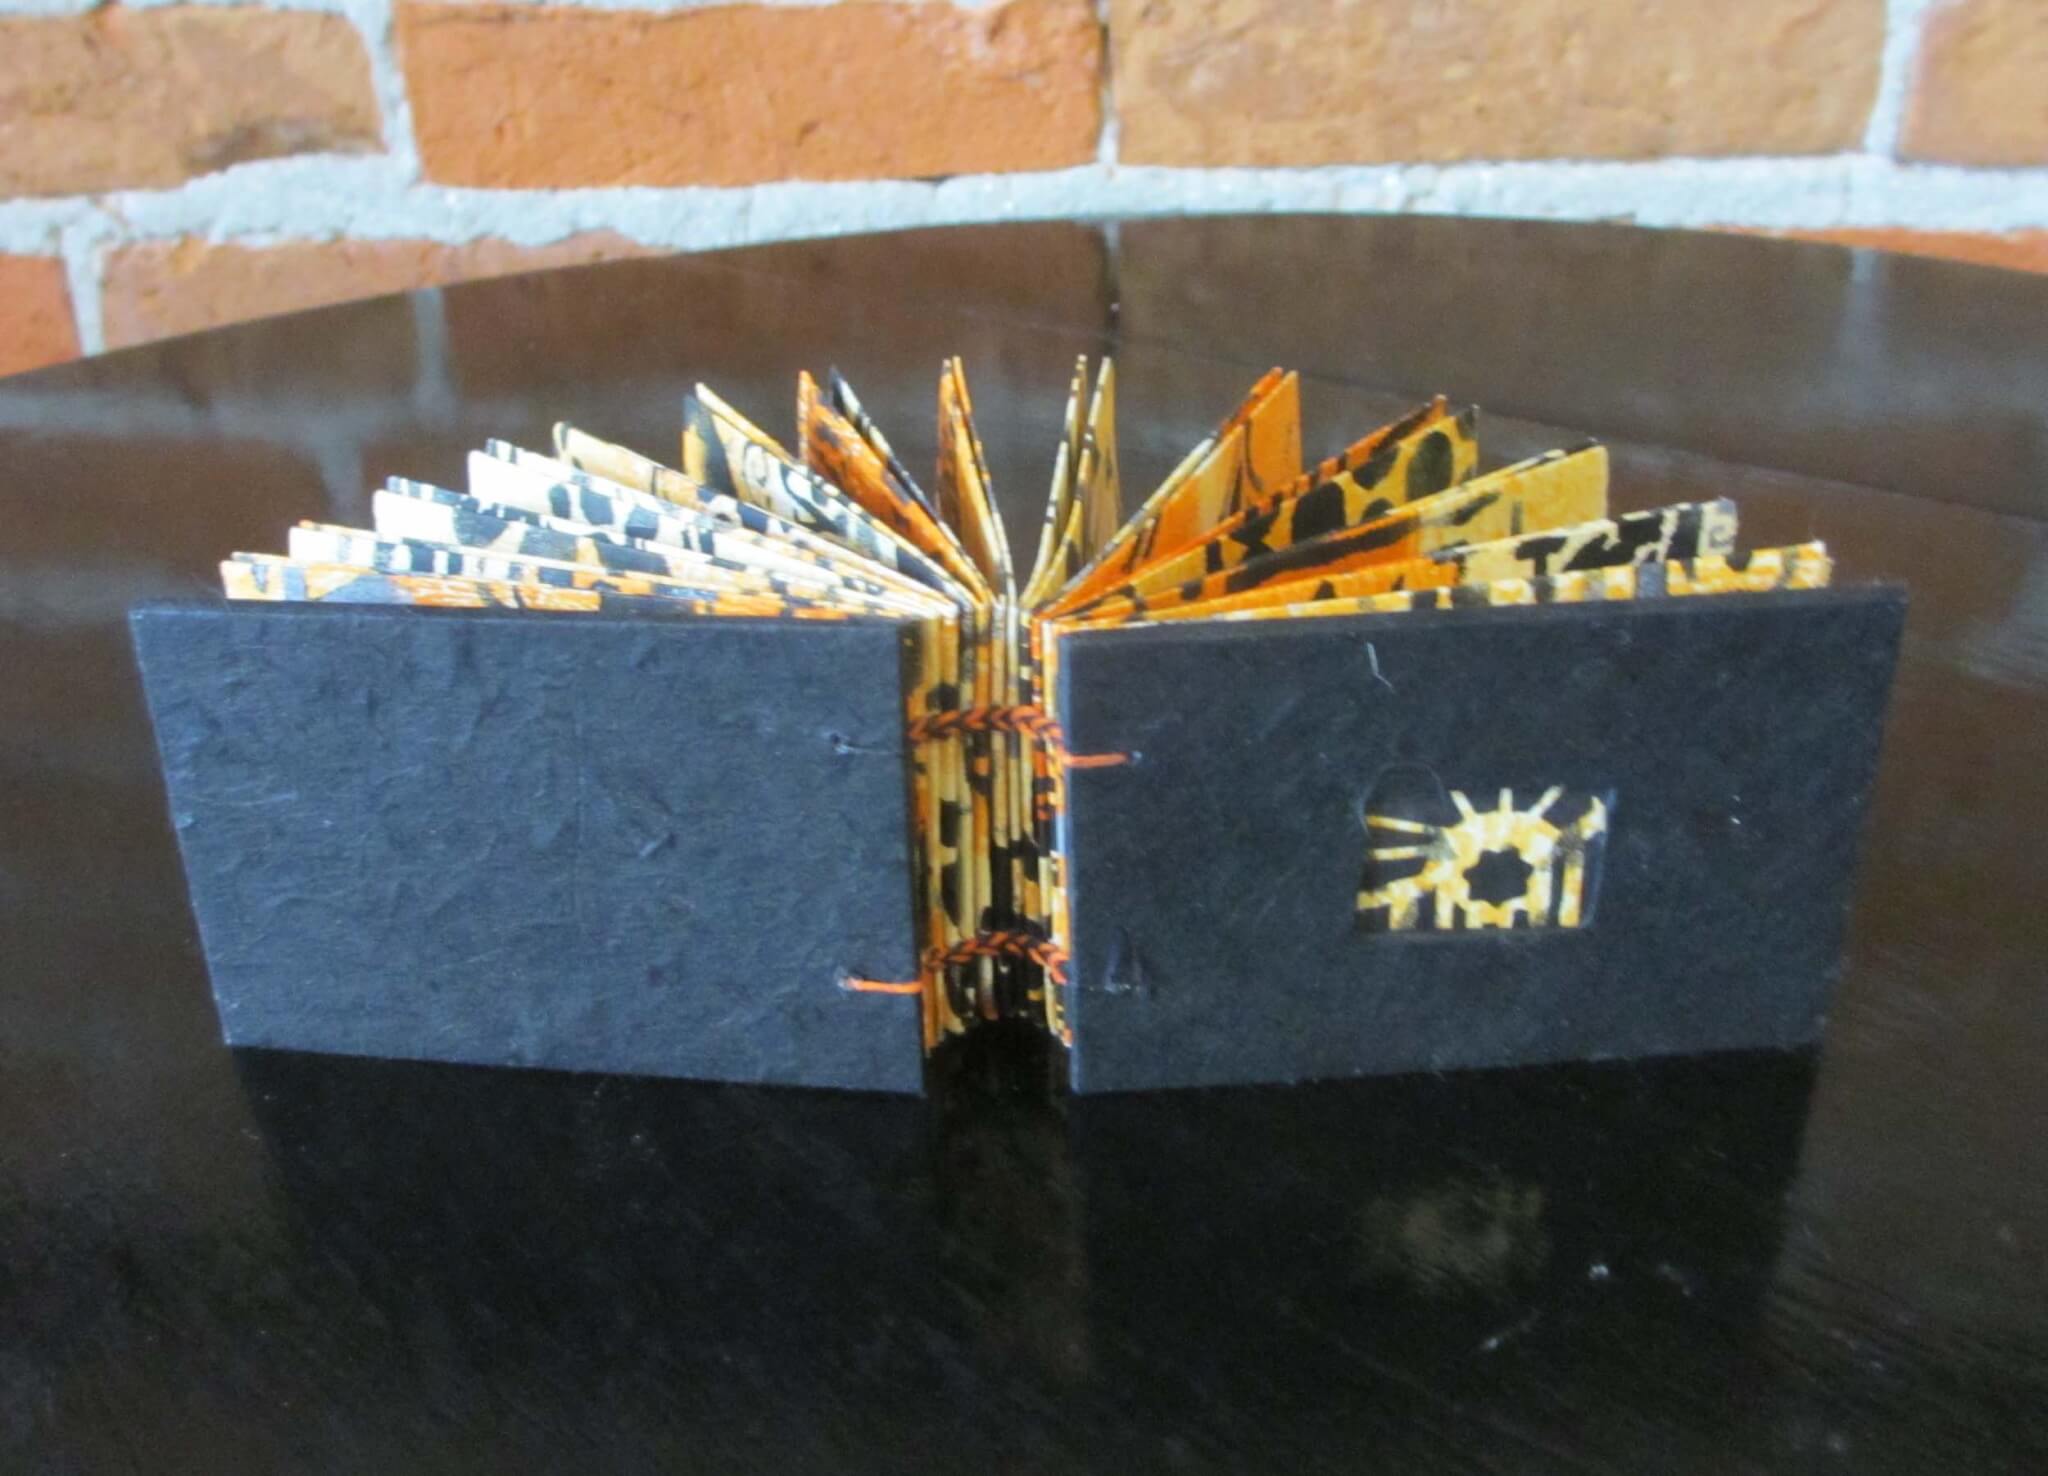
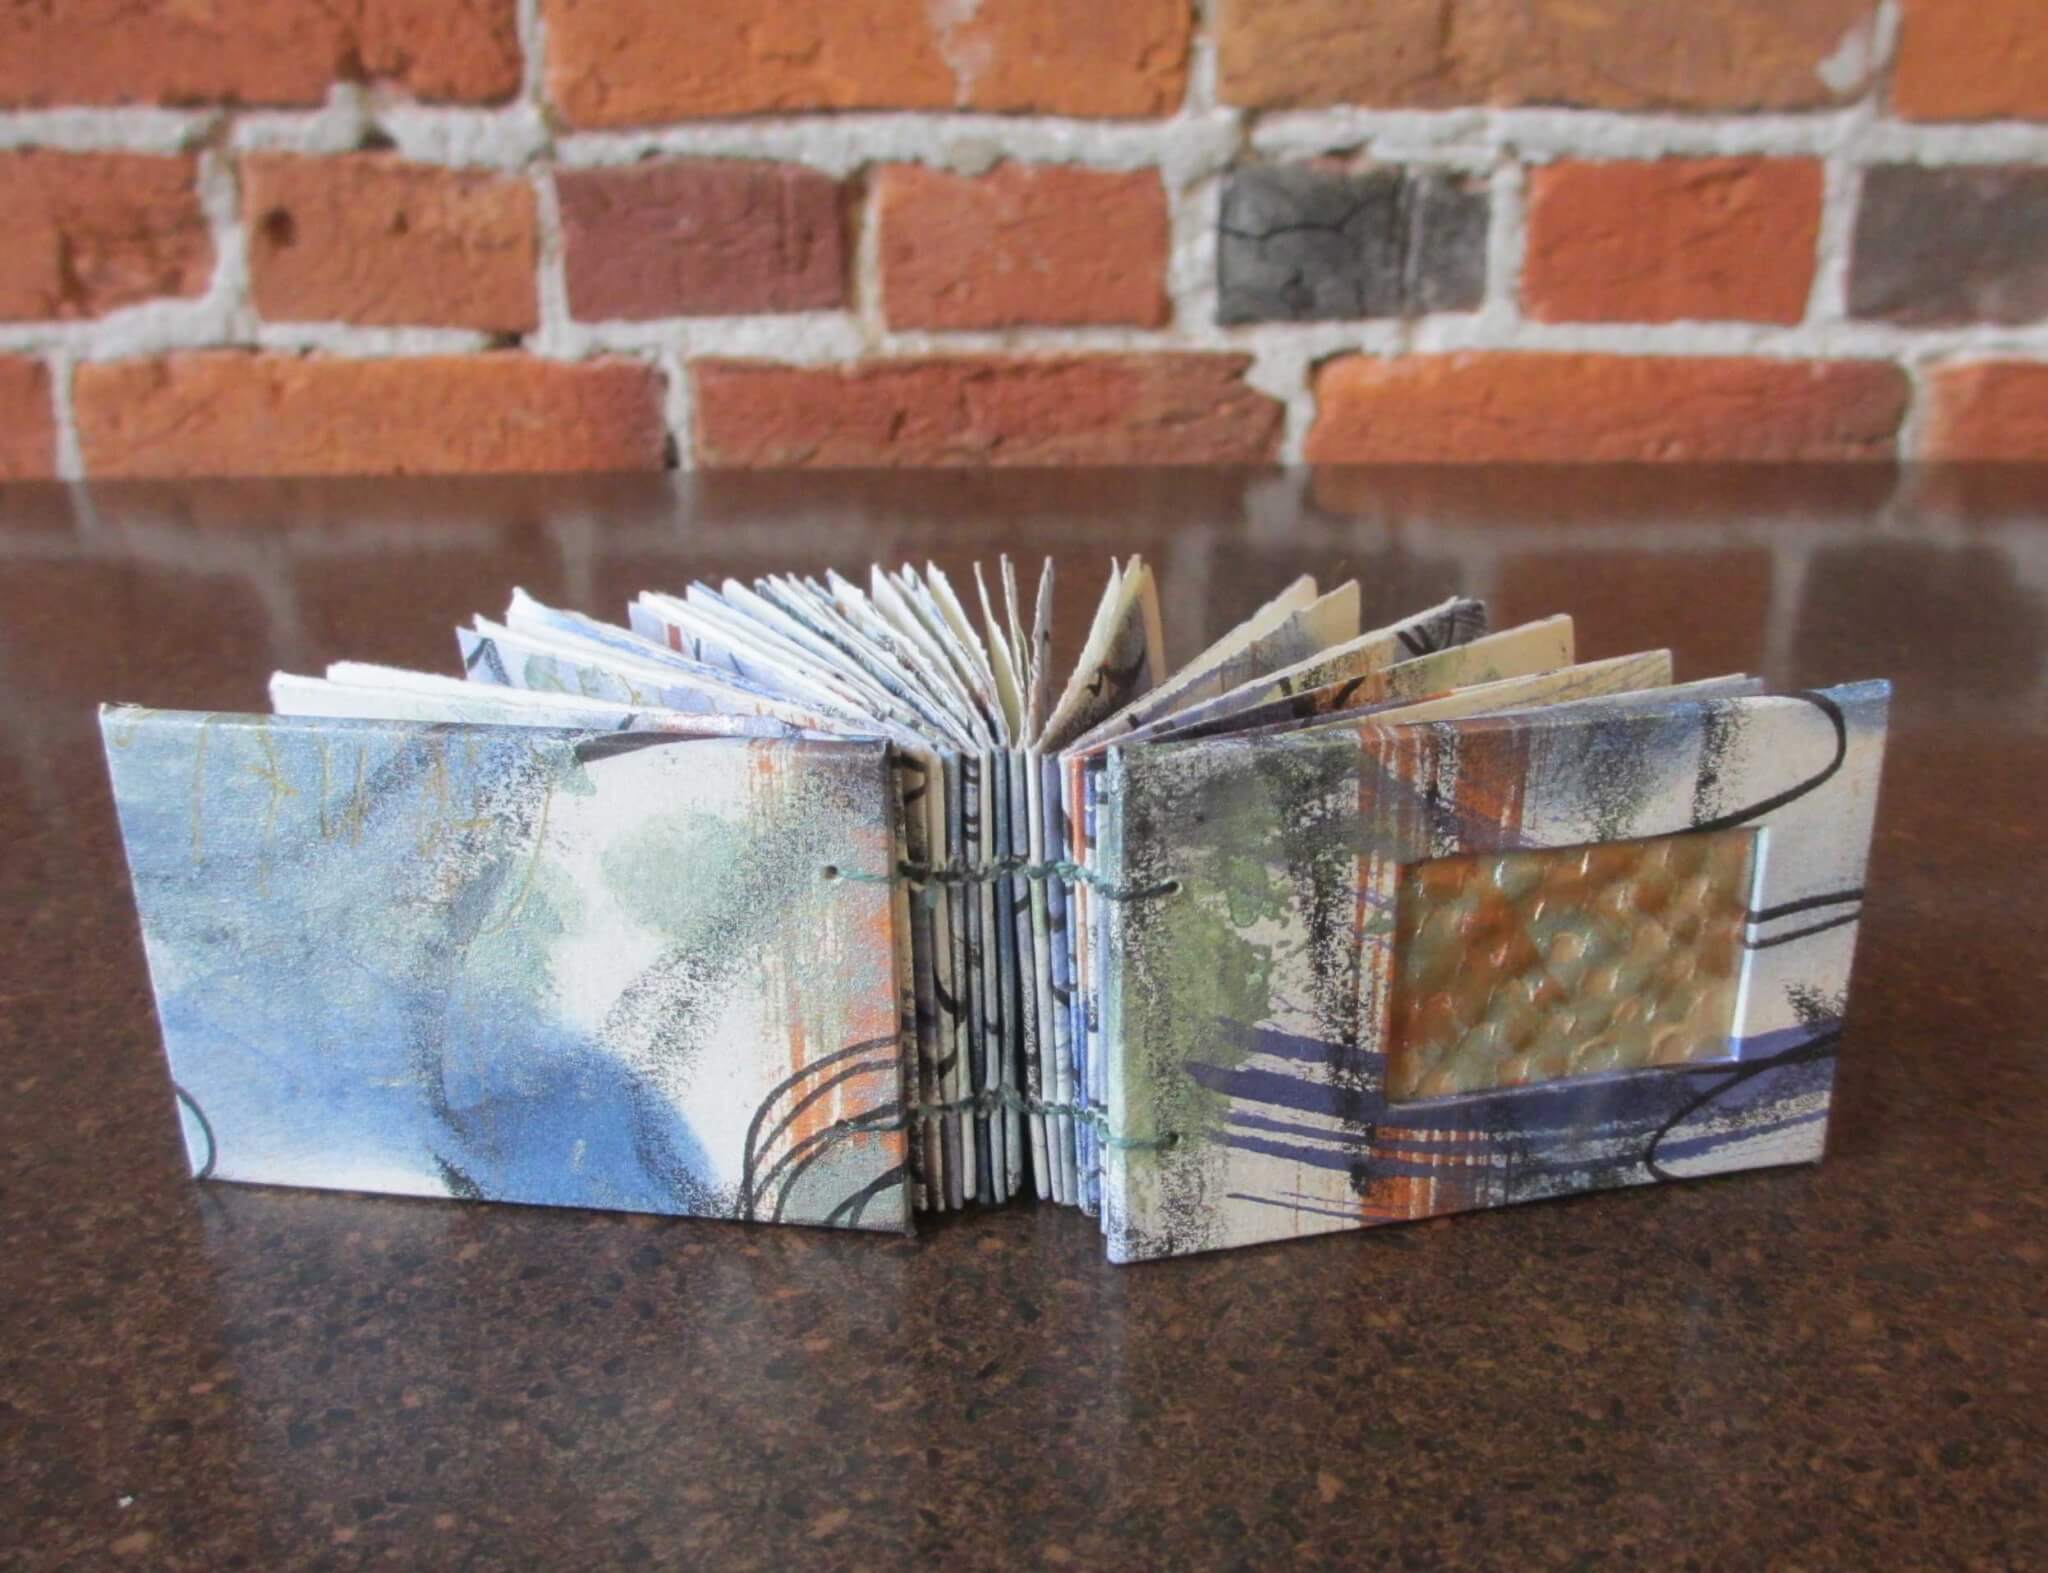
Denise had seen this beautiful paper at the Art Center in Arcata and when she finished her first sample book she knew she had to go back and purchase this paper for her second book. She also did a very nice job of covering the inside of the book with a single sheet of paper! She’s very pleased!

Buttonhole inside

A group of local book art lovers finished an OLLI class last week and created some beautiful model books in preparation for their final book. Some had never made a book and I don’t think any had sewn the buttonhole stitch so there was a lot to learn.


The model had paper covers but the second book will have board covers and they chose the design for the spine openings.


The following photos are a review of the start of the buttonhole stitch. (Ignore the slit in the spine as I will unpick the demo and do the final sewing through the slit)

1) Insert the needle and thread into the valley of the leftmost section. Pull the thread through leaving a tail of about 3 inches. Pull the thread straight up and wrap over the top of the section to the inside.


2) Tie off near the original hole and then enter that same hole with the needle and thread.


3) Pull the needle and thread through and pull the thread behind the first vertical stitch, right to left.


4) Pull the thread through and over to the next section on the right. Enter the hole.


5) Pull the thread through leaving a bit of a loop in the thread exiting the first hole; come up underneath and through this loop and cross over the top of the thread before entering the next hole.


6) To finish off this stitch pull the loop snug before pulling the thread completely through the next hole in the next section to the right. Repeat these steps until the last section and after looping over the top of the last section re-enter the hole and tie off inside.

Hope this makes sense!

Please join me along with the OLLI Book Arts community as we make this fun little book. Students will pick one of the many variations available using this structure –  from beginning to more advanced choices! Show off some of your hand decorated papers from your collection and choose papers for writing, drawing, or watercolor.

OLLI HUMBOLDT STATE, SPRING 2017

Book Arts: The Buttonhole Stitch Book With Michele Olsen

Embroiderers use the buttonhole stitch to decorate fabric; book artists use it to attach pages to the book spine. The technique results in a open spine structure that reveals individual sections and provides many creative possibilities for the paper artist and book designer. We will explore variations of the structure — beginning to more advanced. All levels welcome.

Day & Date: Tues., March 28 & Thurs., March 30

Time: 1-4 p.m.

Fee: OLLI Members $65

Class #: 27649: REGISTER ONLINE

Location: Humboldt Bay Aquatic Center

When I headed to Nebraska this Fall I had already committed to making a book for the Humboldt County Library Foundation auction to be held December 5 at the Ingomar Club in Eureka, California. I had an idea of what I wanted to make and I brought an abundance of materials along so that I could have choices. I love working in my studio in rural Nebraska; I’ve  done some of my most creative work isolated from people, phones, and internet. I had almost completed the book when I discovered that one of my favorite artists Karen Kunc was offering a class in boxmaking in Lincoln, Nebraska, and this was no ordinary box! I was thrilled to take yet another class from such a talented artist and teacher. So. I built a box for the book.


The Coptic bound book is made from old growth redwood boards rescued from the 1905 carriage house of Liz Murguia, president of the library foundation board. The apple twigs come from a 50 year old Gravenstein apple tree belonging to Sara Traphagen, vice-president of the library foundation board. The book structure was inspired by another wonderful book artist and teacher Margo Klass.


The thread is heavy natural flax, the pebble comes from the Mad River Beach, and the sections inside were constructed  from German Ingres paper wrapped in eco-dyed papers.


The clamshell box is covered with linen book cloth with recessed niches for eco-dyed papers on the front and spine.


When the book and platform are removed a tray is revealed which can also be removed. Whoever wins the bid on this can write in the journal and store their treasures in the tray. This is a fairly large box (9″ x 7″ x 4.5″) and I have plans to make a series of smaller ones. I’m always surprised by the completed project as I never know what I will create when I start out. I love the mathematical and logical ways of putting things together but it’s the unpredictability of the artistic opportunities that are the most exciting. Here is hoping that the auction brings in lots of money to support the purchase of non-fiction books for children – this year’s project.

In the second OLLI Book Arts class of Spring Semester, 2016,  the students gave new life to old books. Each participant  brought a book that had appealing covers along with decorative and/or text weight papers for the four sections.  They also brought a strip of fabric to use for creating their own book cloth. The results are fabulous and unique.

First, the covers of the books to be repurposed were cut from the text block and spine.  Next we made our own book cloth using Heat-N-Bond Lite fused to the fabric and bond paper. I prefer book cloth made from wheat paste and bond paper but there wasn’t time for this to dry during the four hours class. The strip of cloth for the outer spine was then glued to the covers. The covers of the example below already had beautiful papers on the inside and those were preserved.  A strip of book cloth was glued to the inside of the spine. The next photo shows the positioning of the sewing template. The template was adjusted for each book—they all had different heights!


 Students then pierced the sewing stations. Some of the holes were very hard to see but if you held them up to the light, the holes were obvious.   The books were sewing using the long stitch on four sections.  Here are the beautiful results.


 Everyone did a super job. It’s such a privilege to work with students who are SO artistically adventurous. This is the 14th book structure I’ve taught in our OLLI classes and I can always depend on these book artists to go beyond what is being taught to create something that is unique. Gisela added metal corner decorations as well as a pencil and elastic closure. Terrific! 

  Stay tuned for the “What’s It Book” starting March 10.

IMG_4482

OLLI Book Arts: Judge a Book by Its Cover with Michele Olsen

Create your own personal journal by using the covers from an old book. The spine will be replaced with book cloth made in class and sections of the book will be sewn using the easy long stitch pattern.  This technique can be used with just about anything for covers.

Bring to class:

Basic Toolkit: cutting mat, small utility knife, metal ruler, bookbinder’s awl, embroidery thread or linen thread, size 20 or 22 tapestry needle, PVA glue, glue brush, sharp pencil, baby wipes, sewing cradle (or phonebook), bone folder.

Materials: an old book with interesting covers (about 5 ” x 7″ would be best), favorite text weight papers, decorative papers, a strip of fabric for the spine (2-3″ wide and 2 inches taller than the height of your book), button for a closure.

Prerequisite: Book Arts: The Basics or previous instruction in book arts. Level: Beginner.

Day & Date: Saturday, Feb. 20

Time: 9 a.m.-1 p.m.

Fee: OLLI Members $50

Class #: 27851: REGISTER ONLINE

Location: Humboldt Bay Aquatic Center

FrenchLink

BookPages_xs

OLLI Book Arts: The “What’s It” Book

I’m calling this structure a “What’s It ” book because it’s a creative space for organizing anything you treasure. These make great planning journals with pullouts for photos, a couple of pockets, and sections for writing. The accordion spine provides expansion space for attaching tickets, packets, flyers, etc. Everything is sewn together using either the long stitch or French link stitch and the wooden hand-painted covers make it very durable. PLEASE NOTE THIS IS A THREE-AFTERNOON CLASS and most of our time will be spent assembling the structure! Some homework too.
Materials List: Bring to the first day of class.Basic Toolkit: Cutting mat, small utility knife, metal ruler, bookbinder’s awl, sewing cradle (or old phone book), bone folder, small sharp scissors, sharp pencil, #20 or #22 tapestry needles, waxed linen or embroidery thread, PVA glue, glue brush, baby wipes, rags, waste paper, 125- and 220-grit sandpaper, two 2″ foam paint brushes. Materials: Pad of sketching paper (11″ x 14″), 1 sheet black Mi-Tientes, 1 sheet colored Mi-Tientes. Several sheets of decorative card stock. Optional: Electric handheld drill (Dremel) with drill bit slightly larger than tapestry needles (1/16 inch drill bit for wood).

Level: Intermediate. Previous Basic Book Arts course required.

Day & Date: Thurs., March 10, 17 & Tues. March 15

Time: 1-4 p.m.

Fee: OLLI Members $65

Class #: 27852: REGISTER ONLINE

Location: Humboldt Bay Aquatic Center

Our OLLI class Book of Words: Coptic Stitch was officially completed last week but as we usually do, we assembled at Humboldt Coffee and Chocolates for “debriefing” and sharing. As always, it’s a privilege to work with such talented and daring people. Adding a window to the cover was optional but everyone wanted to make them and really, in the end, this feature really made the books more personal. I learn so much from all of them. The following photos are from the class or followup. Enjoy!

The following photos were taken during class. The first hour was spent decorating a large piece of Arches Text Wove paper. For color students used everything: stamp pads, watercolors, acrylic inks, acrylic paints, pens, colored pencils. There were some very creative mark makers too: handmade stamps, interesting brushes, sticks, and a helix style lightbulb!

Image-3 Image-2 Image-1

Many books were finished during our coffee session. These photos show some of the sewing taking place. We used a double needle Coptic stitch. The second photo shows how creative these students can be—it was too dark for Joan to see so Darcy used the flashlight on her phone to assist. Funny!


IMG_4454IMG_4475

AND!! These are the books that are finished.

IMG_4450

Judy’s Book: Family

IMG_4451

Denise’s Book

IMG_4455

Azalea’s Book

IMG_4470

Pat’s Book

IMG_4467

Pat’s Book

IMG_4471

Cheryl’s Book: Welcome

IMG_4472

Darcy’s Book

IMG_4474

Gisela’s Book

IMG_4476

Joan’s Book

If you couldn’t attend the coffee gathering, please let me know if you need help finishing. Most books took a mere 15 minutes to finish. If you did finish, would you send me a photo and I’ll include it. THANKS FOR ANOTHER GREAT CLASS. GOOD JOB.

Donna has finished her book and sent me a photo. It’s never to late to add your photo!  Nice work and great colors.

Caterpillar


My Fall stay in Nebraska was very productive in terms of reading books (seven!) and making books (four!). Two of my books were created for future OLLI workshops so you will see those at the end of January. The book I enjoyed the most was created from lacewood boards (a gift from my woodworking husband). All of the sewing was done with waxed Irish linen thread. The section wraps were made with handmade papers. The interior pages were made a year ago from rose petals and various leaves. Folios were bundled together with the plant materials in a kind of “sandwich” and boiled for 1.5 hours in a solution of water, vinegar, and alum. All of the holes were drilled with a vintage Dremel rotary tool purchased several years ago at an antique store in Eastern Colorado. Except for the electric drill, I felt like I was working in a medieval bookbinding studio. I really do like older materials and techniques. I suppose I should start looking for a vintage hand drill.

Leaf1


It’s time for the last book arts class of the HSU OLLI Fall 2015 Semester!

MiroAlphabet_web

Course Description:

Explore the written word as an art form as you create pages for your small book. Bring your favorite writing or drawing tools — pens, watercolor, stamps, or colored pencils — to decorate the pages. The structure is sewn using a double needle Coptic stitch. The cover will include a small window. The book will be small enough to fit in the palm of your hand and would make a wonderful gift.

Prerequisite: “Book Arts: The Basics” or an introductory book arts class elsewhere.

Day & Date: Tues. & Thurs., Dec. 8 & 10

Time: 1-4 p.m.

Fee: OLLI Members $65

Class #: 47546

Location: HBAC

Supplies:

Basic Toolkit: bone folder, cutting mat, small cutting knife, small sharp scissors, metal ruler (bring 25″or 36″ if you have them), bookmaker’s awl, two #20 or #22 tapestry needles, PVA glue, glue brush, book press (or heavy book or brick), wet wipes, beeswax, glossy  magazines for scrap paper.

Materials: mark making supplies (stamps/stamp pads, watercolors, colored pencils, markers, or acrylic ink), cotton embroidery thread (or linen thread) in color of choice.

Provided: Arches Text Wove and Mat Board, Stencils

See you soon!